Chocolate Cake Recipes That Win Birthdays and Bad Days
Bake one rich, moist slice-worthy cake with pantry basics, no fancy gear, and repeatable steps for celebrations or Tuesday cravings.
You want a cake that makes people pause mid-bite and go, “Wait… you made this?” Good. Because this is the kind of bake that turns casual guests into loyal fans.
Most cakes fail for one boring reason: dry crumbs pretending to be dessert. This one doesn’t. It stays moist, deeply chocolatey, and forgiving even if your measuring isn’t NASA-level precise.
And yes, it’s simple enough for a weeknight but dramatic enough for a birthday table. Because if you’re going to eat cake, it should at least feel like a life upgrade.
Let’s make the chocolate cake that quietly embarrasses every bakery slice you’ve “settled” for.
Why This Recipe Works
This cake uses oil instead of butter for a softer crumb that stays moist for days. Butter tastes great, but oil plays the long game.
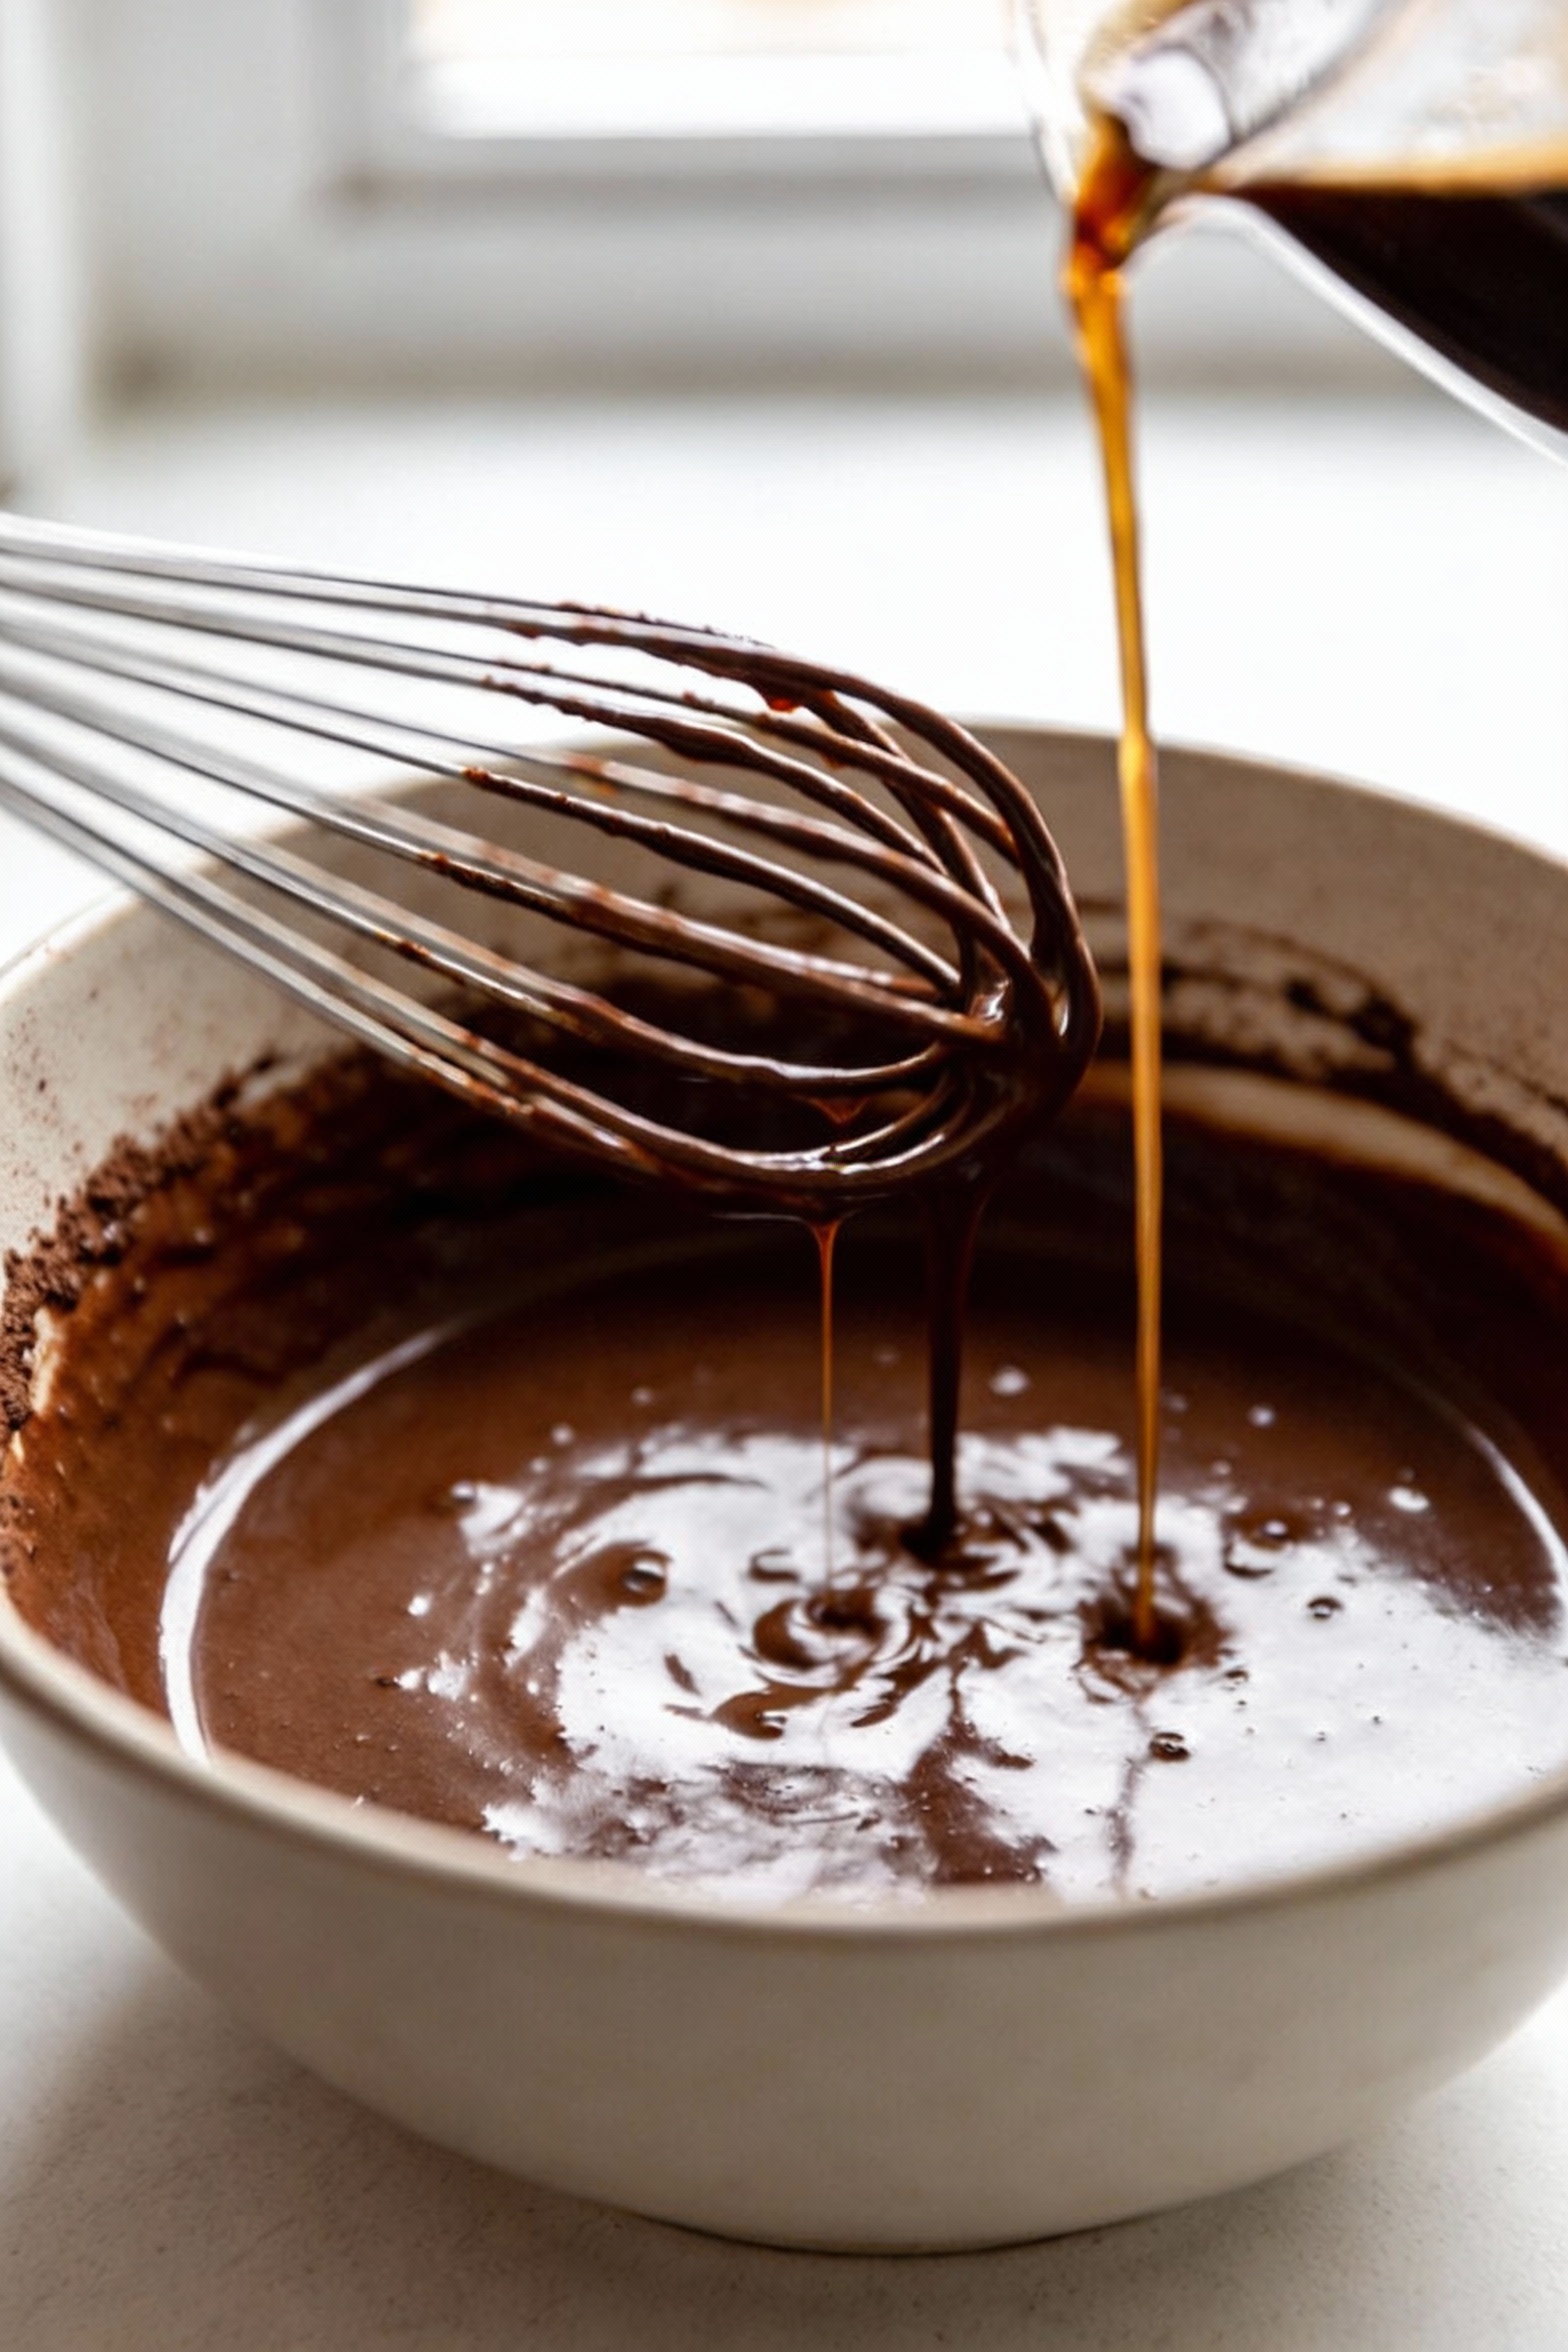
Blooming cocoa with hot coffee amplifies chocolate flavor without making the cake taste like a latte. Coffee acts like a volume knob for cocoa, not a competing flavor.
Buttermilk + baking soda create lift and tenderness, so you get a plush bite instead of a dense brick. The acid also smooths out cocoa’s bitterness.
The batter runs thin on purpose. That thinner mix bakes into a more even, velvety crumb, so your fork slides through like it owns the place.
Shopping List – Ingredients
- All-purpose flour (2 cups)
- Granulated sugar (2 cups)
- Unsweetened cocoa powder (3/4 cup)
- Baking powder (2 teaspoons)
- Baking soda (2 teaspoons)
- Fine salt (1 teaspoon)
- Eggs (2 large)
- Buttermilk (1 cup)
- Neutral oil like canola or avocado (1/2 cup)
- Vanilla extract (2 teaspoons)
- Hot coffee or hot water (1 cup)
- Butter, softened, for frosting (1 cup)
- Powdered sugar (3 1/2 to 4 cups)
- Pinch of salt for frosting
- Heavy cream or milk (2 to 4 tablespoons)
- Melted dark chocolate or extra cocoa for frosting (optional, 2 ounces or 1/4 cup cocoa)
Instructions
-
Heat your oven to 350°F. Grease two 9-inch round pans, line the bottoms with parchment, then lightly grease again. This is the cake version of wearing a seatbelt.
-
Whisk flour, sugar, cocoa, baking powder, baking soda, and salt in a large bowl. Break up cocoa lumps like they personally offended you.
-
Add eggs, buttermilk, oil, and vanilla. Mix until smooth and glossy, about 30 to 45 seconds. Don’t overmix, you’re making cake, not building muscle.
-
Slowly pour in hot coffee while whisking. The batter will look thin and a little suspicious. Ignore the doubt and trust the process.
-
Divide batter evenly between pans. Tap pans gently on the counter to pop big air bubbles, then slide them into the oven.
-
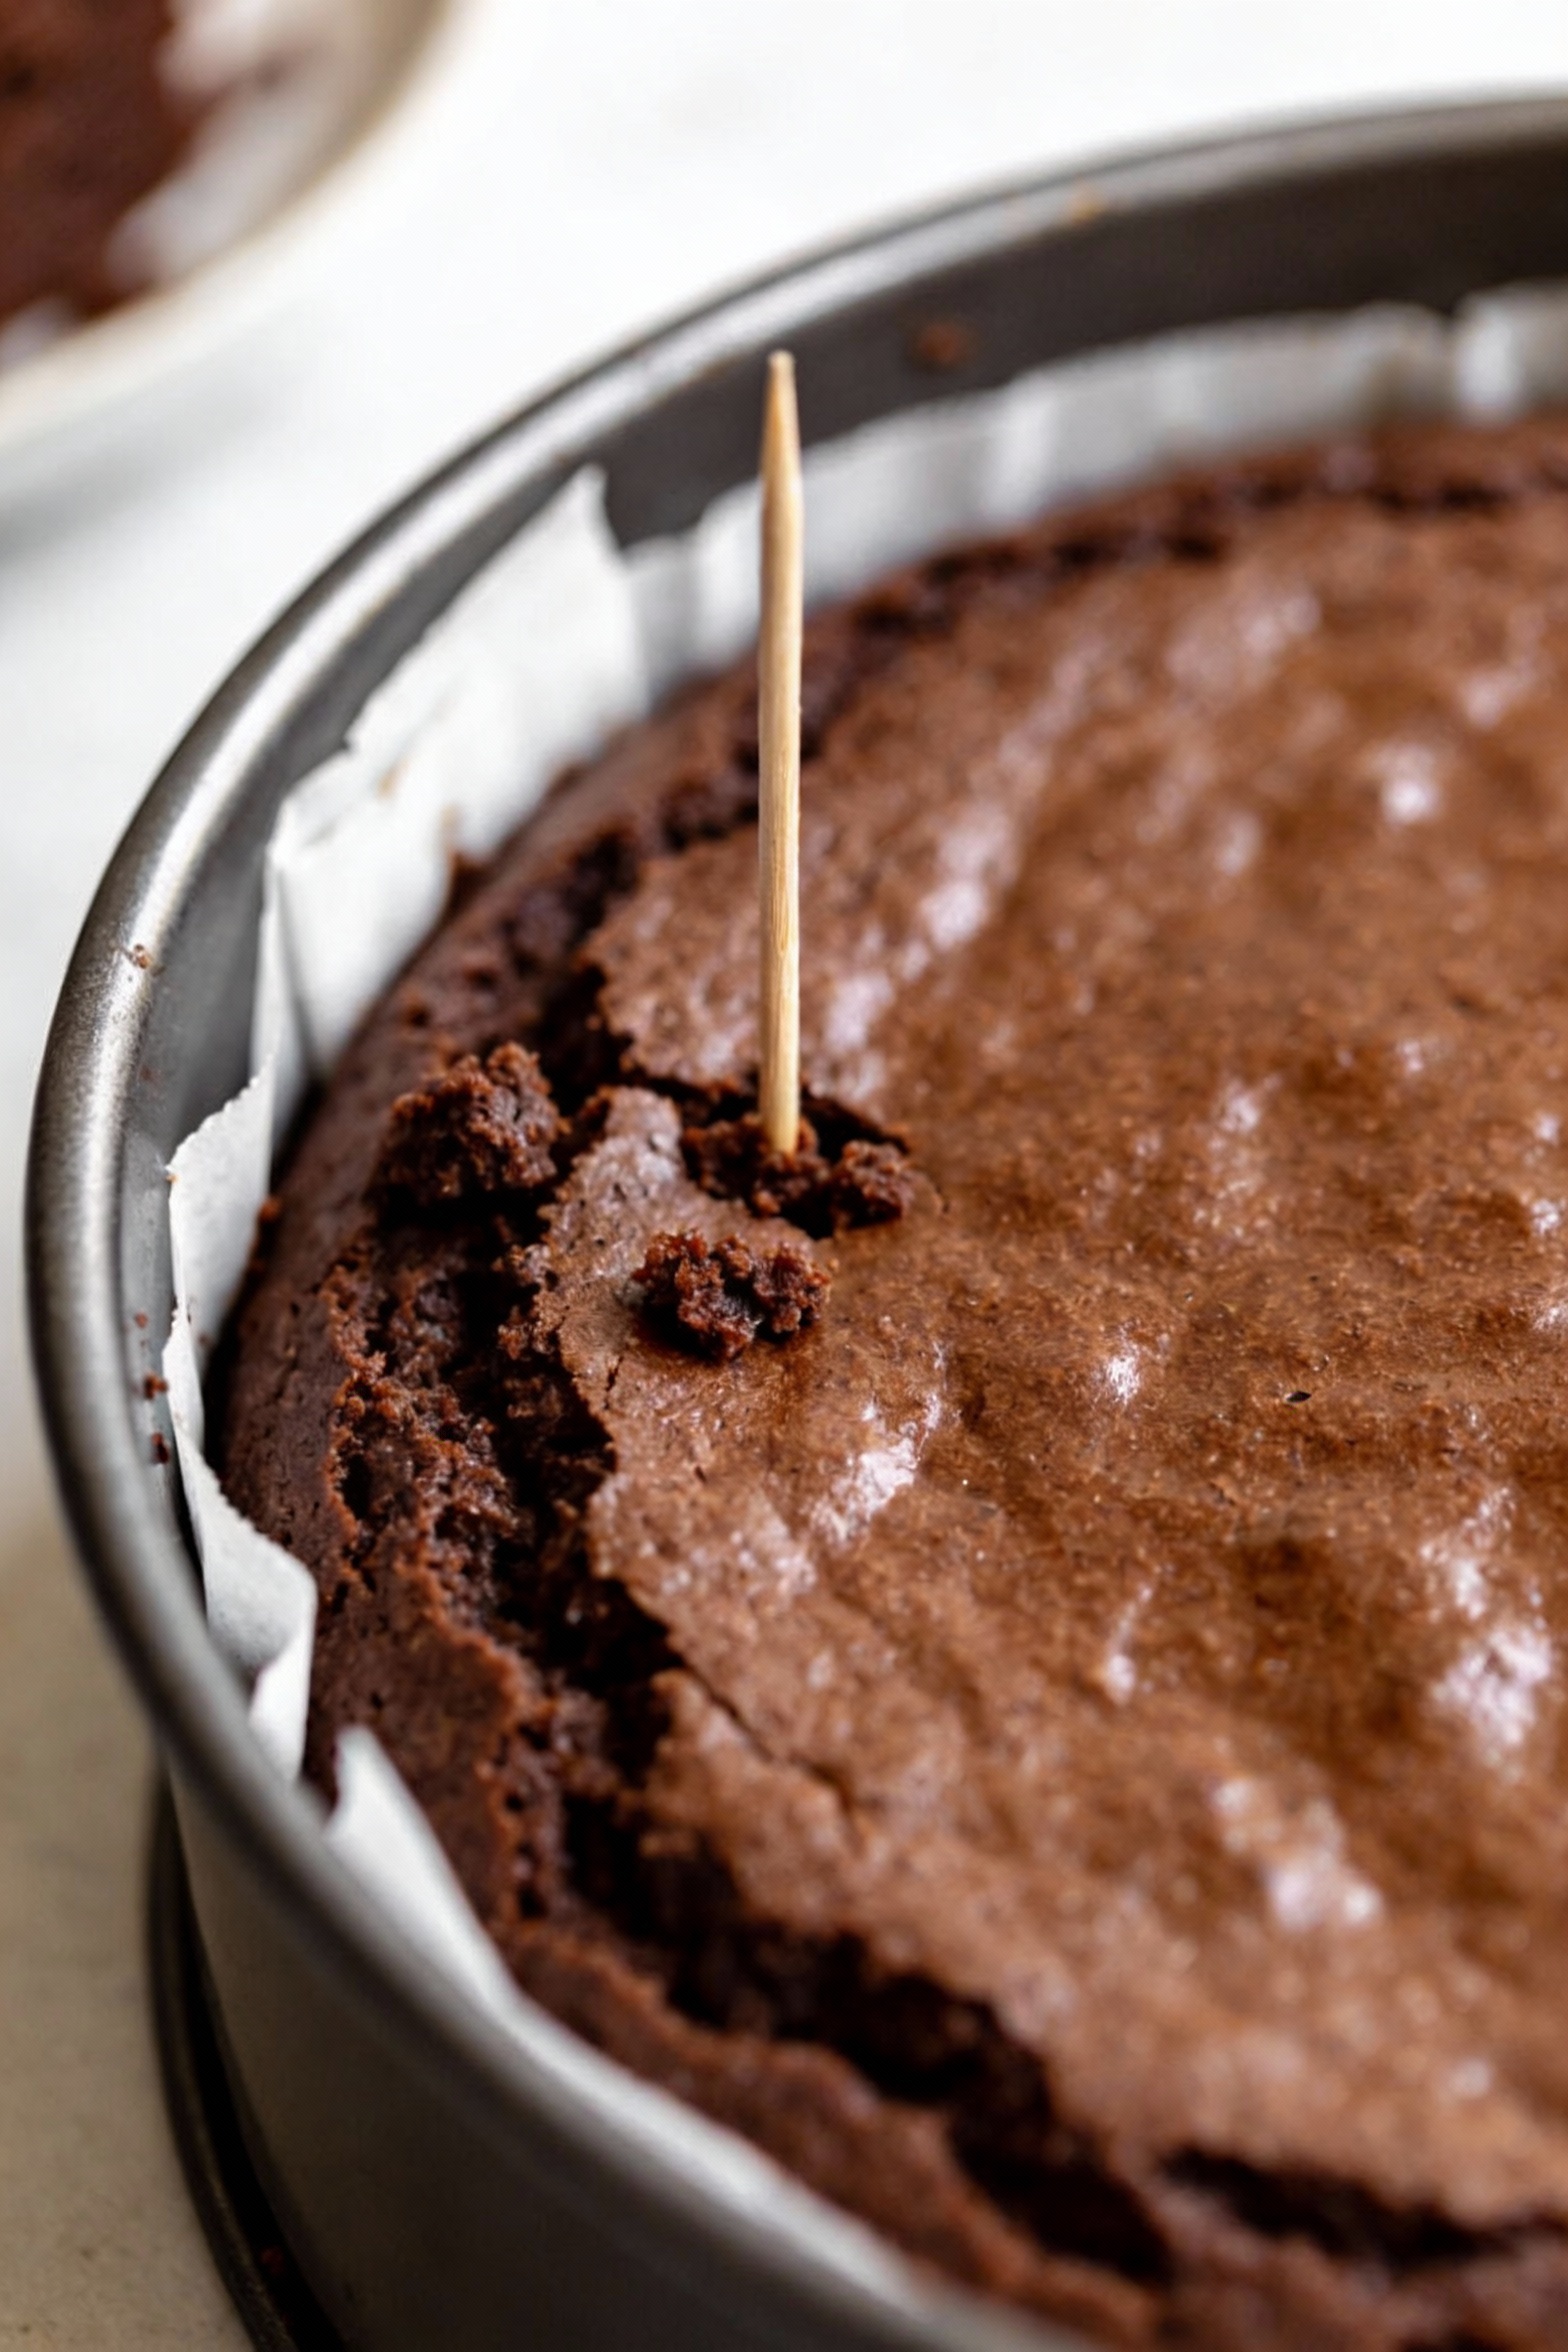
Bake 28 to 34 minutes, until a toothpick comes out with a few moist crumbs. If it comes out clean, you’re flirting with dry cake.
-
Cool cakes in pans for 10 minutes, then turn out onto a rack to cool completely. Frosting a warm cake equals “chocolate landslide” energy.
-
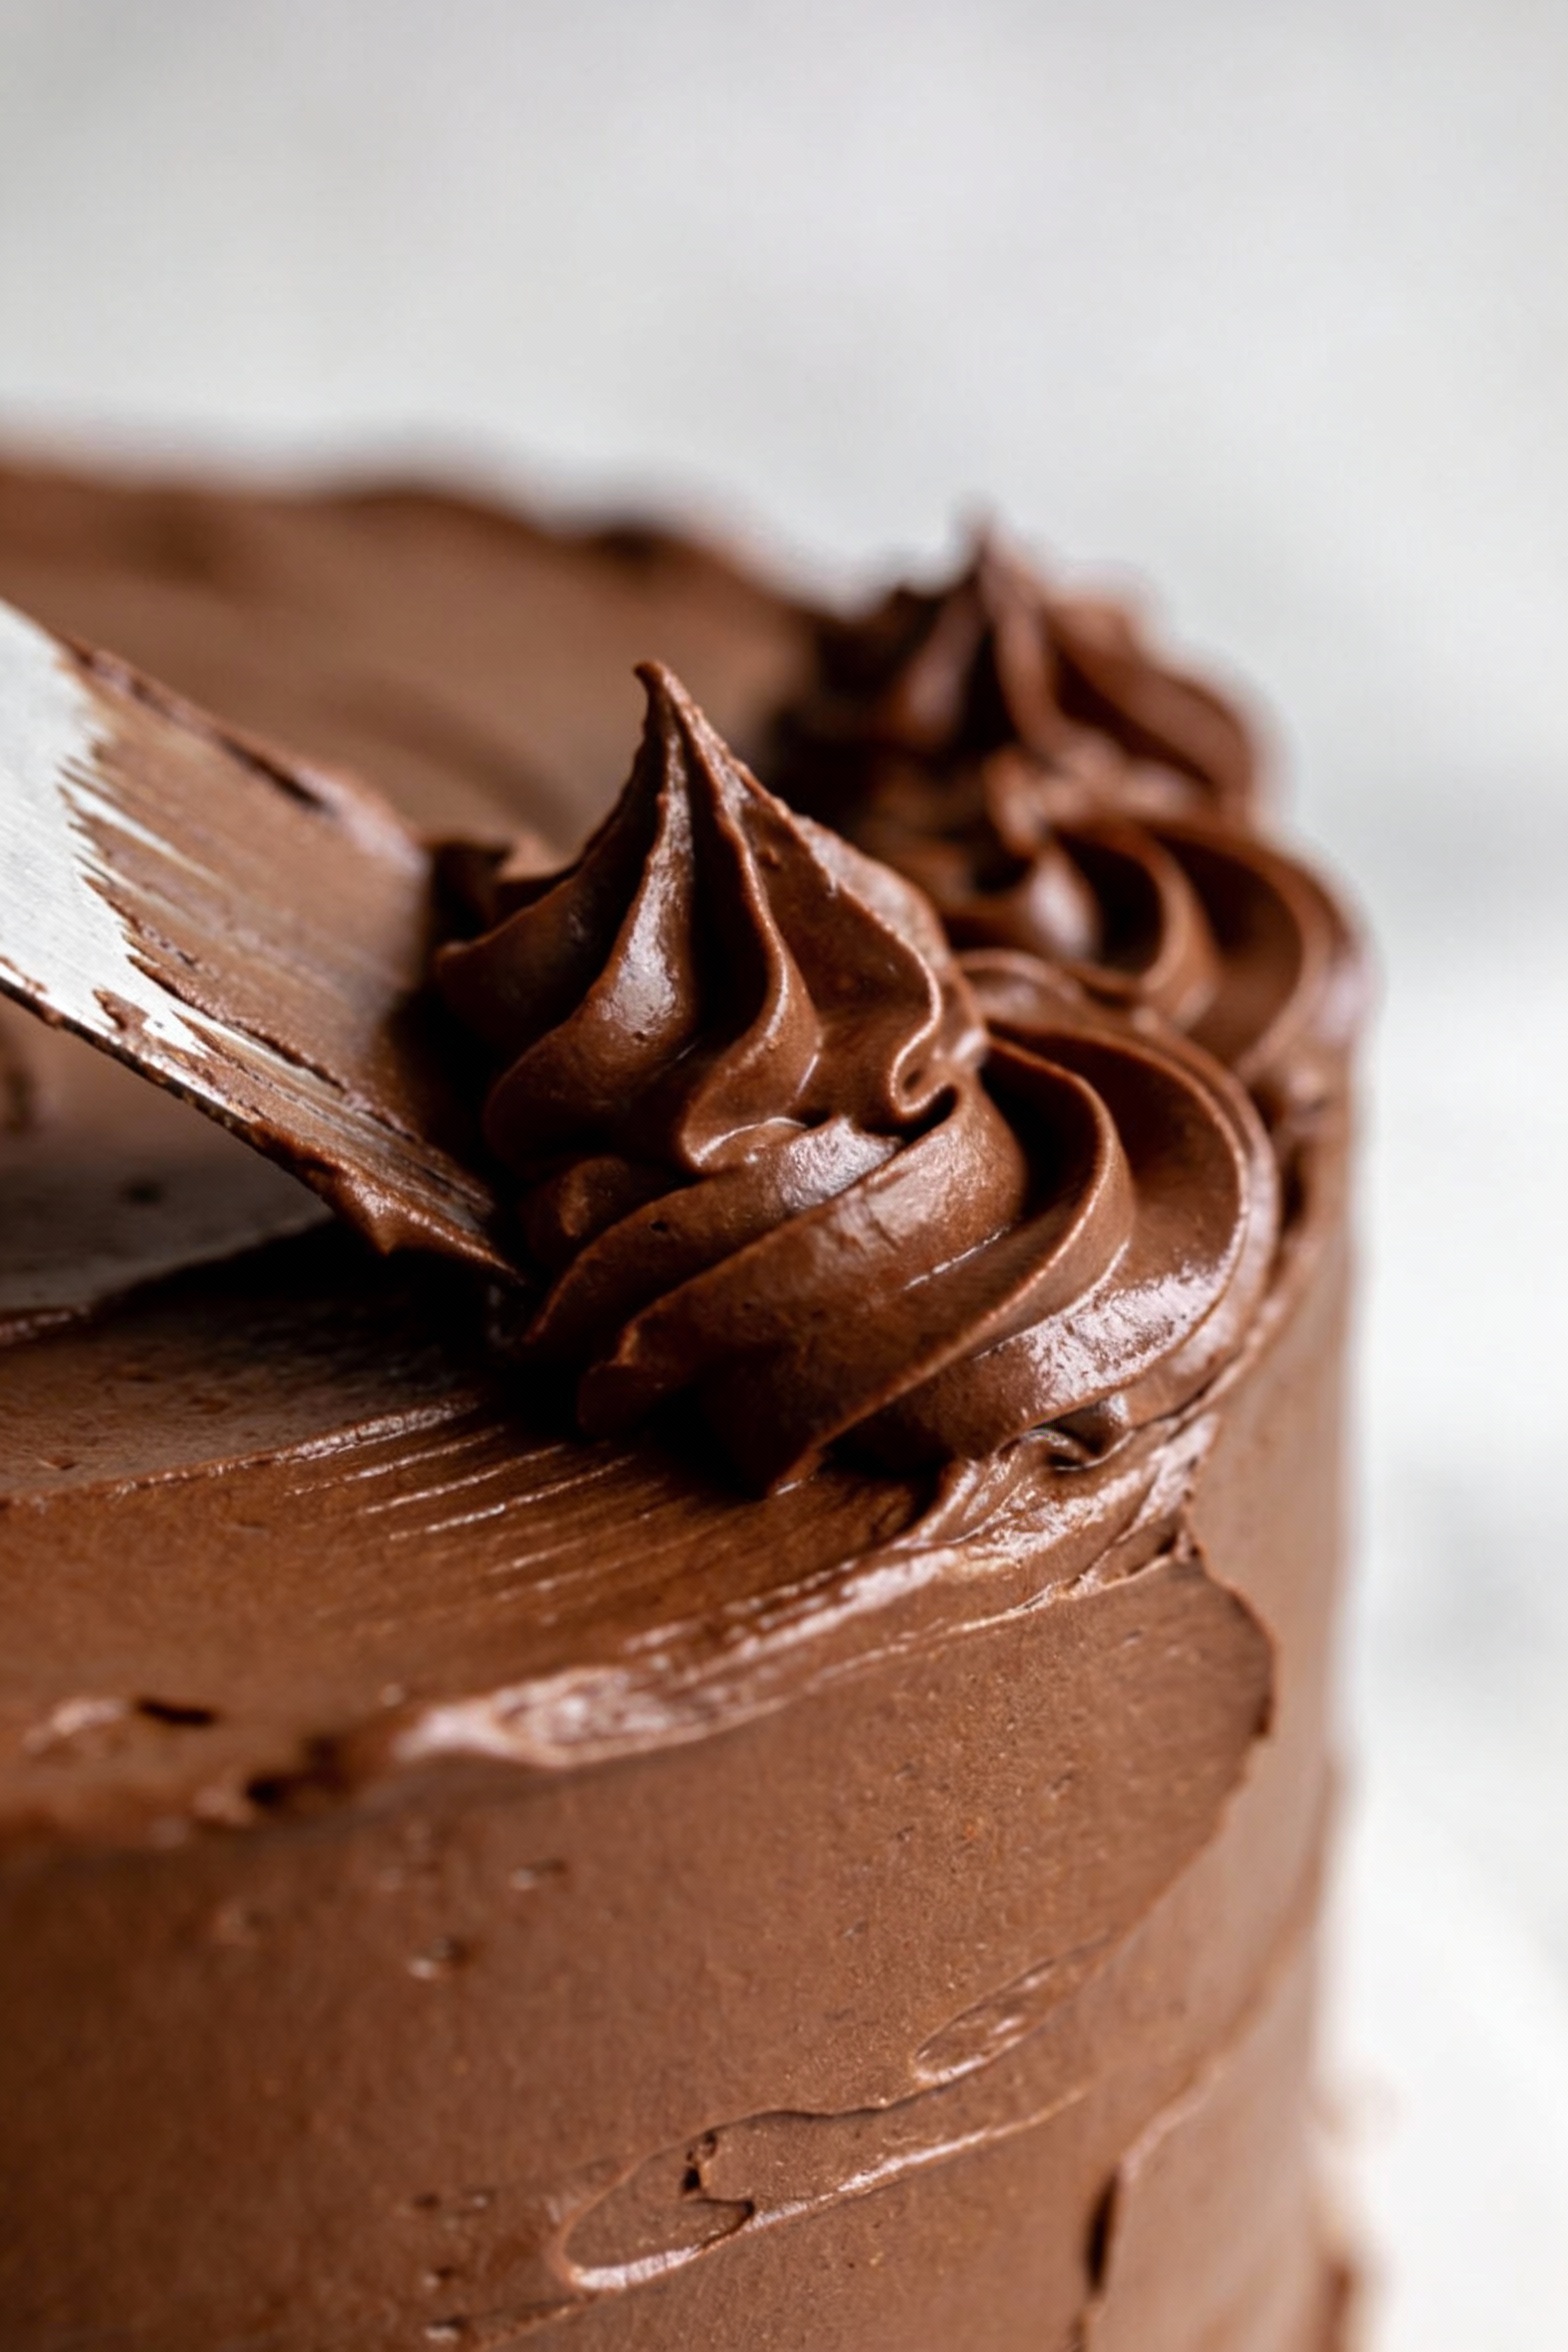
Make the frosting: beat softened butter until creamy, then add powdered sugar, cocoa or melted chocolate (if using), a pinch of salt, and 2 tablespoons cream. Beat until fluffy, adding more cream as needed for a spreadable, swoopy texture.
-
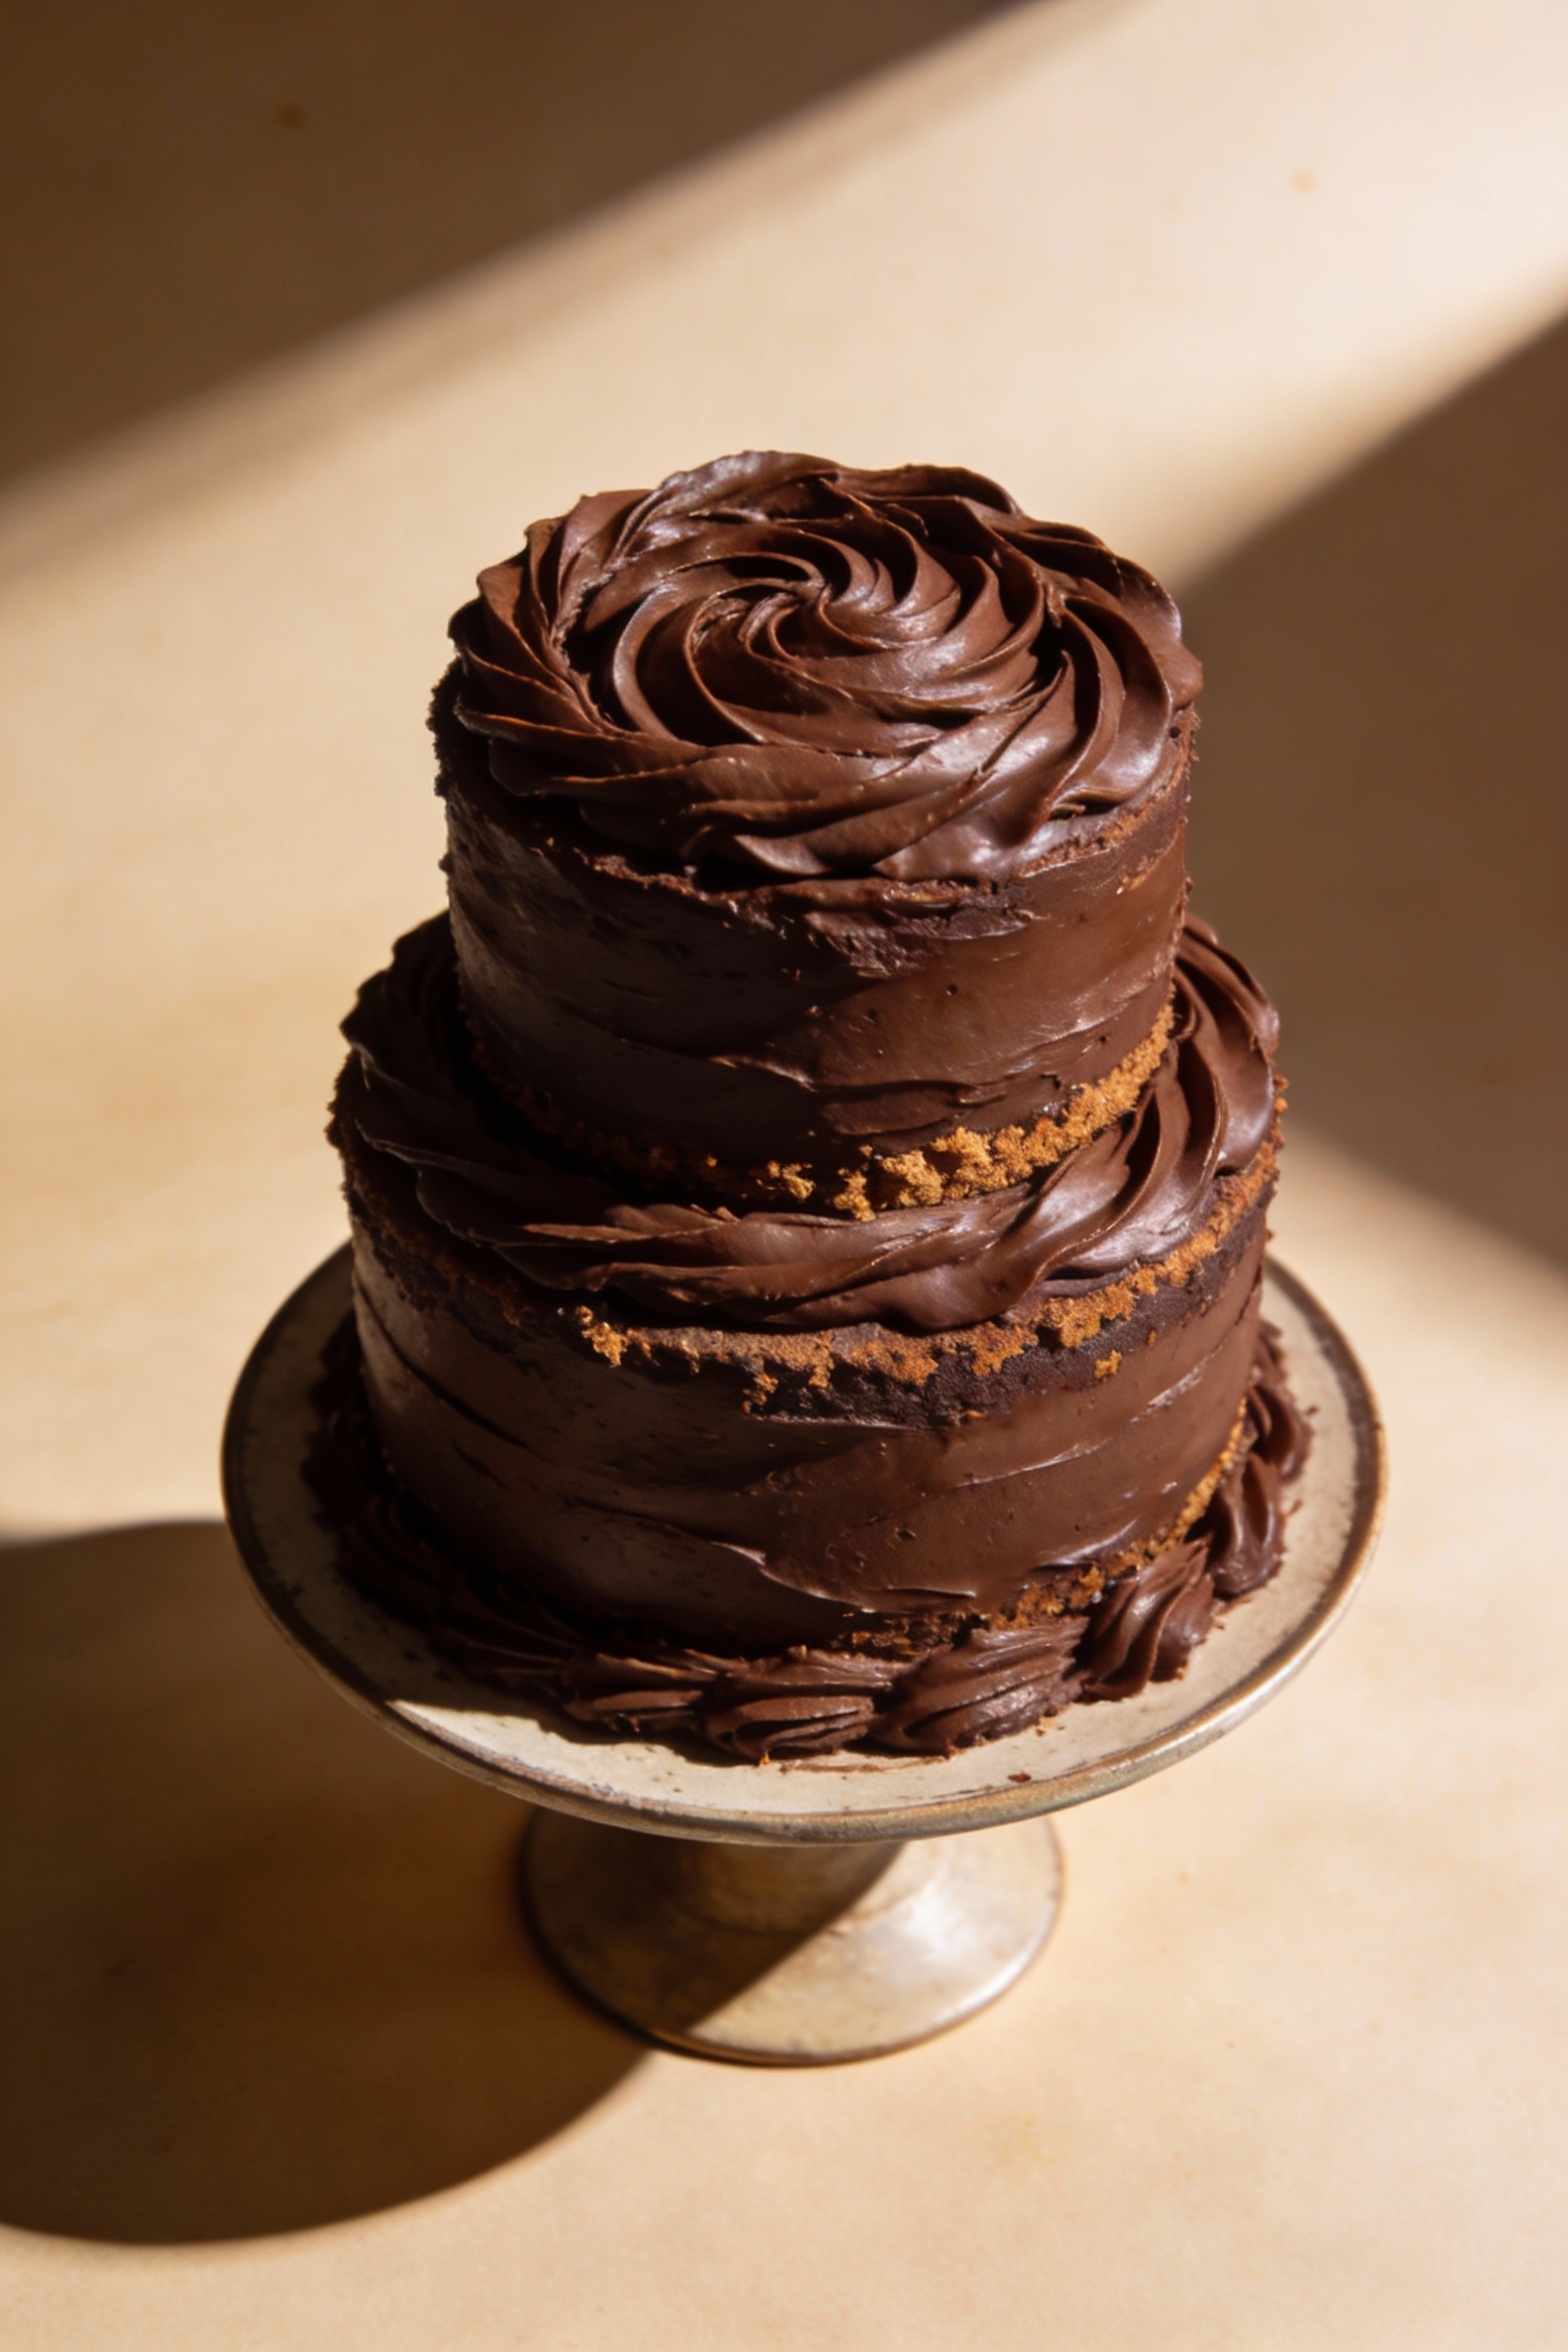
Assemble: place one layer on a plate, spread frosting on top, add the second layer, then frost the top and sides. If crumbs show, call it “rustic” and move on with your life.
-
Optional power move: chill the frosted cake 20 minutes, then add a final smoothing pass. You’ll look like you own a bakery, minus the overhead.
How to Store
Store the frosted cake covered at room temperature for up to 2 days if your kitchen stays cool. The oil-based crumb holds moisture well, so it doesn’t turn into cardboard overnight.
For longer storage, refrigerate it covered for up to 5 days. Let slices sit at room temperature 20 to 30 minutes before eating, because cold cake hides flavor like it’s shy.
To freeze, wrap unfrosted layers tightly in plastic wrap and then foil, and freeze up to 2 months. Thaw overnight in the fridge, then frost once fully thawed and cool.
Freezing frosted cake works too, but do it in slices and wrap well. FYI, your freezer smells like onions? Your cake will remember.
Benefits of This Recipe
-
Moist for days thanks to oil and buttermilk, so leftovers actually feel like a reward.
-
Big chocolate flavor without complicated techniques, because you have a life.
-
Reliable rise with a tender crumb, even if your oven runs a little chaotic.
-
Flexible frosting options, from classic chocolate buttercream to ganache or whipped cream.
-
Celebration-ready but still weeknight-friendly, which is the sweet spot IMO.
Avoid These Mistakes
-
Overbaking is the fastest way to ruin the party. Pull the layers when the toothpick shows moist crumbs, not when it’s bone dry.
-
Skipping parchment leads to panic-flipping and cratered layers. Cakes should leave the pan politely.
-
Cold ingredients can make the batter look curdled and bake unevenly. Room temp eggs and buttermilk behave better.
-
Overmixing after flour builds toughness. Mix just until smooth, then stop being heroic.
-
Frosting warm layers makes the frosting melt and slide. If you want a drip cake, do it on purpose, not by accident.
Alternatives
You can tweak this cake without wrecking it, which is honestly rare. Here are swaps that keep the vibe intact.
-
No buttermilk? Mix 1 tablespoon lemon juice or vinegar into 1 cup milk and let it sit 5 minutes.
-
No coffee? Use hot water. Coffee boosts flavor, but the cake still works without it.
-
One-pan version: Bake in a 9×13-inch pan for about 30 to 38 minutes and frost right in the pan.
-
Cupcakes: Fill liners 2/3 full and bake 18 to 22 minutes. Great for “I need dessert now” situations.
-
Extra-dark flavor: Replace 1/4 cup cocoa with Dutch-process cocoa, but keep the baking soda as written for lift.
-
Dairy-free: Use plant milk with acid for the buttermilk swap and a dairy-free butter alternative for frosting.
FAQ
Can I make this cake ahead of time?
Yes. Bake the layers a day ahead, wrap them tightly once cool, and store at room temperature. Frost the next day for the freshest texture and easiest assembly.
Why is the batter so thin?
It’s supposed to be thin. The hot coffee loosens the batter and blooms the cocoa, which bakes into a tender, evenly hydrated crumb instead of a dry, tight one.
Can I use Dutch-process cocoa?
You can, but the cake rises best with natural cocoa because it reacts more predictably with baking soda. If you go Dutch-process, keep the recipe exactly the same and expect a slightly smoother, darker flavor.
What frosting works best if I want it less sweet?
Use a chocolate ganache or a whipped chocolate frosting. Buttercream tastes classic, but ganache gives you deep chocolate with less sugar and a sleek finish.
How do I keep my layers flat?
Don’t overmix, and make sure your oven is fully preheated. If you want bakery-flat layers, chill the batter for 10 minutes before baking or trim the domes after cooling with a serrated knife.
Can I turn this into a three-layer cake?
Yes, but use three 8-inch pans and start checking earlier, around 22 minutes. Thinner layers bake faster and stay extra moist, which feels unfair in the best way.
My Take
This is the cake I make when I want guaranteed applause with minimal stress. It hits that rare combo: easy enough for a random weeknight, good enough to flex at a party.
I don’t chase “perfect” frosting edges unless I’m bored and trying to avoid my inbox. A slightly swoopy finish looks homemade in the charming way, not the “I gave up” way.
If you bake one thing this month, make it this. Then watch how fast people start requesting it like you’re their personal dessert subscription.