Cake Recipes Without Oven: 7 No-bake Wins Tonight
Make a legit celebration cake with pantry staples, zero baking, and fridge-friendly steps that work in small kitchens.
You want cake. Not “someday,” not “when I fix the oven,” not “after I preheat for 20 minutes like a Victorian.” You want it now, with minimal mess, maximum payoff, and the kind of result that makes people ask, “Wait, you made this?” Here’s the cheat code: no-bake cakes use texture and temperature, not heat, to feel like the real deal. If you can stir, chill, and resist licking the bowl for five minutes, you’re qualified.
This article gives you one flexible master method plus seven variations that feel wildly different, even though they share the same smart tricks. You’ll learn what makes no-bake cakes set, how to avoid the classic soggy-crust tragedy, and how to customize flavors without accidentally inventing pudding soup. Ready to win dessert with the least effort possible?
What Makes This Special
No-bake cakes don’t just “work.” They solve problems: no oven, no sweating in a hot kitchen, no timing stress. You build structure with a crumb crust, a creamy filling, and cold time that turns chaos into clean slices.
They also scale beautifully. Make them in a springform pan, a loaf pan, jars, or even a bowl if you want that “rustic” look (aka you didn’t feel like unmolding). And because you control sweetness and flavor, you can keep things bright and fresh instead of heavy and baked-out.
Best part? The “wow” factor stays high while the effort stays suspiciously low. People assume cake equals hard work. Let them keep assuming.
What Goes Into This Recipe – Ingredients
This is a master ingredient list with options for seven variations. Pick your base, pick your flavor, and you’re off.
- Crust base: 2 1/2 cups crushed cookies or crackers (graham crackers, digestive biscuits, chocolate wafers, Oreos)
- Fat to bind: 6 to 8 tablespoons melted butter or coconut oil
- Pinch of salt: especially if your cookies are sweet
- Creamy body: 16 ounces cream cheese, mascarpone, or thick Greek yogurt
- Sweetener: 1/2 to 3/4 cup powdered sugar, honey, or condensed milk
- Vanilla: 1 to 2 teaspoons
- Stabilizer option: 1 tablespoon gelatin (bloomed) or 2 teaspoons agar agar, optional but helpful
- Whipped lift: 1 1/2 cups heavy cream (or 2 1/2 cups whipped topping)
- Flavor boosters: cocoa powder, instant espresso, lemon zest, peanut butter, melted chocolate, fruit puree
- Toppings: berries, shaved chocolate, cookie crumbs, caramel drizzle, chopped nuts, whipped cream
Instructions
Follow the master steps, then choose one of the flavor paths in the listicle to finish.
- Crush the base. Blitz cookies in a food processor or smash them in a bag with a rolling pin. Aim for sandy crumbs with a few tiny bits for texture.
- Make the crust. Mix crumbs with melted butter (and salt). Press firmly into the bottom of a lined 8 or 9-inch springform pan. Chill 15 minutes so it locks in.
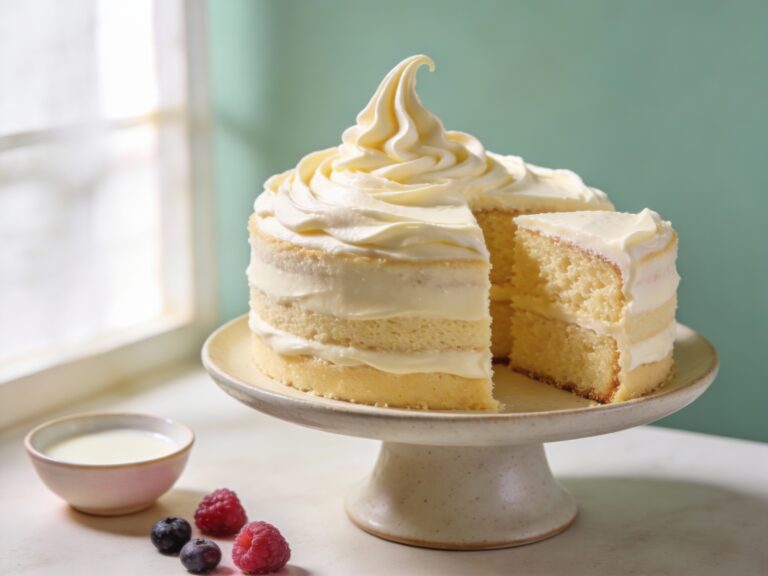
- Whip the cream. Whip heavy cream to medium peaks. You want it fluffy but not stiff and grainy.
- Mix the creamy base. Beat cream cheese (or mascarpone) with sweetener and vanilla until smooth. Scrape the bowl like you mean it.
- Stabilize if needed. If you want extra clean slices, add bloomed gelatin (or prepared agar) to the creamy base while mixing. Skip if you plan to serve it soft and spoonable.
- Fold for volume. Fold whipped cream into the base in 2 to 3 additions. Don’t deflate it; you’re building “cake” vibes.
- Choose your flavor path. Pick one option below and mix it in gently.
- Fill and chill. Spread filling over crust, smooth the top, and chill at least 6 hours, ideally overnight. Yes, patience. No, you can’t “speed-run” physics.
- Finish like a pro. Add toppings right before serving so they stay crisp and pretty.
Flavor Path 1: Chocolate Fudge Cloud
Mix 1/3 cup cocoa powder and 4 ounces melted, cooled dark chocolate into the creamy base. Top with chocolate shavings and a pinch of flaky salt.
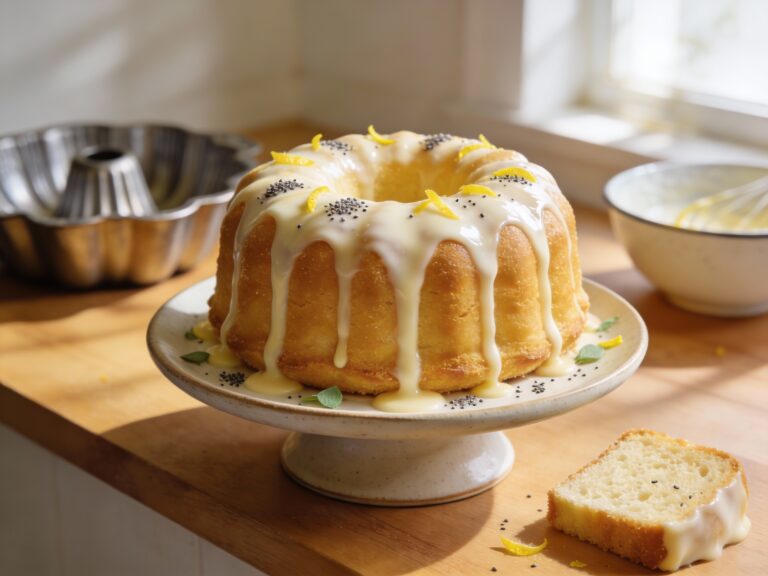
Flavor Path 2: Lemon Cream Dream
Add zest of 2 lemons and 1/3 cup fresh lemon juice. Fold in a spoon of lemon curd for extra punch, then top with berries.
Flavor Path 3: Peanut Butter Cup
Beat in 1/2 cup peanut butter and a tablespoon of brown sugar. Fold in chopped mini peanut butter cups, then drizzle with melted chocolate.
Flavor Path 4: Cookies and Cream Flex
Use Oreo crumbs for the crust, then fold in 1 1/2 cups crushed Oreos into the filling. Top with more crumbs because subtlety is overrated.
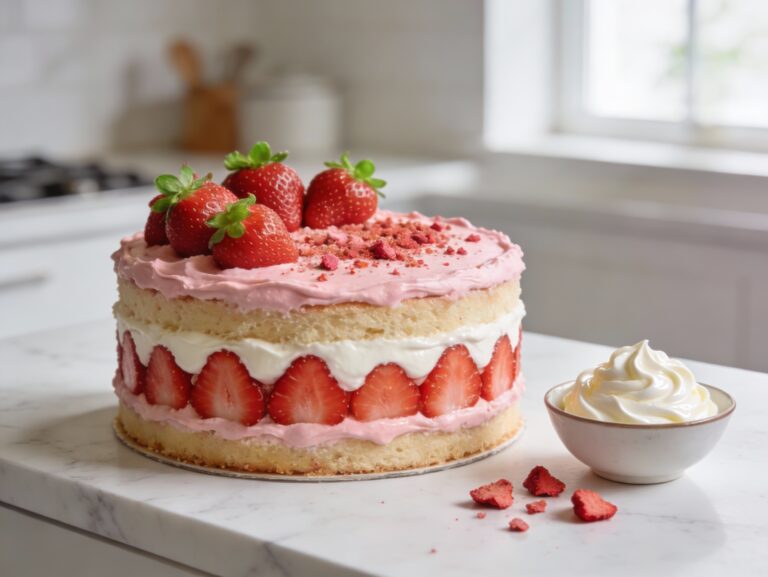
Flavor Path 5: Strawberry Shortcake (No Bake Version)
Fold in 1/2 cup strawberry puree or crushed strawberries. Layer sliced strawberries on top and add whipped cream swirls for the “I planned this” look.
Flavor Path 6: Espresso Mocha
Dissolve 2 teaspoons instant espresso in 1 tablespoon hot water and add it to the base with 2 tablespoons cocoa. Top with cacao nibs or coffee beans (decorative, not snackable… unless you’re chaotic).
Flavor Path 7: Mango Coconut Chill Cake
Swap half the butter for coconut oil in the crust. Fold in 3/4 cup mango puree and 1/2 cup toasted coconut, then top with lime zest.
How to Store
Cover the cake tightly and store it in the fridge for up to 4 days. The crust softens slightly over time, but the flavor usually gets better, which feels unfair in a good way.
For longer storage, freeze slices on a tray until firm, then wrap them and store in a freezer-safe container for up to 1 month. Thaw in the fridge for a few hours, or eat it semi-frozen if you like that ice-cream-cake energy.
Keep toppings like berries, crunchy cookies, and caramel drizzles separate until serving. FYI, moisture is the sneaky villain here.
Benefits of This Recipe
- No oven required: perfect for dorms, summer days, or broken appliances that “you’ll fix next weekend.”
- Beginner-friendly: no baking math, no doneness guessing, no toothpick drama.
- Make-ahead magic: chill overnight and serve with zero stress.
- Highly customizable: one base formula becomes multiple “different” desserts.
- Great texture: creamy, airy filling with a crisp-leaning crust when handled right.
Pitfalls to Watch Out For
- Warm ingredients: soft cream cheese is good, but hot melted chocolate or warm butter in the filling can make it loose. Cool things down before mixing.
- Overwhipping cream: push it too far and it turns grainy, then your filling feels heavy. Stop at medium peaks.
- Not chilling long enough: 2 hours is a tease, not a set. Give it 6 hours minimum or accept “spoon cake.”
- Soggy crust: press firmly and chill the crust first. Also, don’t add wet fruit directly onto the crust layer.
- Too much liquid flavoring: extra juice or puree can break the set. Add a little, taste, then add more carefully.
IMO, the biggest mistake is rushing the chill time. The fridge is doing the baking for you. Let it work.
Mix It Up
Want to personalize it without wrecking the texture? Keep your swaps smart and your ratios steady.
- Crust swaps: pretzels for salty crunch, gingersnaps for spice, chocolate cookies for drama.
- Dairy swaps: mascarpone for extra richness, thick Greek yogurt for tang, dairy-free cream cheese for a plant-based version.
- Sweetness control: use less sugar and add flavor with zest, espresso, or a pinch of salt to keep it bold.
- Layer upgrades: add a thin ganache layer, a jam swirl, or a cookie crumb stripe in the middle.
- Presentation hacks: make mini cakes in jars, cupcake liners, or a loaf pan for easy slicing.
If you want a cleaner slice every time, use gelatin or agar and chill overnight. If you want it softer and cloud-like, skip stabilizers and serve it colder.
FAQ
Can I make a no-bake cake without a springform pan?
Yes. Use a loaf pan lined with parchment so you can lift it out, or make it in cups for instant portion control. If it sticks a little, call it “artisan.”
How long does it really need to chill?
Minimum 6 hours for a sliceable texture, but overnight wins. If you cut too soon, it tastes great but looks like it lost a fight.
Do I have to use gelatin or agar?
No, but it helps if you want sharp edges and stable slices. If you skip it, keep the cake well chilled and plan for a softer, mousse-like texture.
Can I use whipped topping instead of heavy cream?
Absolutely. It’s convenient and stable, which makes the filling forgiving. Reduce added sugar slightly because whipped topping already brings sweetness.
What’s the best way to avoid a soggy crust?
Press the crust firmly, chill it before filling, and avoid placing juicy fruit directly on the crust. Add fruit on top or in the filling in small amounts.
Can I make it dairy-free?
Yes. Use dairy-free cream cheese, coconut cream whipped to peaks, and coconut oil in the crust. Choose flavor add-ins like citrus zest, cocoa, or fruit puree that fit the base.
Why is my filling runny?
Usually it’s one of three things: underwhipped cream, too much liquid (juice/puree), or not enough chill time. Chill longer first, then consider a stabilizer next time if you want firmer slices.
The Bottom Line
You don’t need an oven to make a cake that feels like a celebration. You need a smart crust, a whipped creamy base, and enough chill time to let the texture set up and behave.
Pick one flavor path, keep your ingredients cool, and let the fridge do the heavy lifting. Then serve a slice, act casual, and enjoy the confused compliments. That’s the whole game.