Baked Potatoes in Air Fryer That Taste Like Steakhouse
Crispy skins, fluffy centers, and no oven drama—this quick method nails weeknight comfort with minimal effort.
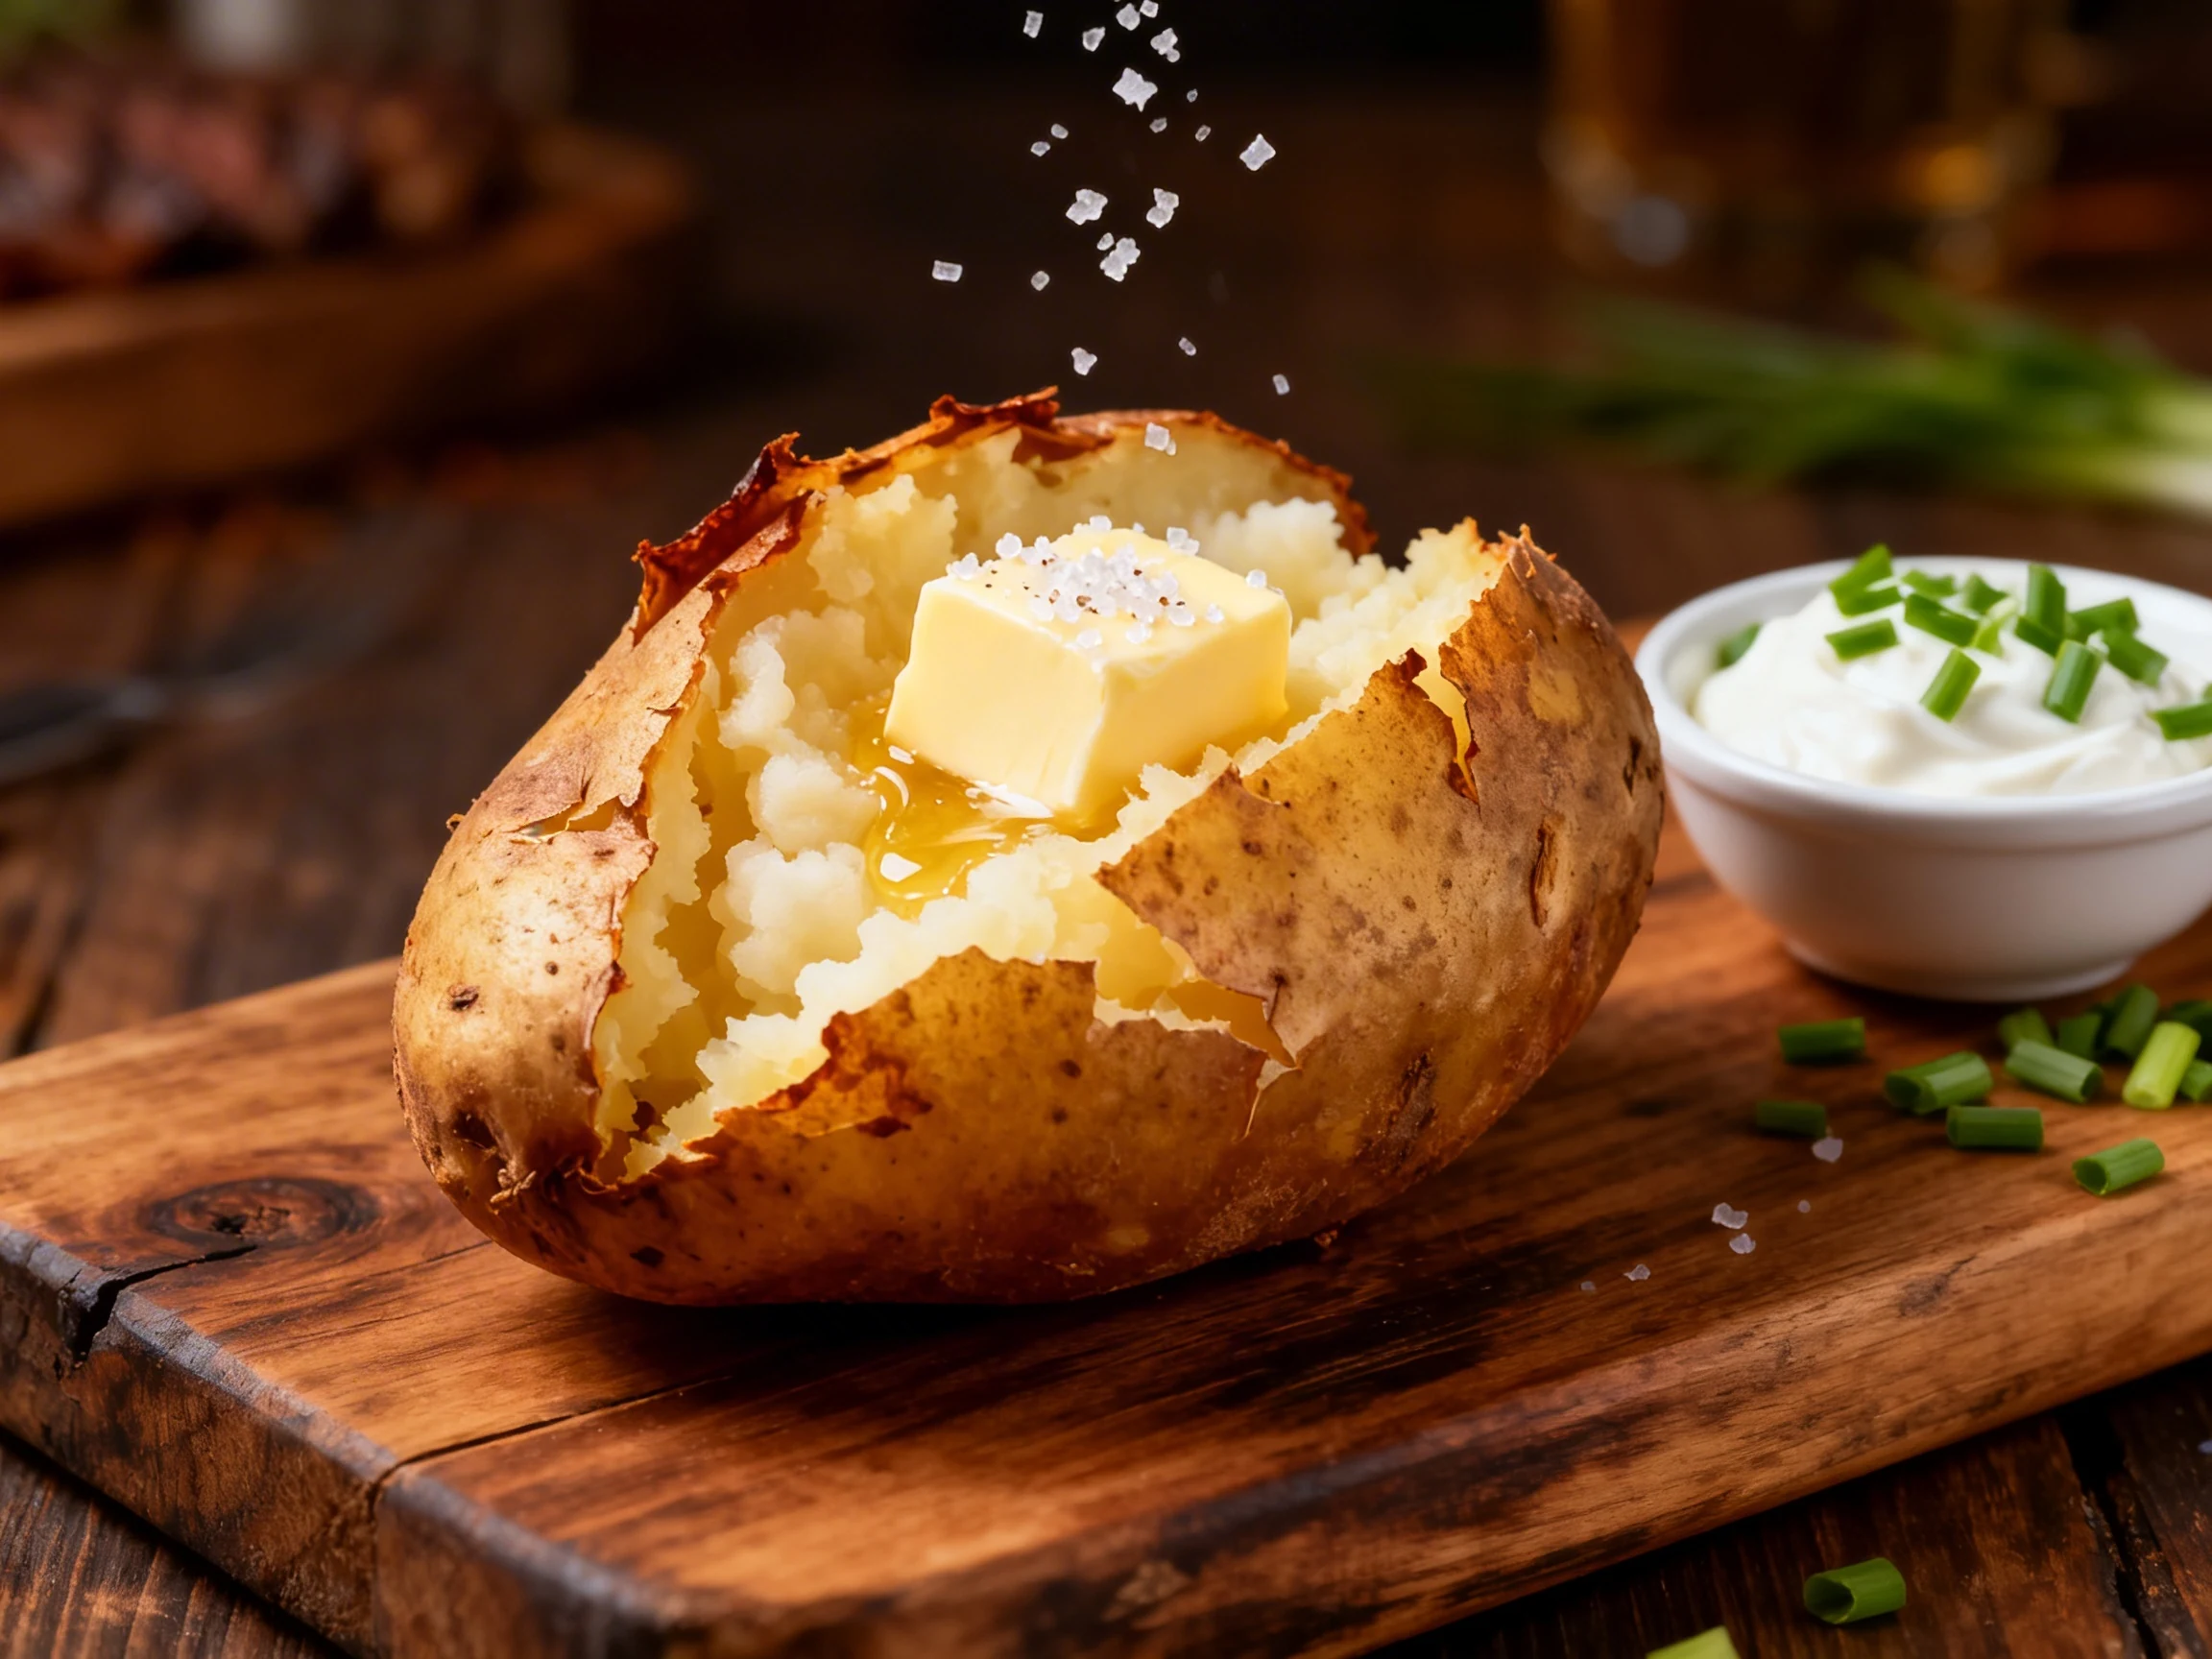
You want that steakhouse potato experience: shattery skin, cloud-soft middle, and butter melting like it pays rent. You also don’t want to wait an hour for your oven to “preheat” and then heat your whole kitchen like a sauna. The air fryer fixes all of that with ruthless efficiency. It’s the rare cooking hack that actually delivers: faster cook time, better texture, and way less babysitting. If you’ve ever bitten into a sad, damp baked potato and wondered why you bothered, this is your redemption arc.
Why This Recipe Works
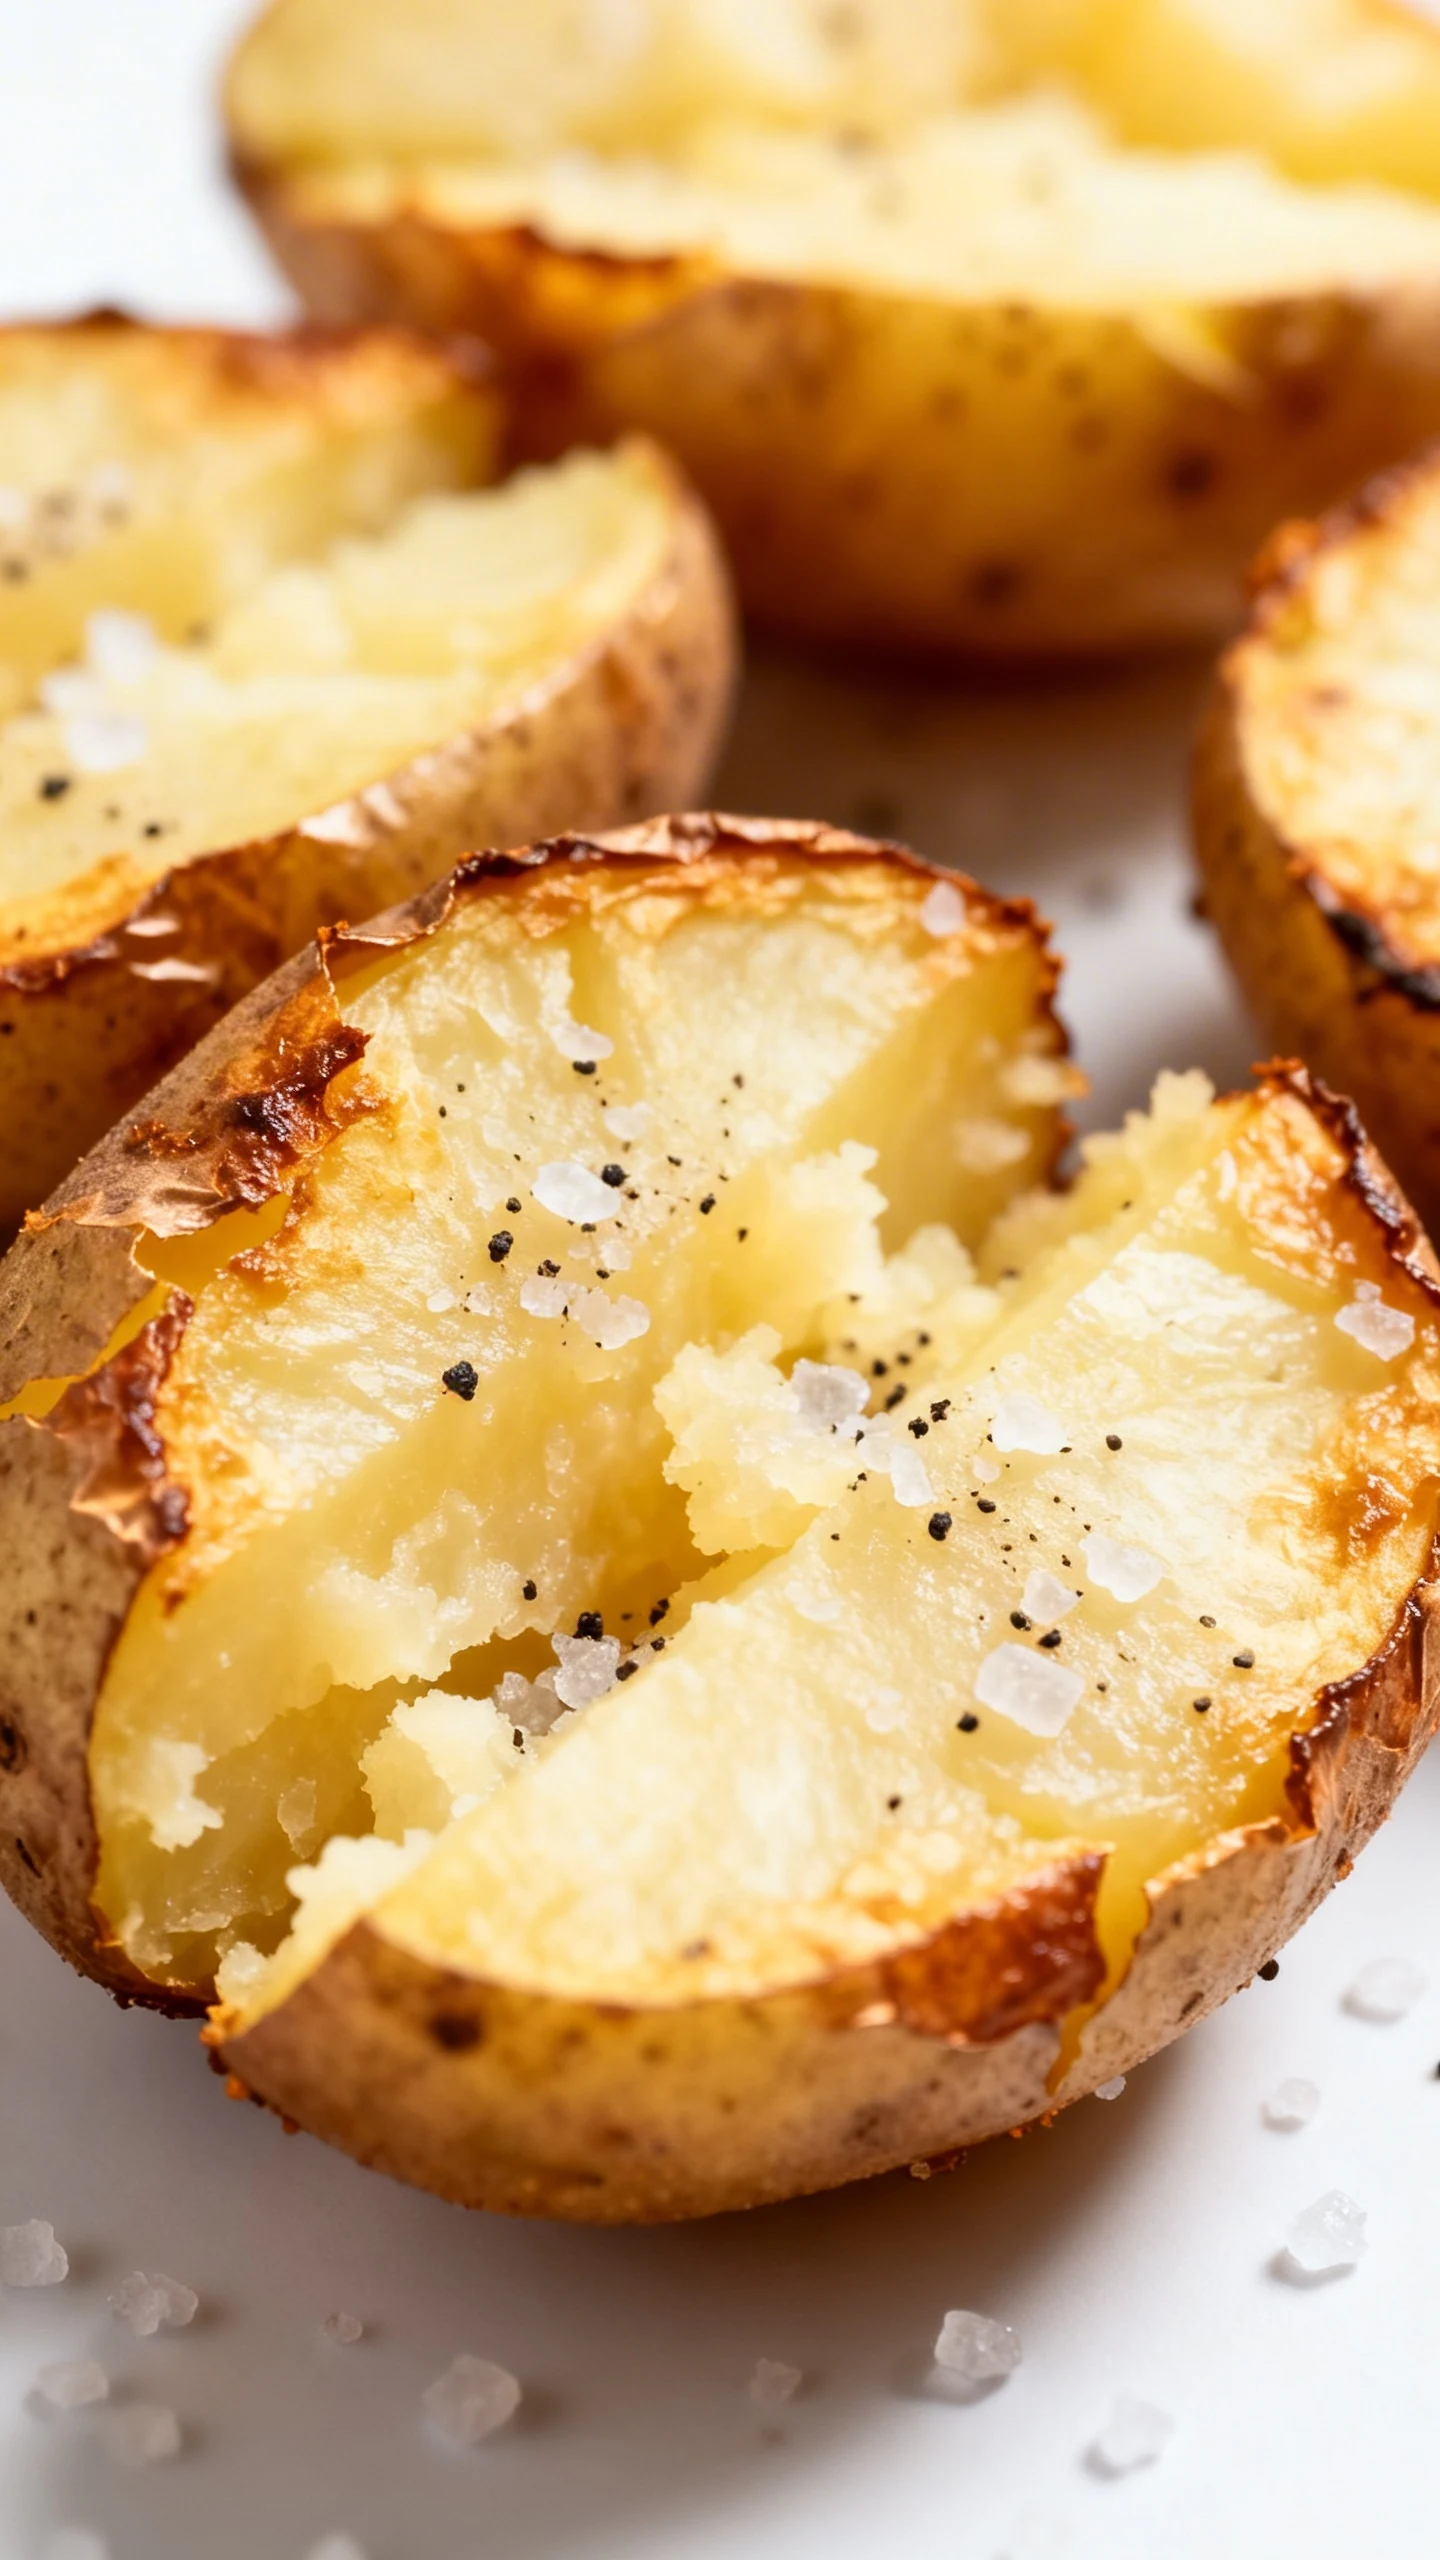
The air fryer blasts hot air around the potato, which means you get even cooking without flipping every five minutes like you’re running a potato daycare. That circulation also dries the exterior just enough to create crisp, crackly skin—the part most methods accidentally turn chewy. A light coat of oil plus salt does the rest, pulling moisture from the surface so the skin fries instead of steams. And because the potato cooks in a contained, high-heat environment, the inside turns fluffy and tender without that “wet mashed potato” vibe.
Bonus: you don’t need foil. Foil traps steam, and steam is the enemy of crispness. We want a potato that snaps when you squeeze it, not one that sighs sadly. This method scales well too; make one for a solo dinner or a whole batch for a family, just don’t cram them in like sardines.
Ingredients
- 2 to 4 medium russet potatoes (8 to 12 ounces each)
- 1 to 2 tablespoons olive oil (or avocado oil)
- 1 to 2 teaspoons kosher salt (adjust to taste)
- Optional: 1/2 teaspoon freshly ground black pepper
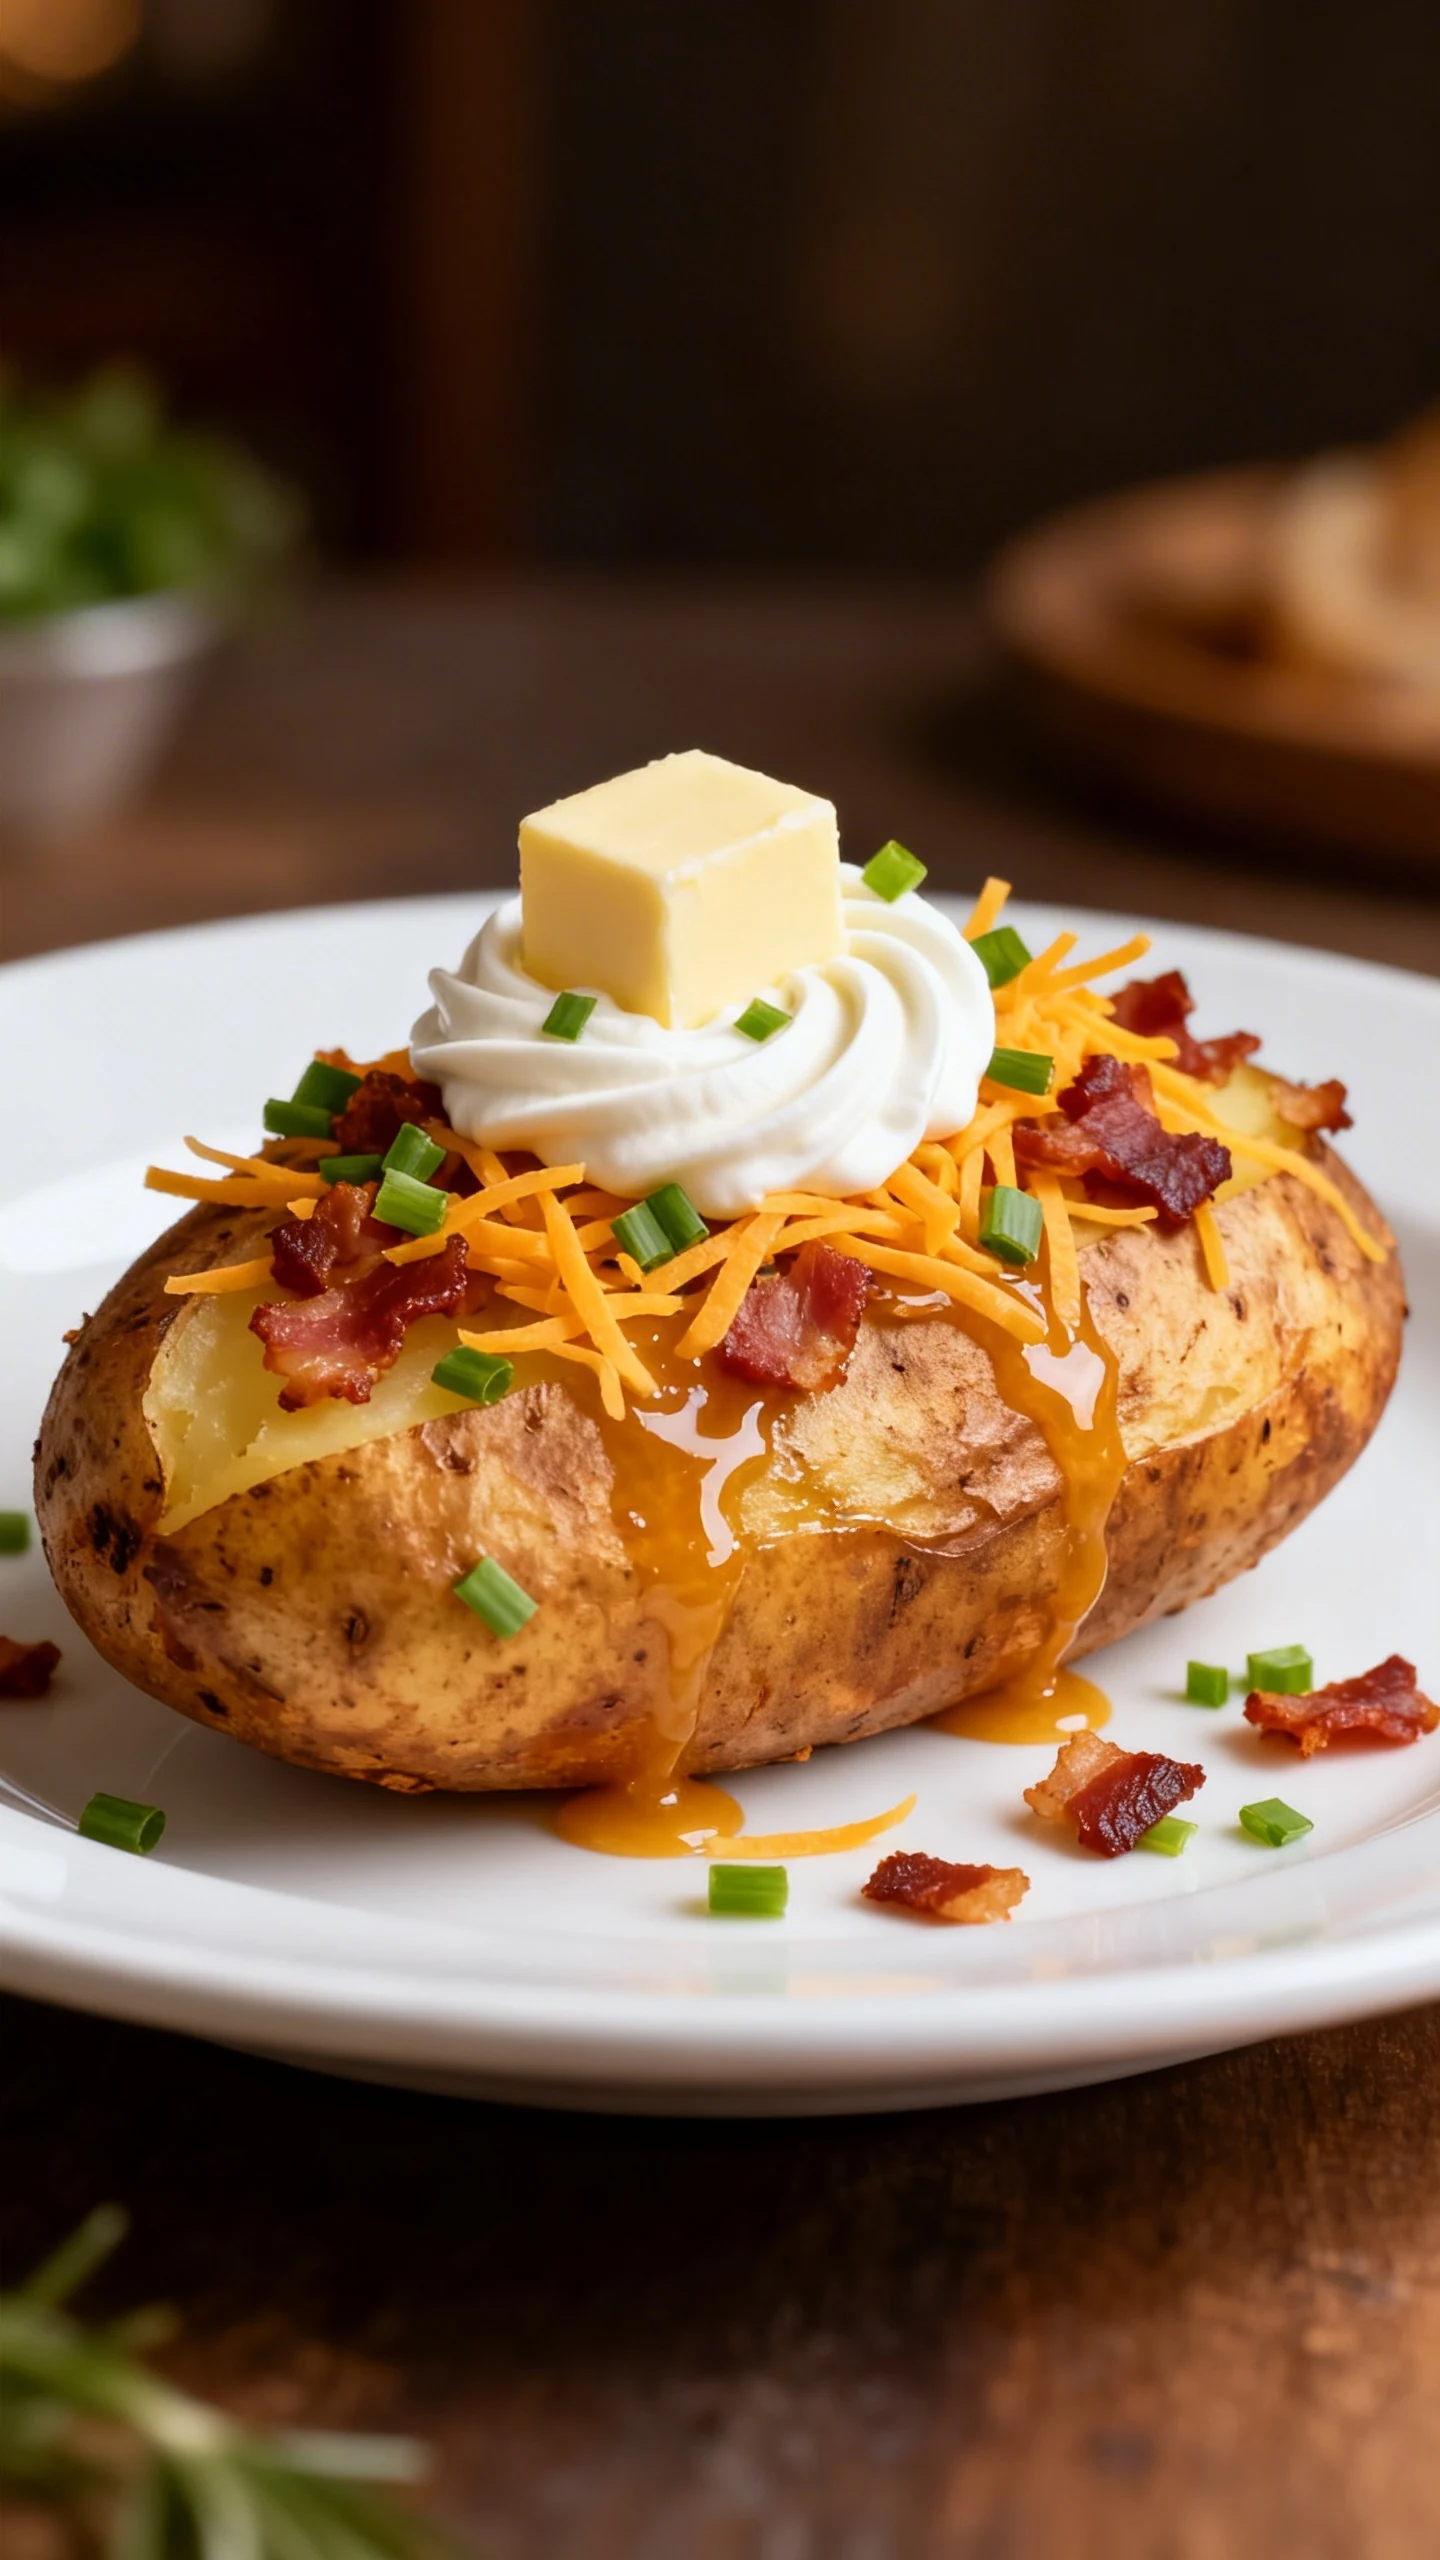
- Optional toppings: butter, sour cream, shredded cheddar, chopped chives, bacon bits, steamed broccoli, chili, Greek yogurt
Russets win here because they have a high starch content, which means that fluffy interior everyone pretends they can get with any potato. Yukon Golds work, but they lean creamier and slightly denser. If that’s your thing, go for it, but don’t act surprised when the texture changes.
Let’s Get Cooking – Instructions
-
Pick the right potatoes. Aim for similar size so they finish at the same time. Giant potatoes look impressive but cook slower and can trick you with an underdone center.
-
Scrub and dry like you mean it. Rinse the potatoes well, then dry them thoroughly with a towel. Water on the skin turns into steam, and steam turns crisp dreams into soggy reality.
-
Poke a few holes. Use a fork to poke each potato 6 to 8 times. This lets steam escape so your potato doesn’t try to reinvent itself as a balloon.
-
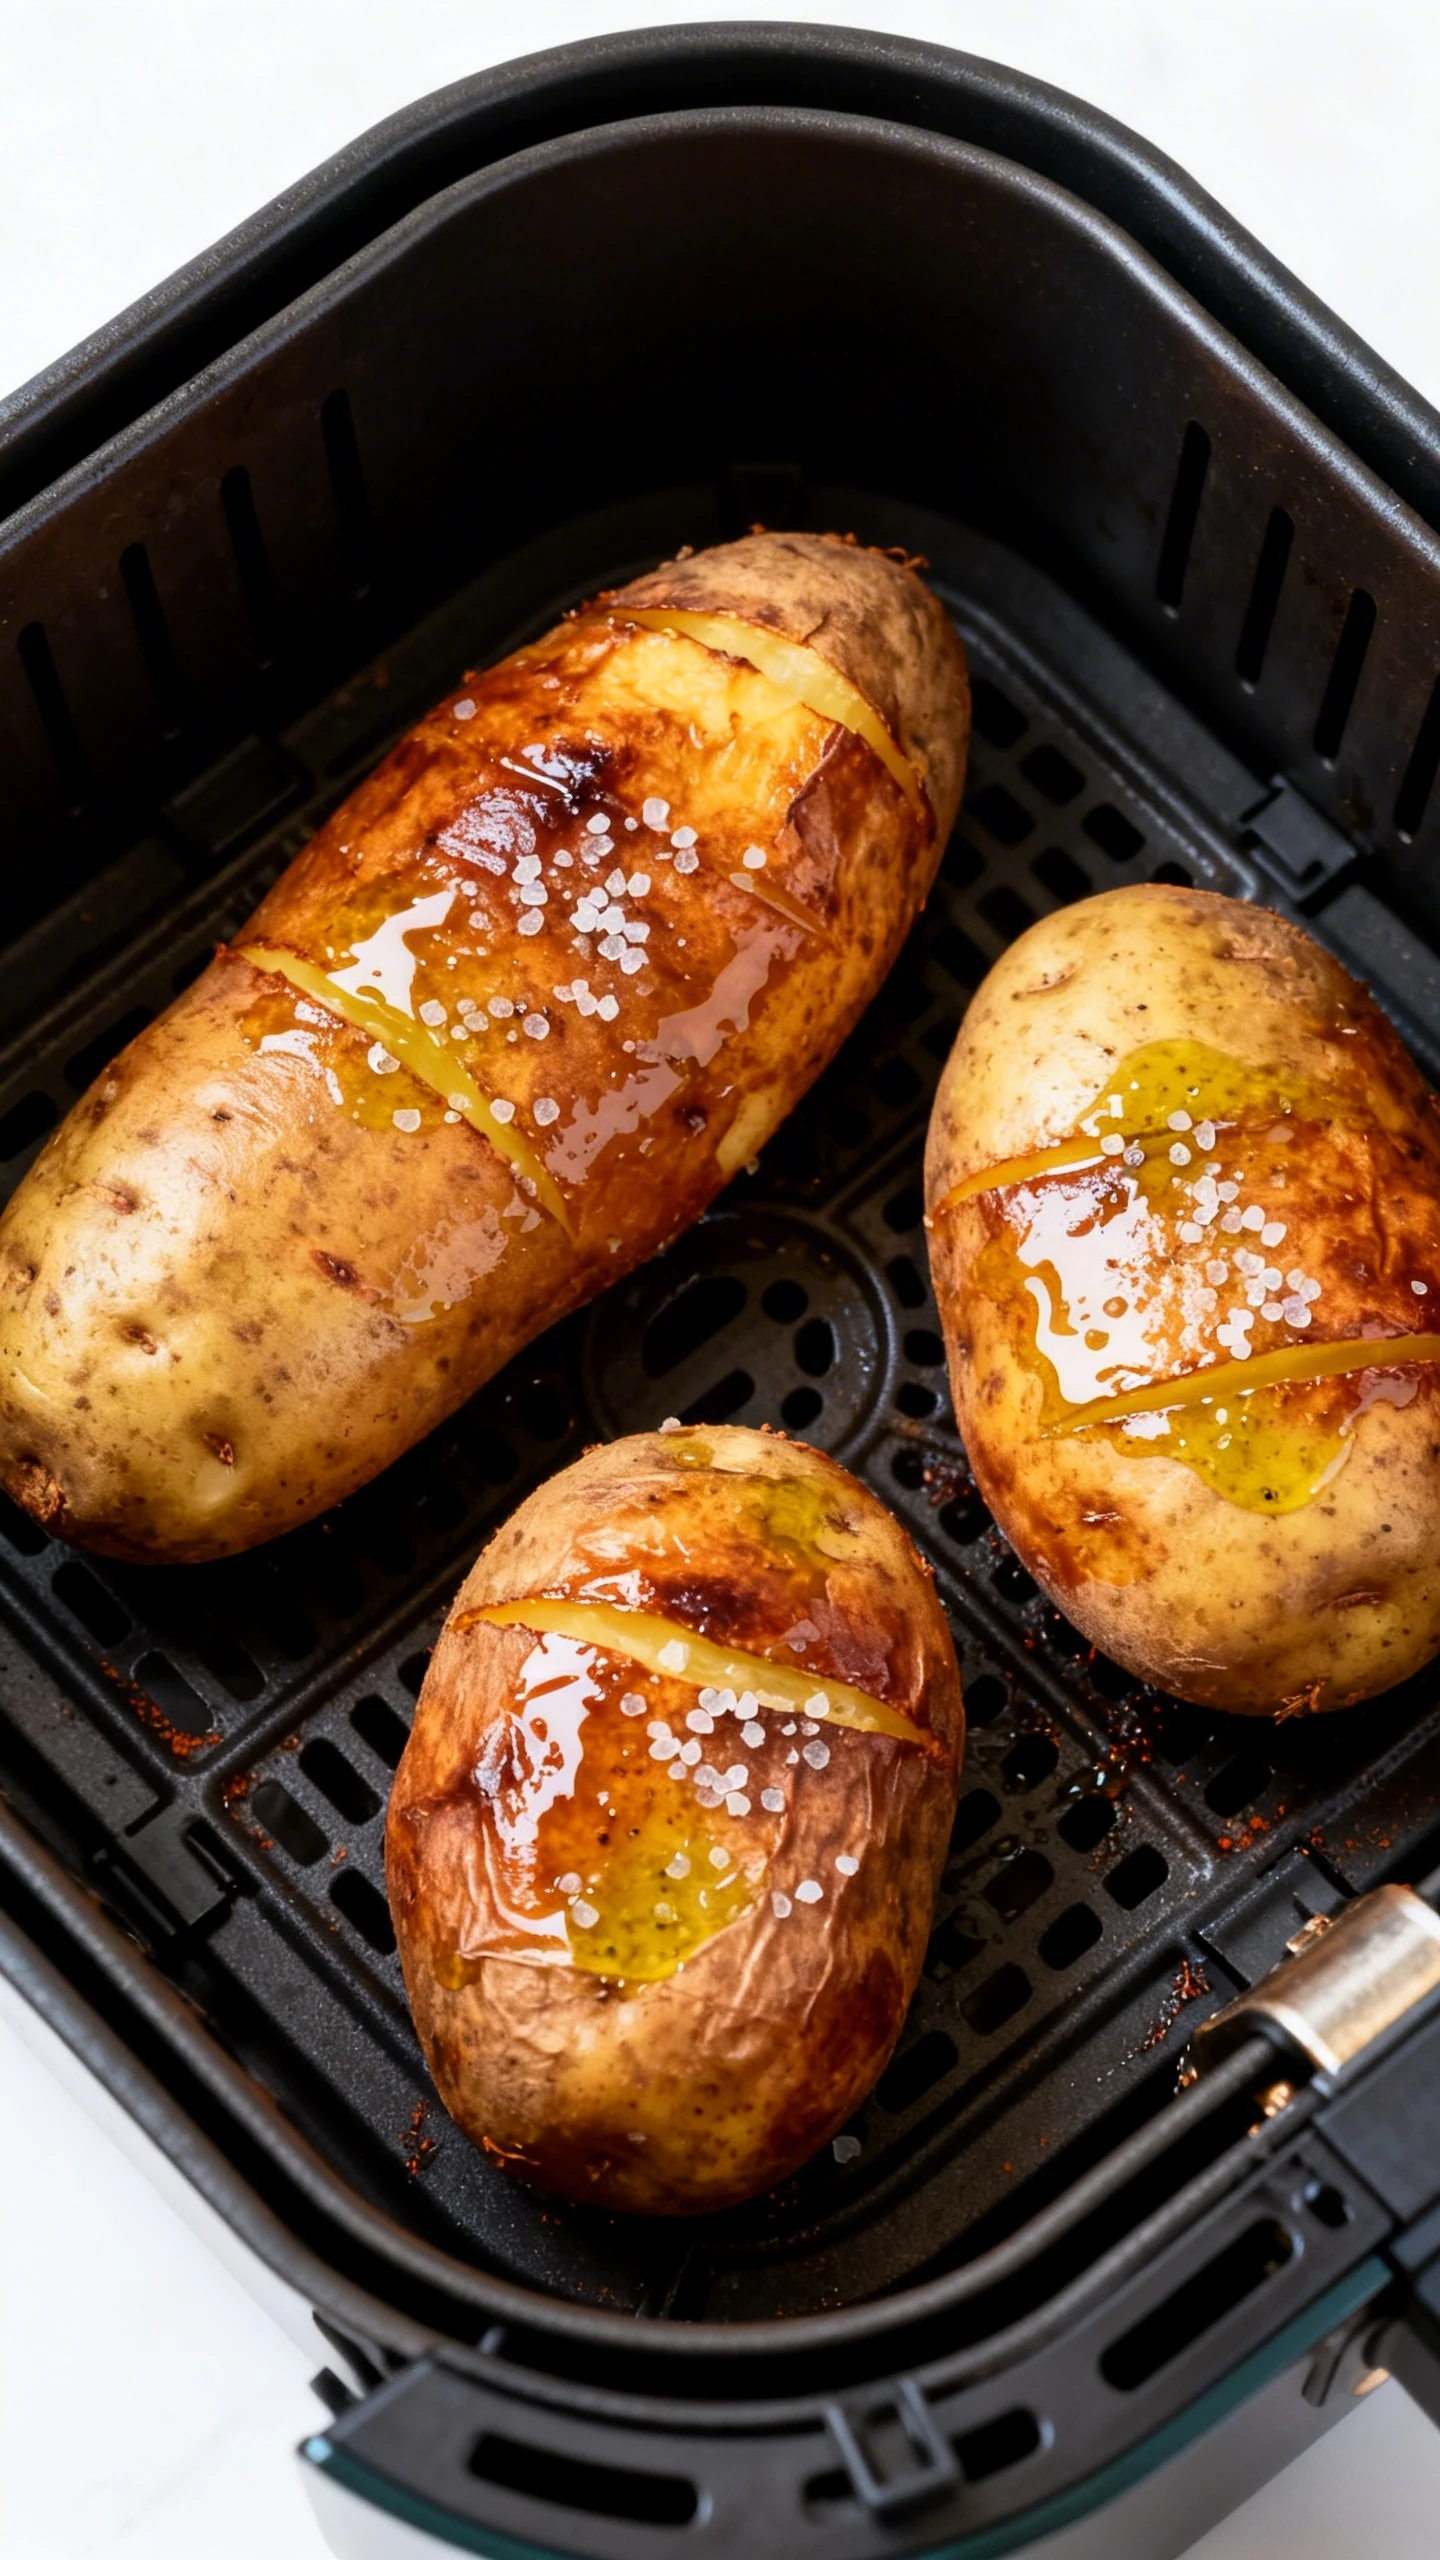
Oil and salt the skins. Rub each potato with oil until lightly coated. Sprinkle generously with kosher salt, rotating the potato so the salt sticks everywhere. If you want pepper, add it now.
-
Preheat (optional, but helpful). Preheat your air fryer to 400°F for 3 to 5 minutes if your model benefits from it. Some air fryers run hot instantly, others need a moment to get serious.
-
Air fry at 400°F. Place potatoes in the basket with a little space between them. Cook for 35 to 45 minutes, depending on size. Rotate or flip once halfway through if your air fryer has hot spots.
-
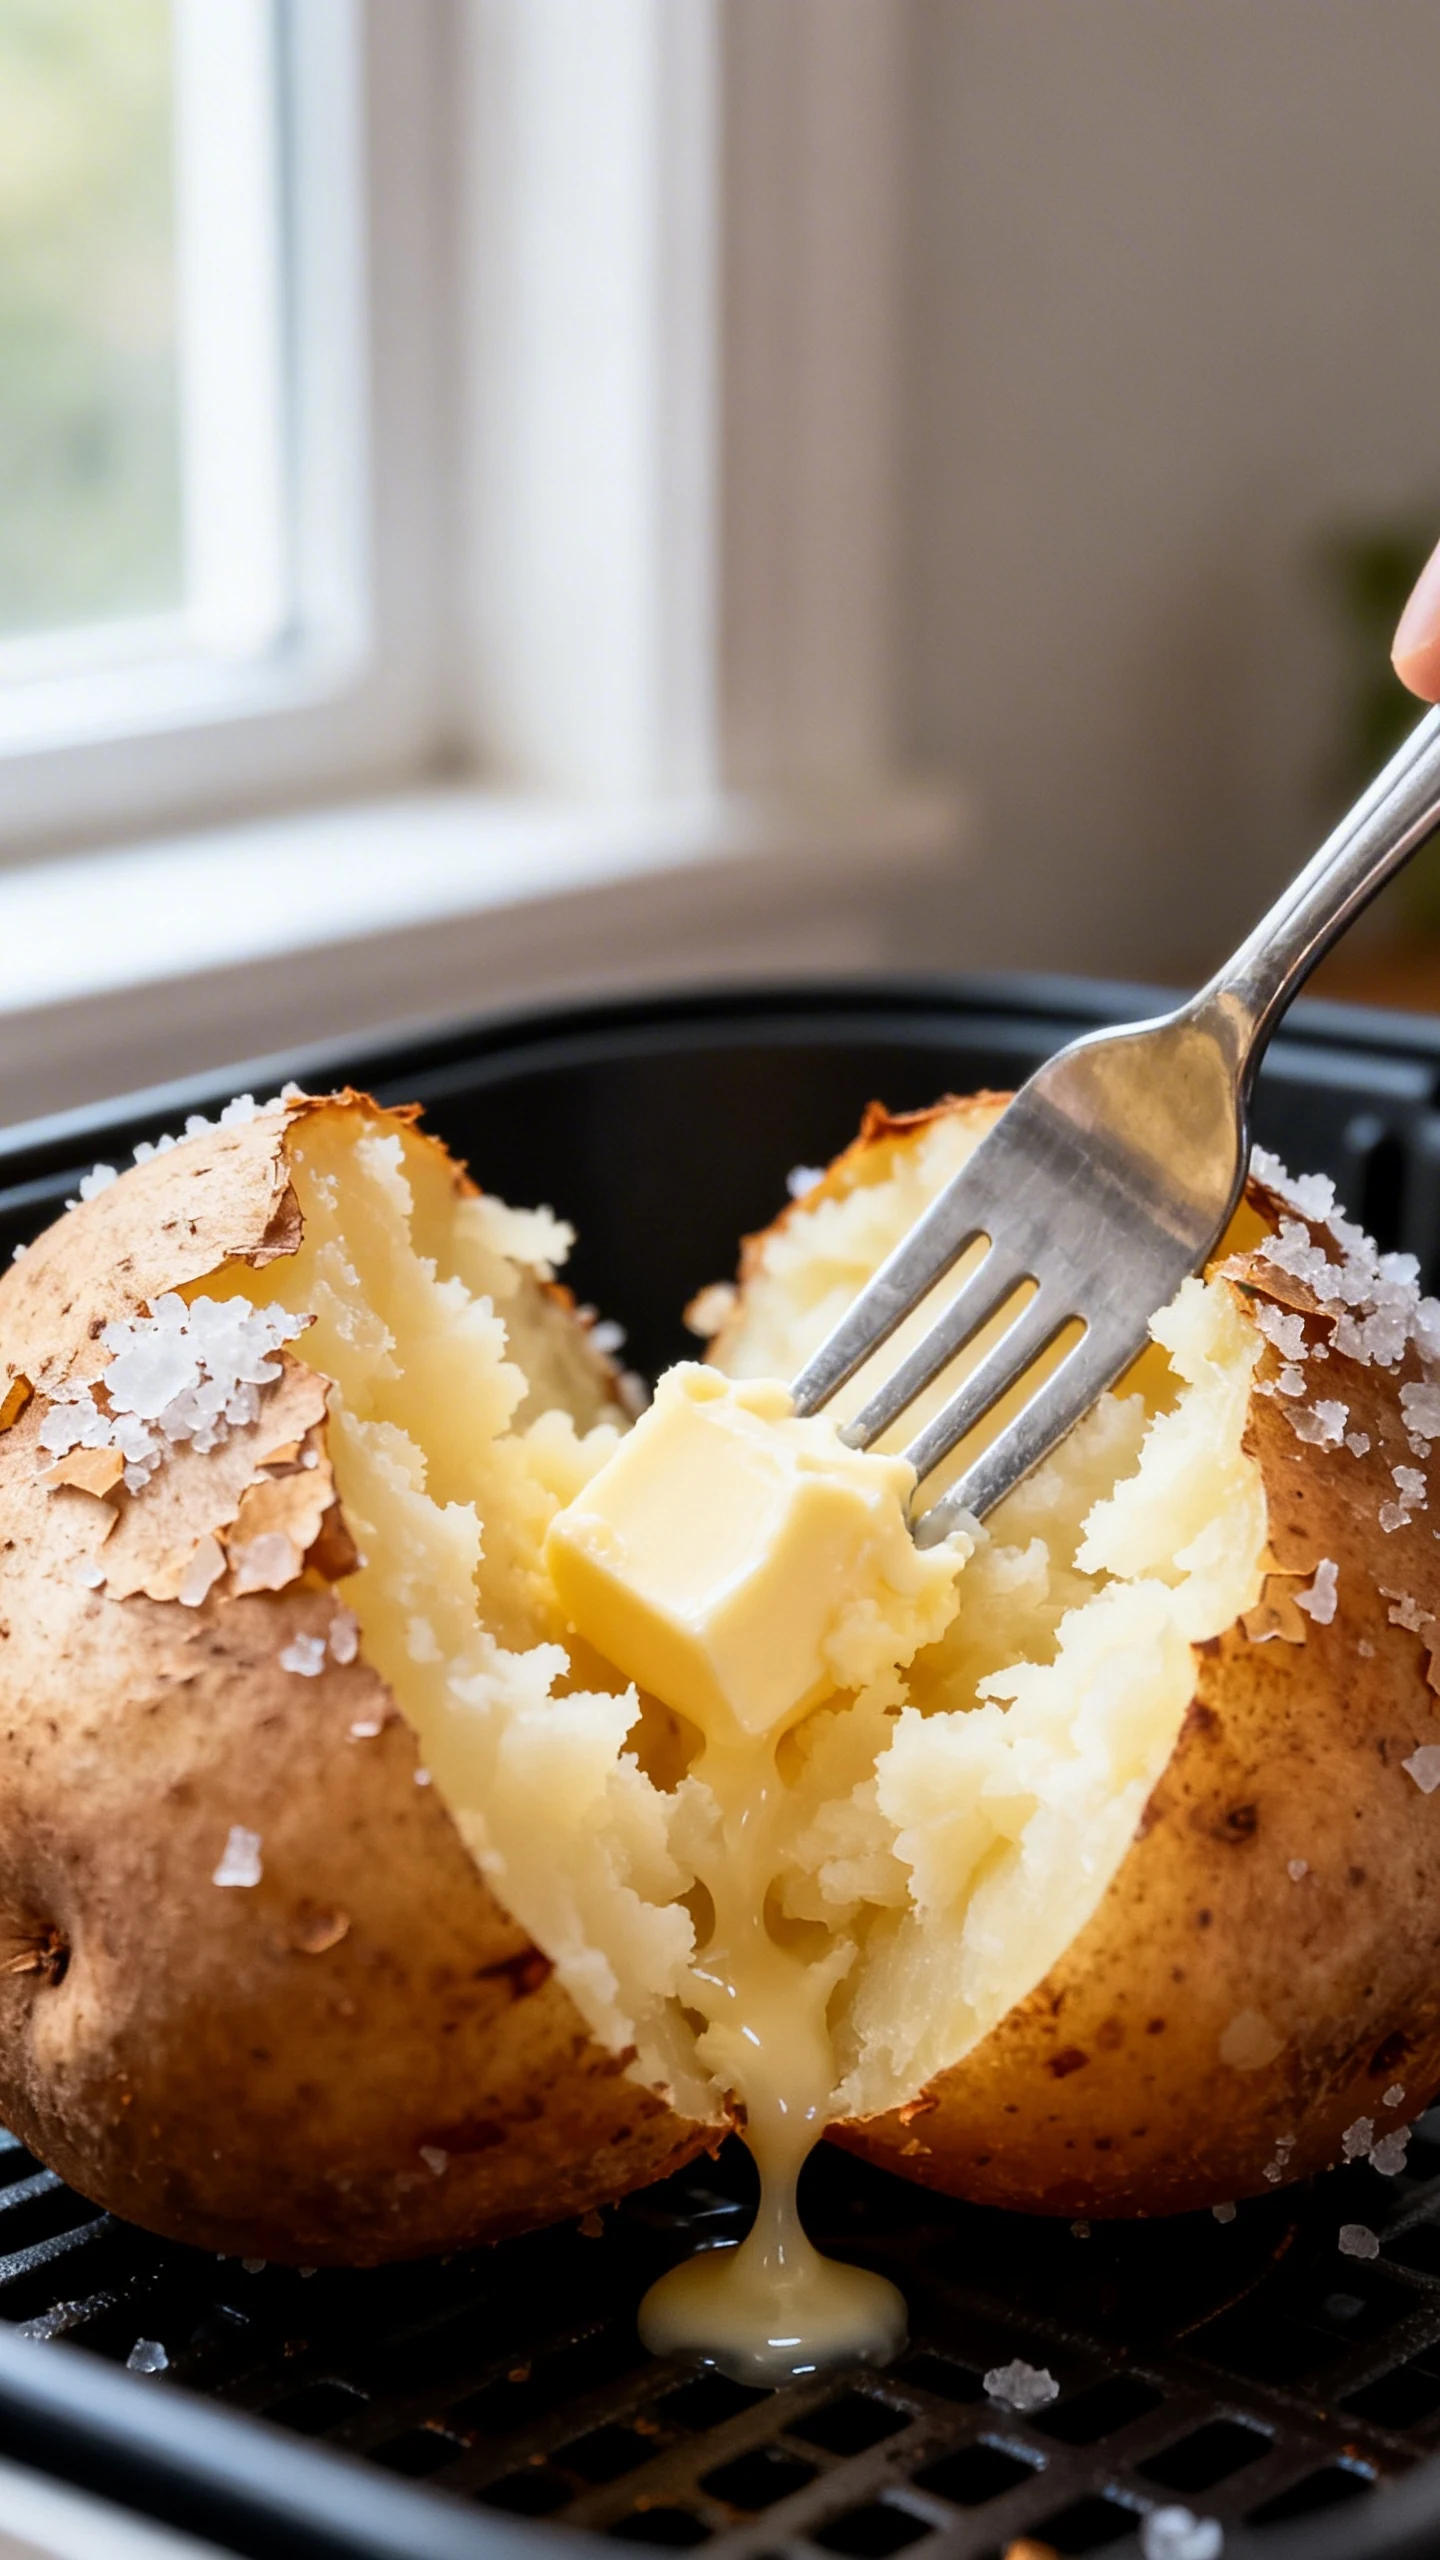
Check for doneness the smart way. A knife or skewer should slide in easily with no resistance. If you have an instant-read thermometer, target 205°F to 210°F in the center for peak fluffiness.
-
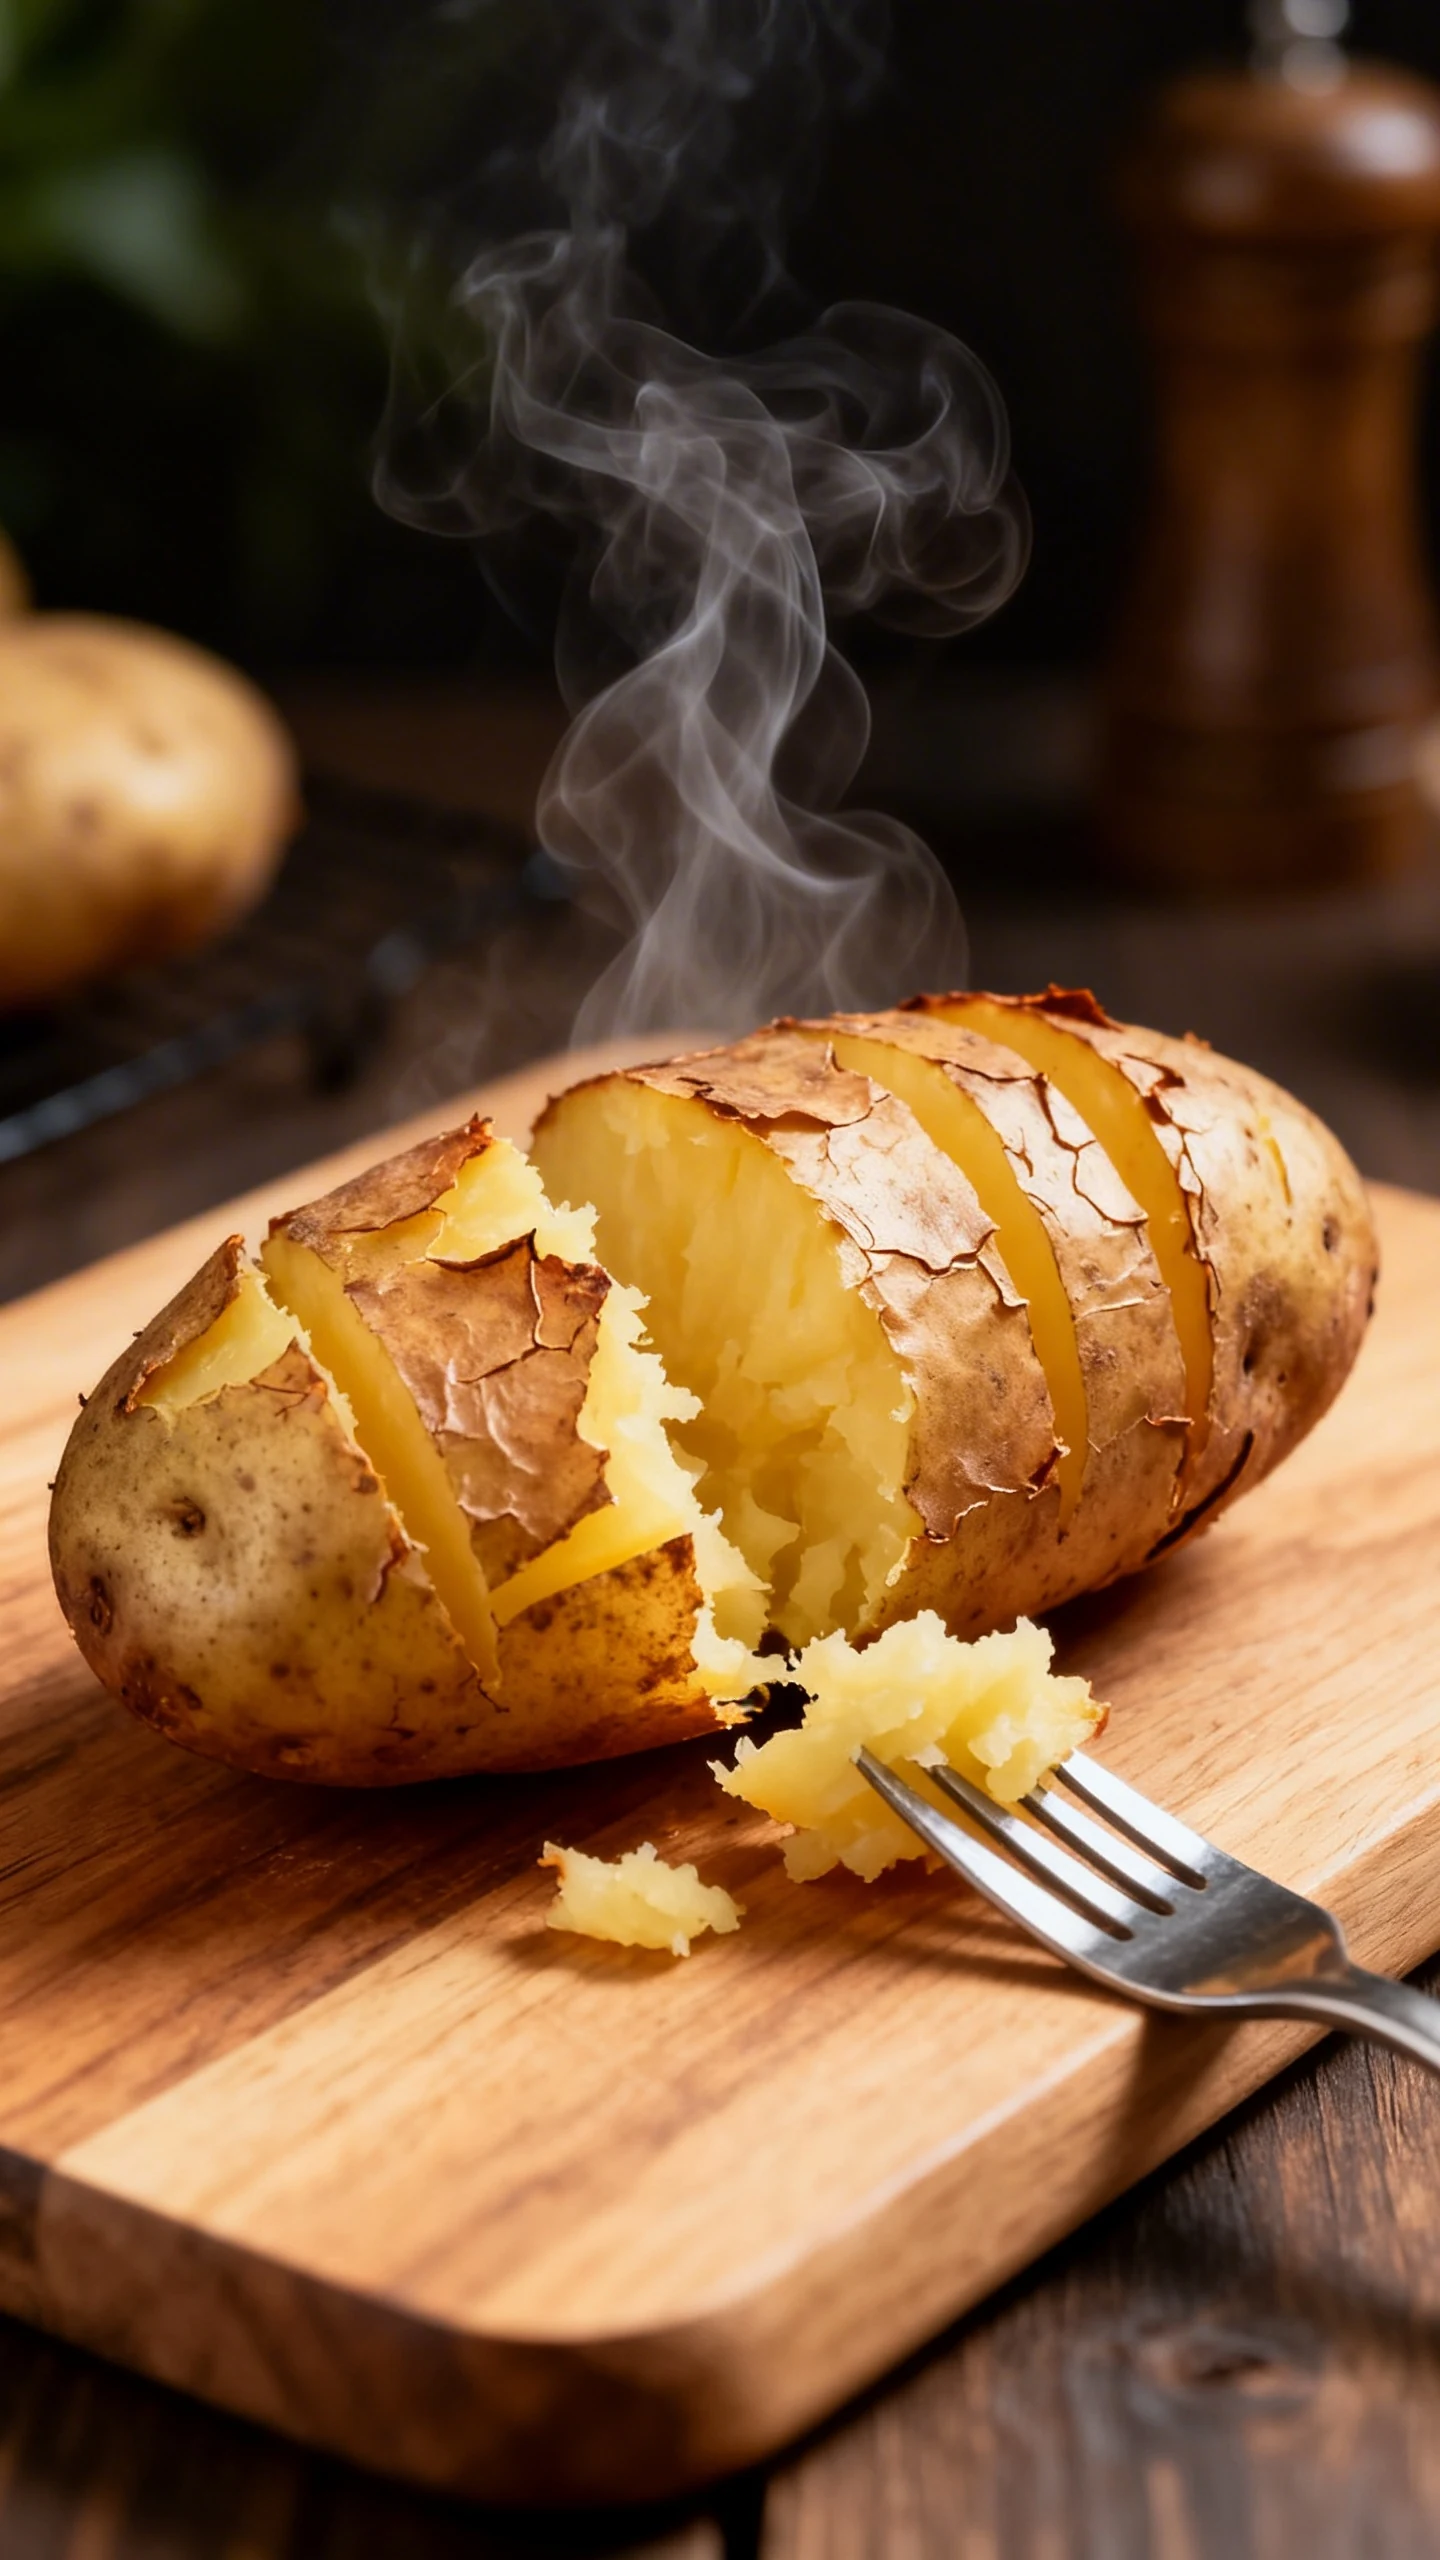
Rest for 5 minutes. Let the potatoes sit so the inside finishes steaming gently and the texture settles. Cut too early and you’ll lose some fluff to escaping steam.
-
Split and fluff. Slice lengthwise, then use a fork to fluff the interior. Add butter first so it melts into every nook, then pile on toppings like you’re building a personality.
Timing cheat sheet: small potatoes often finish around 30 to 35 minutes, medium around 35 to 45, and large can push 50 to 60. If your air fryer runs strong, you’ll learn quickly. FYI, the first batch teaches you more than any chart ever will.
Keeping It Fresh
Store leftover potatoes in an airtight container in the fridge for up to 4 days. Let them cool fully before sealing them up, or condensation will make the skin soft. They reheat surprisingly well, but the method matters if you care about texture.
For the best reheat, slice the potato in half and air fry at 375°F for 6 to 10 minutes until hot and crisp around the edges. You can also microwave it for speed, but the skin will go limp, like it gave up on life. If you want a compromise, microwave for 1 to 2 minutes to warm the center, then air fry for 3 to 5 minutes to bring the skin back.
You can freeze baked potatoes, but expect texture changes. Wrap cooled potatoes tightly and freeze up to 2 months. Thaw overnight in the fridge, then reheat in the air fryer until hot. It’s fine for loaded potato situations where toppings steal the spotlight anyway.
Nutritional Perks
Potatoes get unfairly dragged online like they personally caused everyone’s problems. A plain potato brings potassium, vitamin C, vitamin B6, and fiber (especially if you eat the skin). It also offers satisfying carbs that actually help you feel full, which is kind of the point of food.
The air fryer method uses a small amount of oil, so you get the crispy payoff without deep-frying. If you keep toppings reasonable, this can be a balanced side or even a simple meal. IMO, the real “health” issue starts when we treat sour cream like a beverage.
Pitfalls to Watch Out For
-
Skipping the dry step. Wet skins steam and won’t crisp. Dry the potatoes like you’re prepping them for a photoshoot.
-
Using foil. Foil traps moisture and softens the skin. If you love soft skin, fine, but then don’t complain.
-
Under-salting the outside. Salt isn’t just flavor; it helps draw out surface moisture for better crisp.
-
Overcrowding the basket. Air needs room to circulate. If potatoes touch, you’ll get pale, uneven spots.
-
Trusting time alone. Size varies. Use the knife test or a thermometer so you don’t serve a potato with a raw core.
-
Not resting. A short rest improves texture. Patience for five minutes saves you from a gummy center.
Different Ways to Make This
Once you nail the basic method, you can start playing. The air fryer is basically a crispy-skin machine, so your flavor options go from “simple” to “why is this so good?” quickly. Here are some variations that keep the core technique but change the vibe.
-
Garlic herb skin. Mix oil with garlic powder and dried Italian herbs, then rub on the potato before salting. Your kitchen will smell like you have plans.
-
Salt and vinegar punch. After cooking, brush the hot skin lightly with malt vinegar, then add a pinch more salt. Tangy, snacky, and oddly addictive.
-
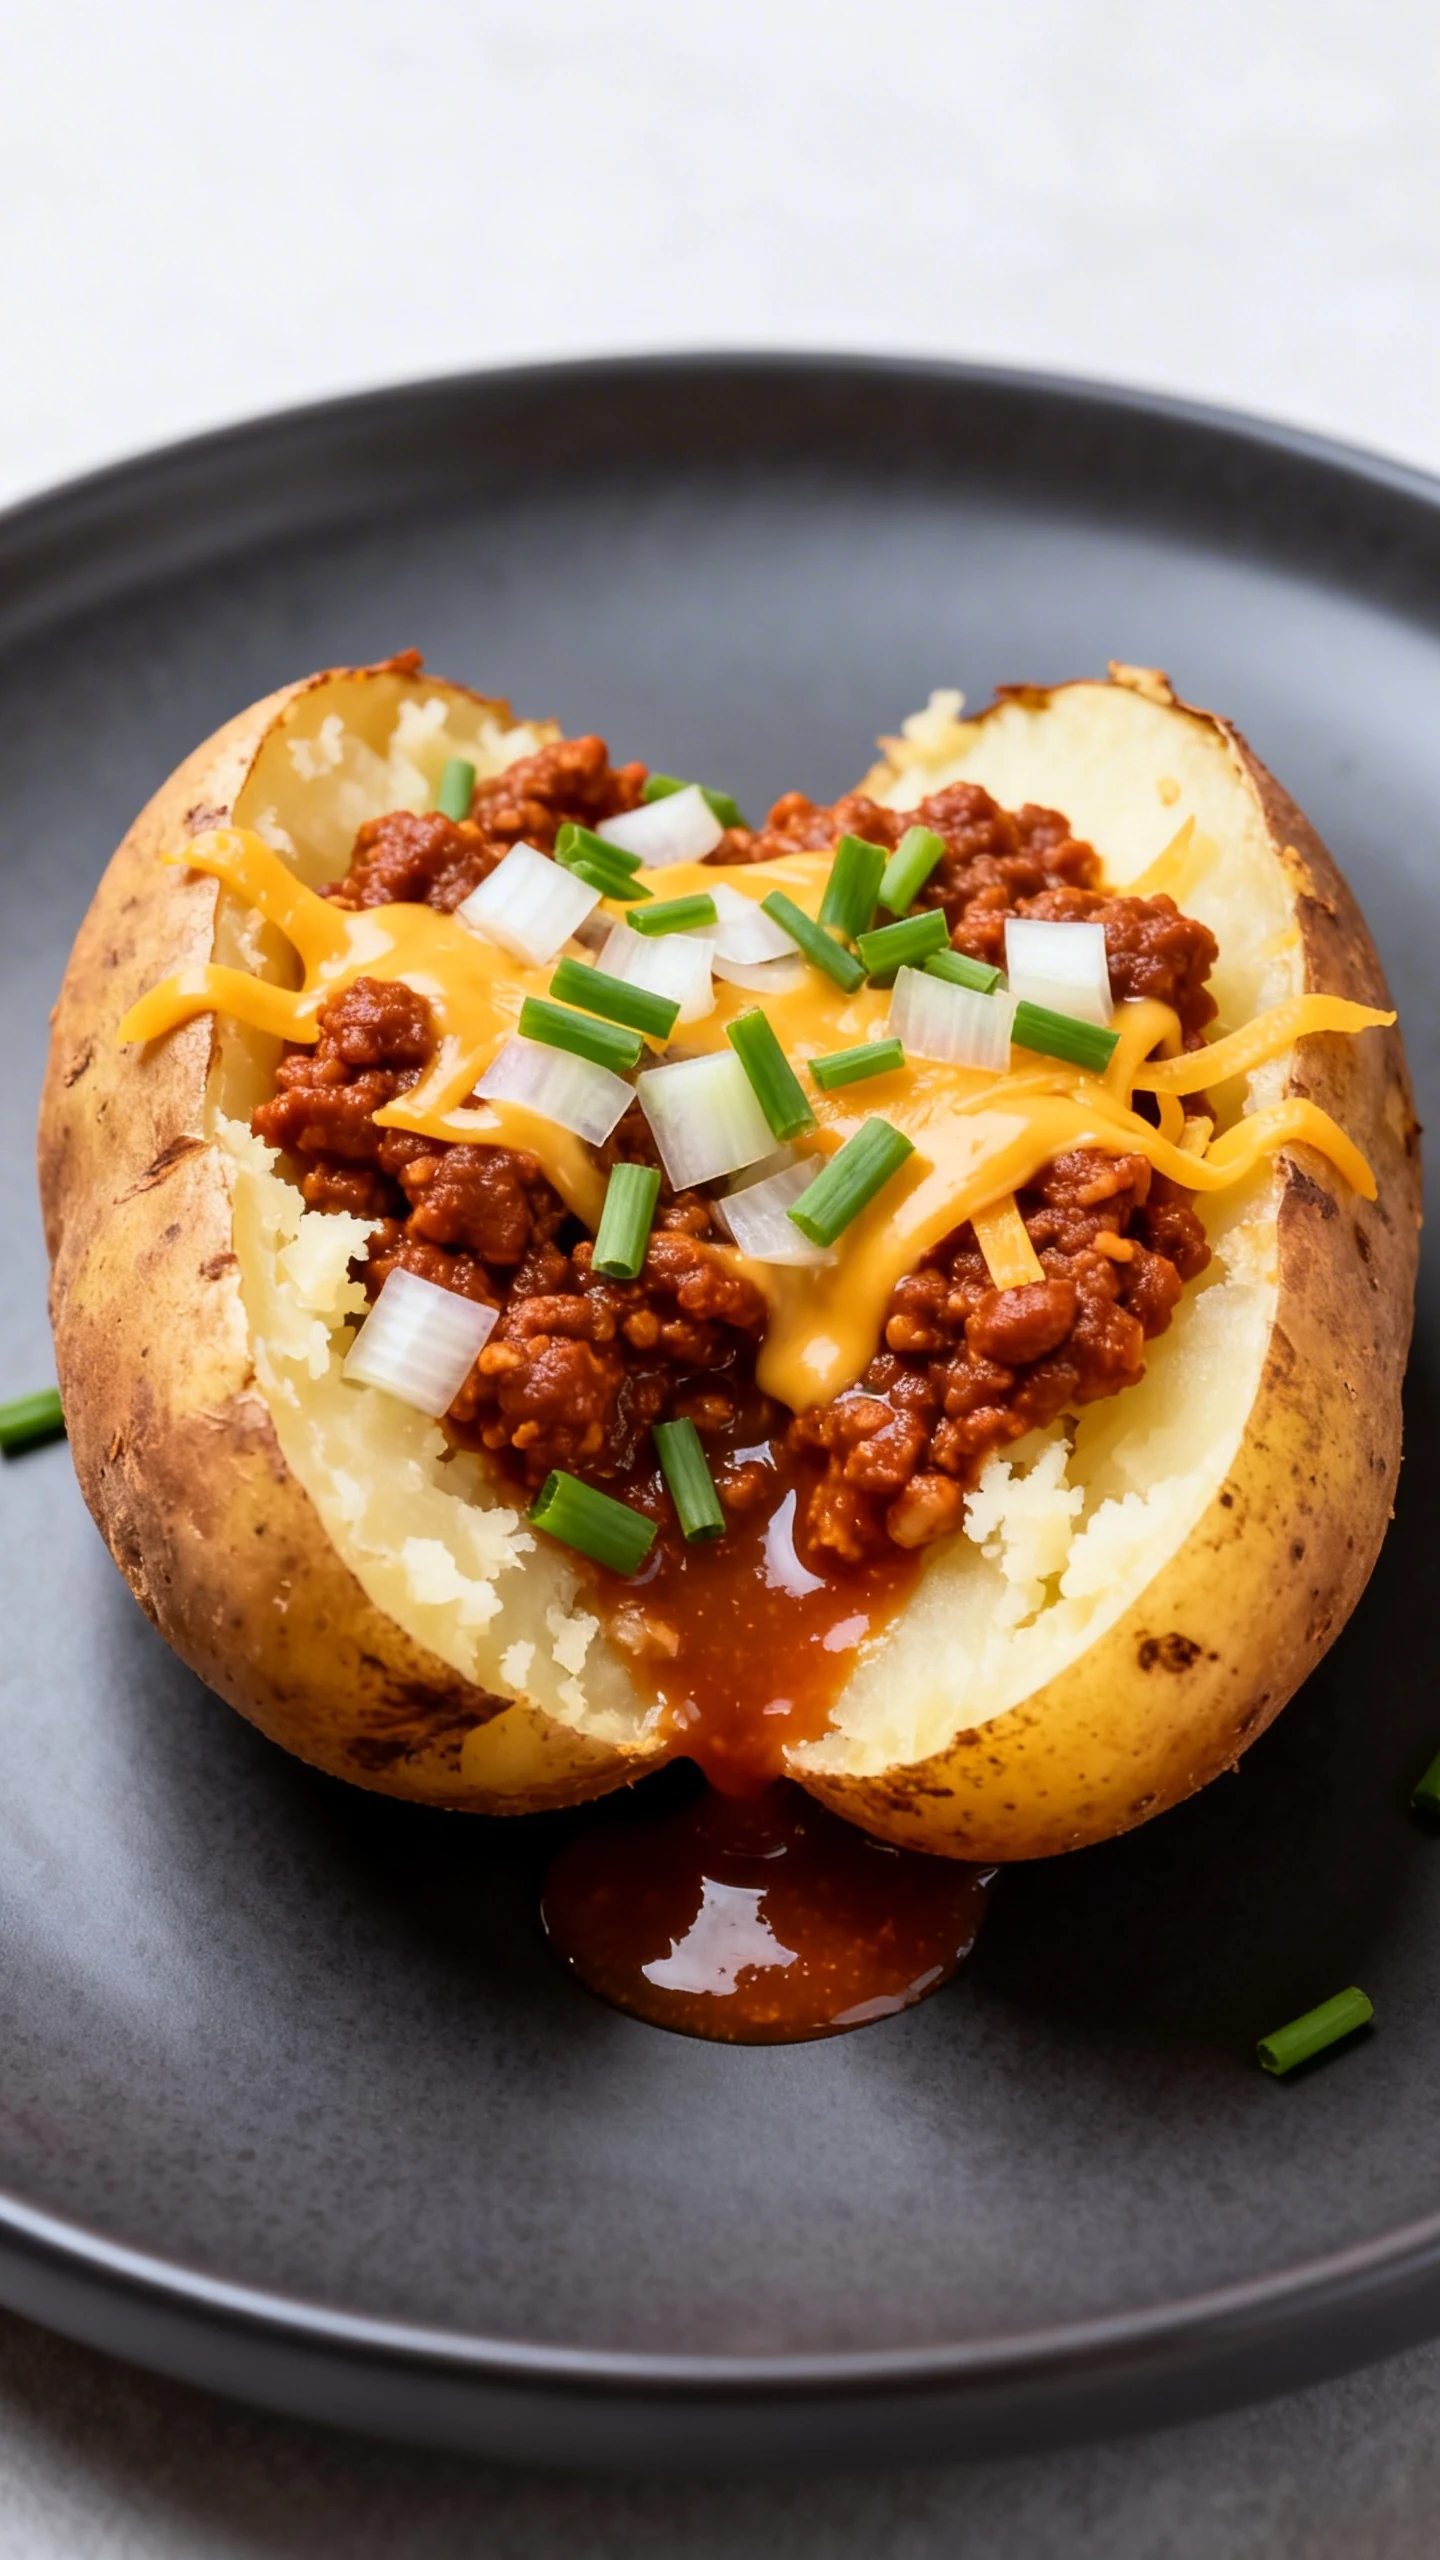
Chili-loaded dinner potato. Split the potato, add chili, cheddar, and chopped onion. This turns a side into a full meal with zero extra drama.
-
Protein upgrade. Top with Greek yogurt, shredded chicken, and hot sauce for a higher-protein take that still tastes like comfort.
-
Veggie-forward. Add steamed broccoli, a sprinkle of cheese, and a squeeze of lemon. It’s like a baked potato that went to therapy and got its life together.
-
Cheesy crisp finish. After splitting, add cheese and air fry 2 more minutes until bubbly. This is not subtle, and that’s the point.
FAQ
Do I need to preheat the air fryer?
You don’t strictly need to, but preheating helps the skin crisp faster and can improve consistency. If your air fryer heats quickly, a short 3 to 5 minute preheat at 400°F is plenty. If you skip it, just expect the cook time to land on the longer end.
What temperature should I use?
400°F gives the best balance of crisp skin and fluffy interior for most air fryers. If your model runs very hot and you notice overly dark skins before the center softens, drop to 390°F and add a few minutes.
How long does it take to cook a baked potato in an air fryer?
Most medium russets take 35 to 45 minutes at 400°F. Smaller potatoes can finish around 30 to 35 minutes, and larger ones can take 50 to 60. Always check with a knife or thermometer because potato sizes love chaos.
How do I know when the potato is done?
A knife or skewer should slide in with almost no resistance. For the most reliable result, check the center temperature; aim for about 205°F to 210°F. That range delivers the fluffy texture people associate with steakhouse potatoes.
Can I cook more than one potato at a time?
Yes, as long as you leave space between them for airflow. If they’re crowded, they’ll cook unevenly and the skins won’t crisp well. You may need to add a few minutes for a fuller basket and rotate halfway through.
Should I wrap the potatoes in foil?
No if you want crisp skin. Foil traps steam and makes the skin soft. If you specifically prefer tender skin, you can use foil, but you’ll trade away that crackly bite.
Can I use Yukon Gold or sweet potatoes?
Yes, but expect different textures. Yukon Golds turn creamier and slightly denser than russets. Sweet potatoes work well too; use a similar method, but plan for 30 to 45 minutes depending on size, and check doneness the same way.
Why is my potato skin not crispy?
Usually it’s moisture or crowding. Dry the potato thoroughly, use a thin coat of oil, and salt the skin well. Also make sure air can circulate around each potato; if they touch, those spots stay pale and soft.
My Take
This is one of those recipes that feels like cheating because the results look way more impressive than the effort. You scrub, oil, salt, press a button, and suddenly you’ve got steakhouse-level potatoes on a random Tuesday. The crispy skin alone makes it worth it, because that’s the part most methods mess up. If you try this once, the oven method starts to feel like you’re choosing inconvenience as a hobby.
If you want the best version, keep it simple: russet, oil, salt, 400°F, and a real doneness check. Then go wild with toppings like you’re decorating a blank canvas that also happens to be edible. You’ll never look at a “sad baked potato” the same way again.