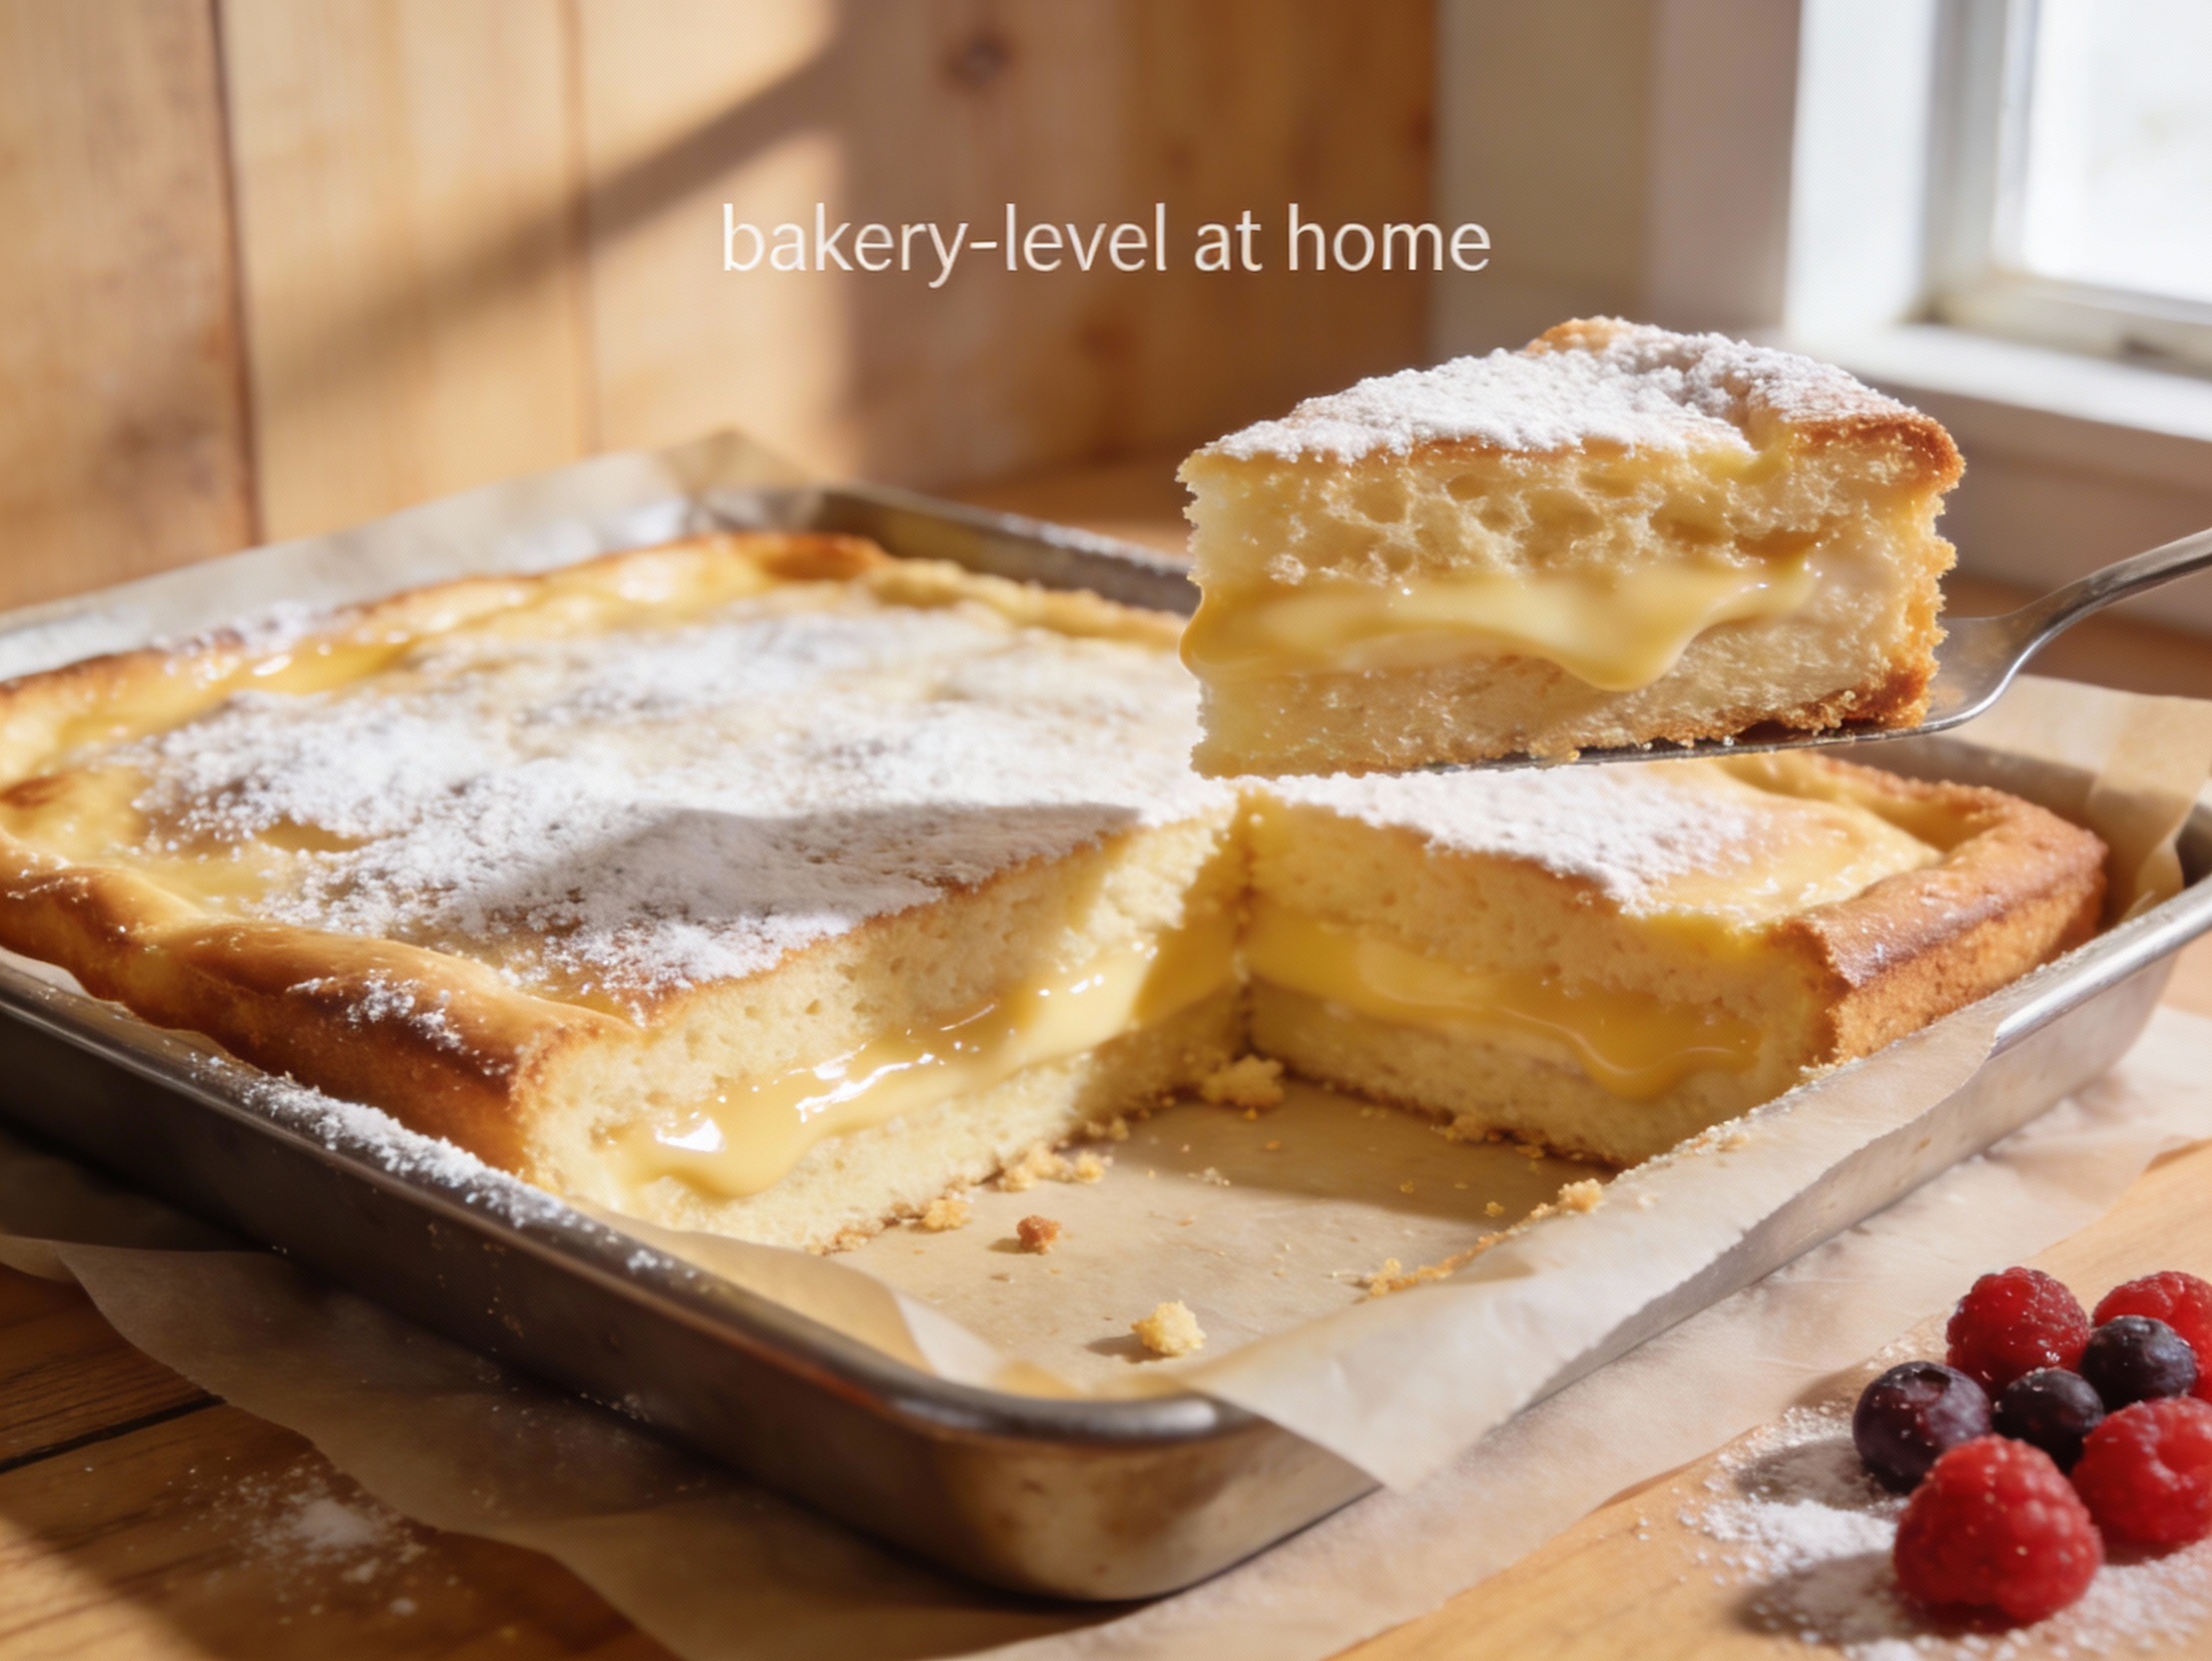
Custard Cake Recipes That Taste Bakery-level at Home
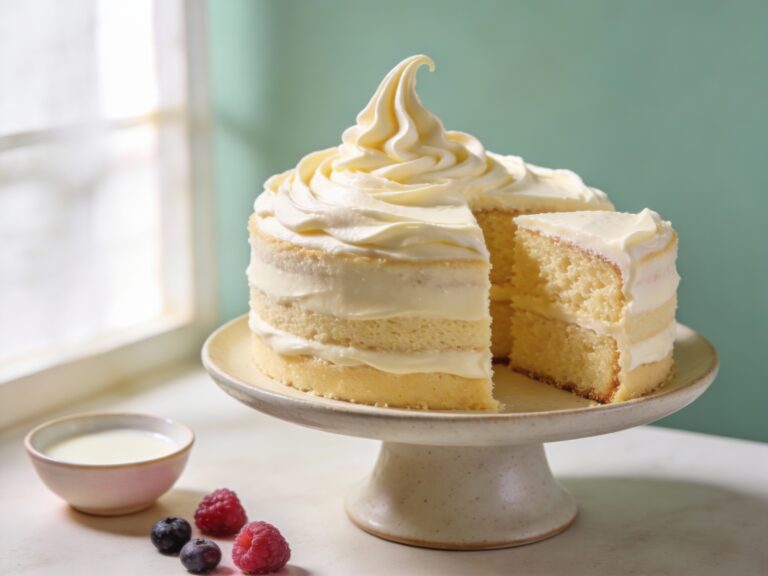
Make a plush vanilla cake with a silky, spoonable filling using simple pantry staples, zero fancy tools, and big crowd-pleasing flavor.
You know that moment when a cake looks “nice” but tastes like sweet air? Not today.
This is the kind of dessert that shuts down small talk, because everyone’s too busy taking “just one more bite.”
You get a tender vanilla cake plus a creamy custard layer that feels like you paid $9 a slice. You didn’t.
It’s easy, it’s forgiving, and it hits that sweet spot between comfort-food cozy and “who made this?” energy.
And yes, it slices cleanly enough to flex on Instagram, if you’re into that.
What Makes This Recipe Awesome
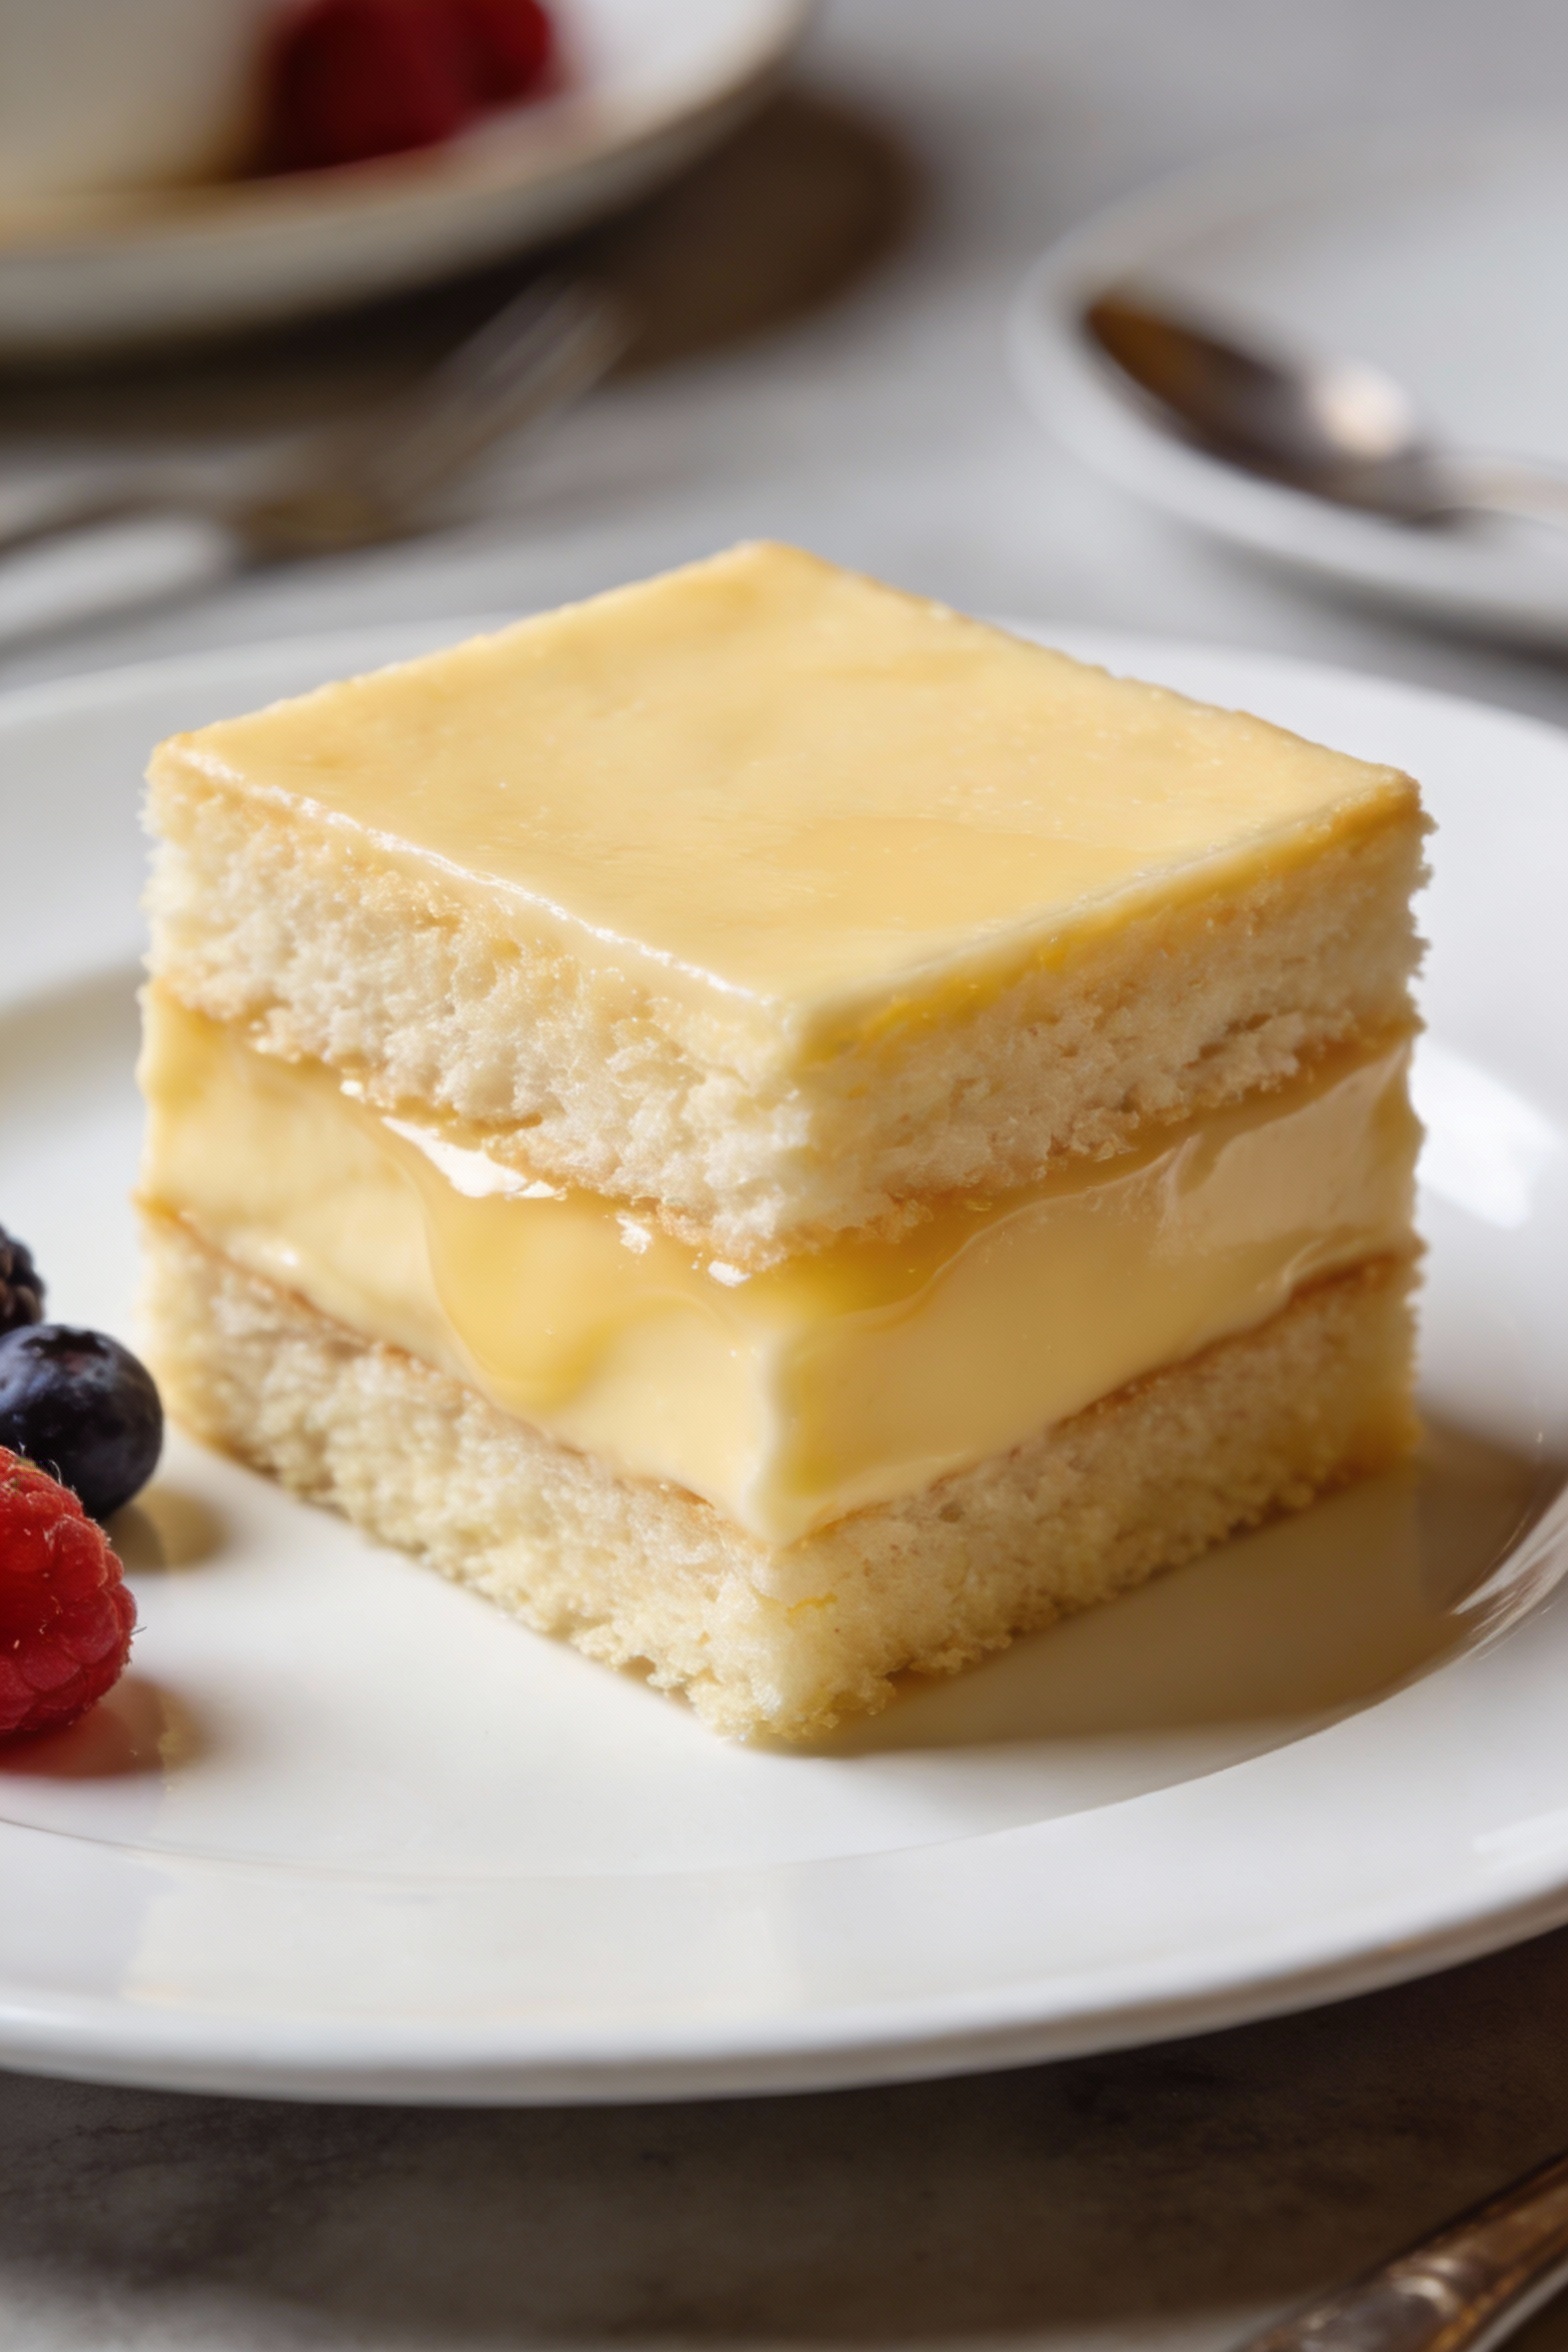
Two textures, one bake. You get fluffy cake and silky custard in a single pan, which feels like cheating in the best way.
Beginner-proof. No water bath, no candy thermometer, no mystical pastry wizardry required.
Make-ahead friendly. It tastes even better after chilling, because the custard sets up and the flavors mellow.
Cheap but impressive. Eggs, milk, sugar, flour, vanilla. That’s it. Your grocery bill won’t start a fight.
Endlessly customizable. Citrus, chocolate, coconut, berries, espresso—this base plays nice with almost anything.
What Goes Into This Recipe – Ingredients
FYI: This is a custard-filled vanilla sheet cake with a simple dusting finish. You can add frosting, but you honestly don’t need it.
- All-purpose flour: 2 1/4 cups
- Baking powder: 2 teaspoons
- Fine salt: 1/2 teaspoon
- Unsalted butter (softened): 1/2 cup (1 stick)
- Granulated sugar: 1 1/2 cups (divided)
- Large eggs: 5 total (2 for cake, 3 yolks for custard)
- Whole milk: 2 3/4 cups (divided)
- Vanilla extract: 2 tablespoons (divided)
- Cornstarch: 1/4 cup
- Heavy cream: 1/2 cup (for richer custard, optional but excellent)
- Powdered sugar: for dusting (optional)
- Fresh berries or sliced fruit: for topping (optional)
How to Make It – Instructions
Plan on about 20 minutes prep, 35–45 minutes bake, and at least 2 hours chill. The chill is where the magic happens.
-
Heat and prep. Preheat oven to 350°F (175°C). Grease and line a 9×13-inch pan with parchment, leaving overhang for easy lifting.
-
Mix dry ingredients. Whisk flour, baking powder, and salt in a bowl. Set aside so it can feel important.
-
Make the cake batter base. Beat butter with 1 cup sugar until light and fluffy, about 2–3 minutes. Add 2 eggs one at a time, then mix in 1 tablespoon vanilla.
-
Finish the cake batter. Add dry ingredients in two additions, alternating with 1 1/4 cups milk. Mix just until smooth. Overmixing turns your cake into a gym mat.
-
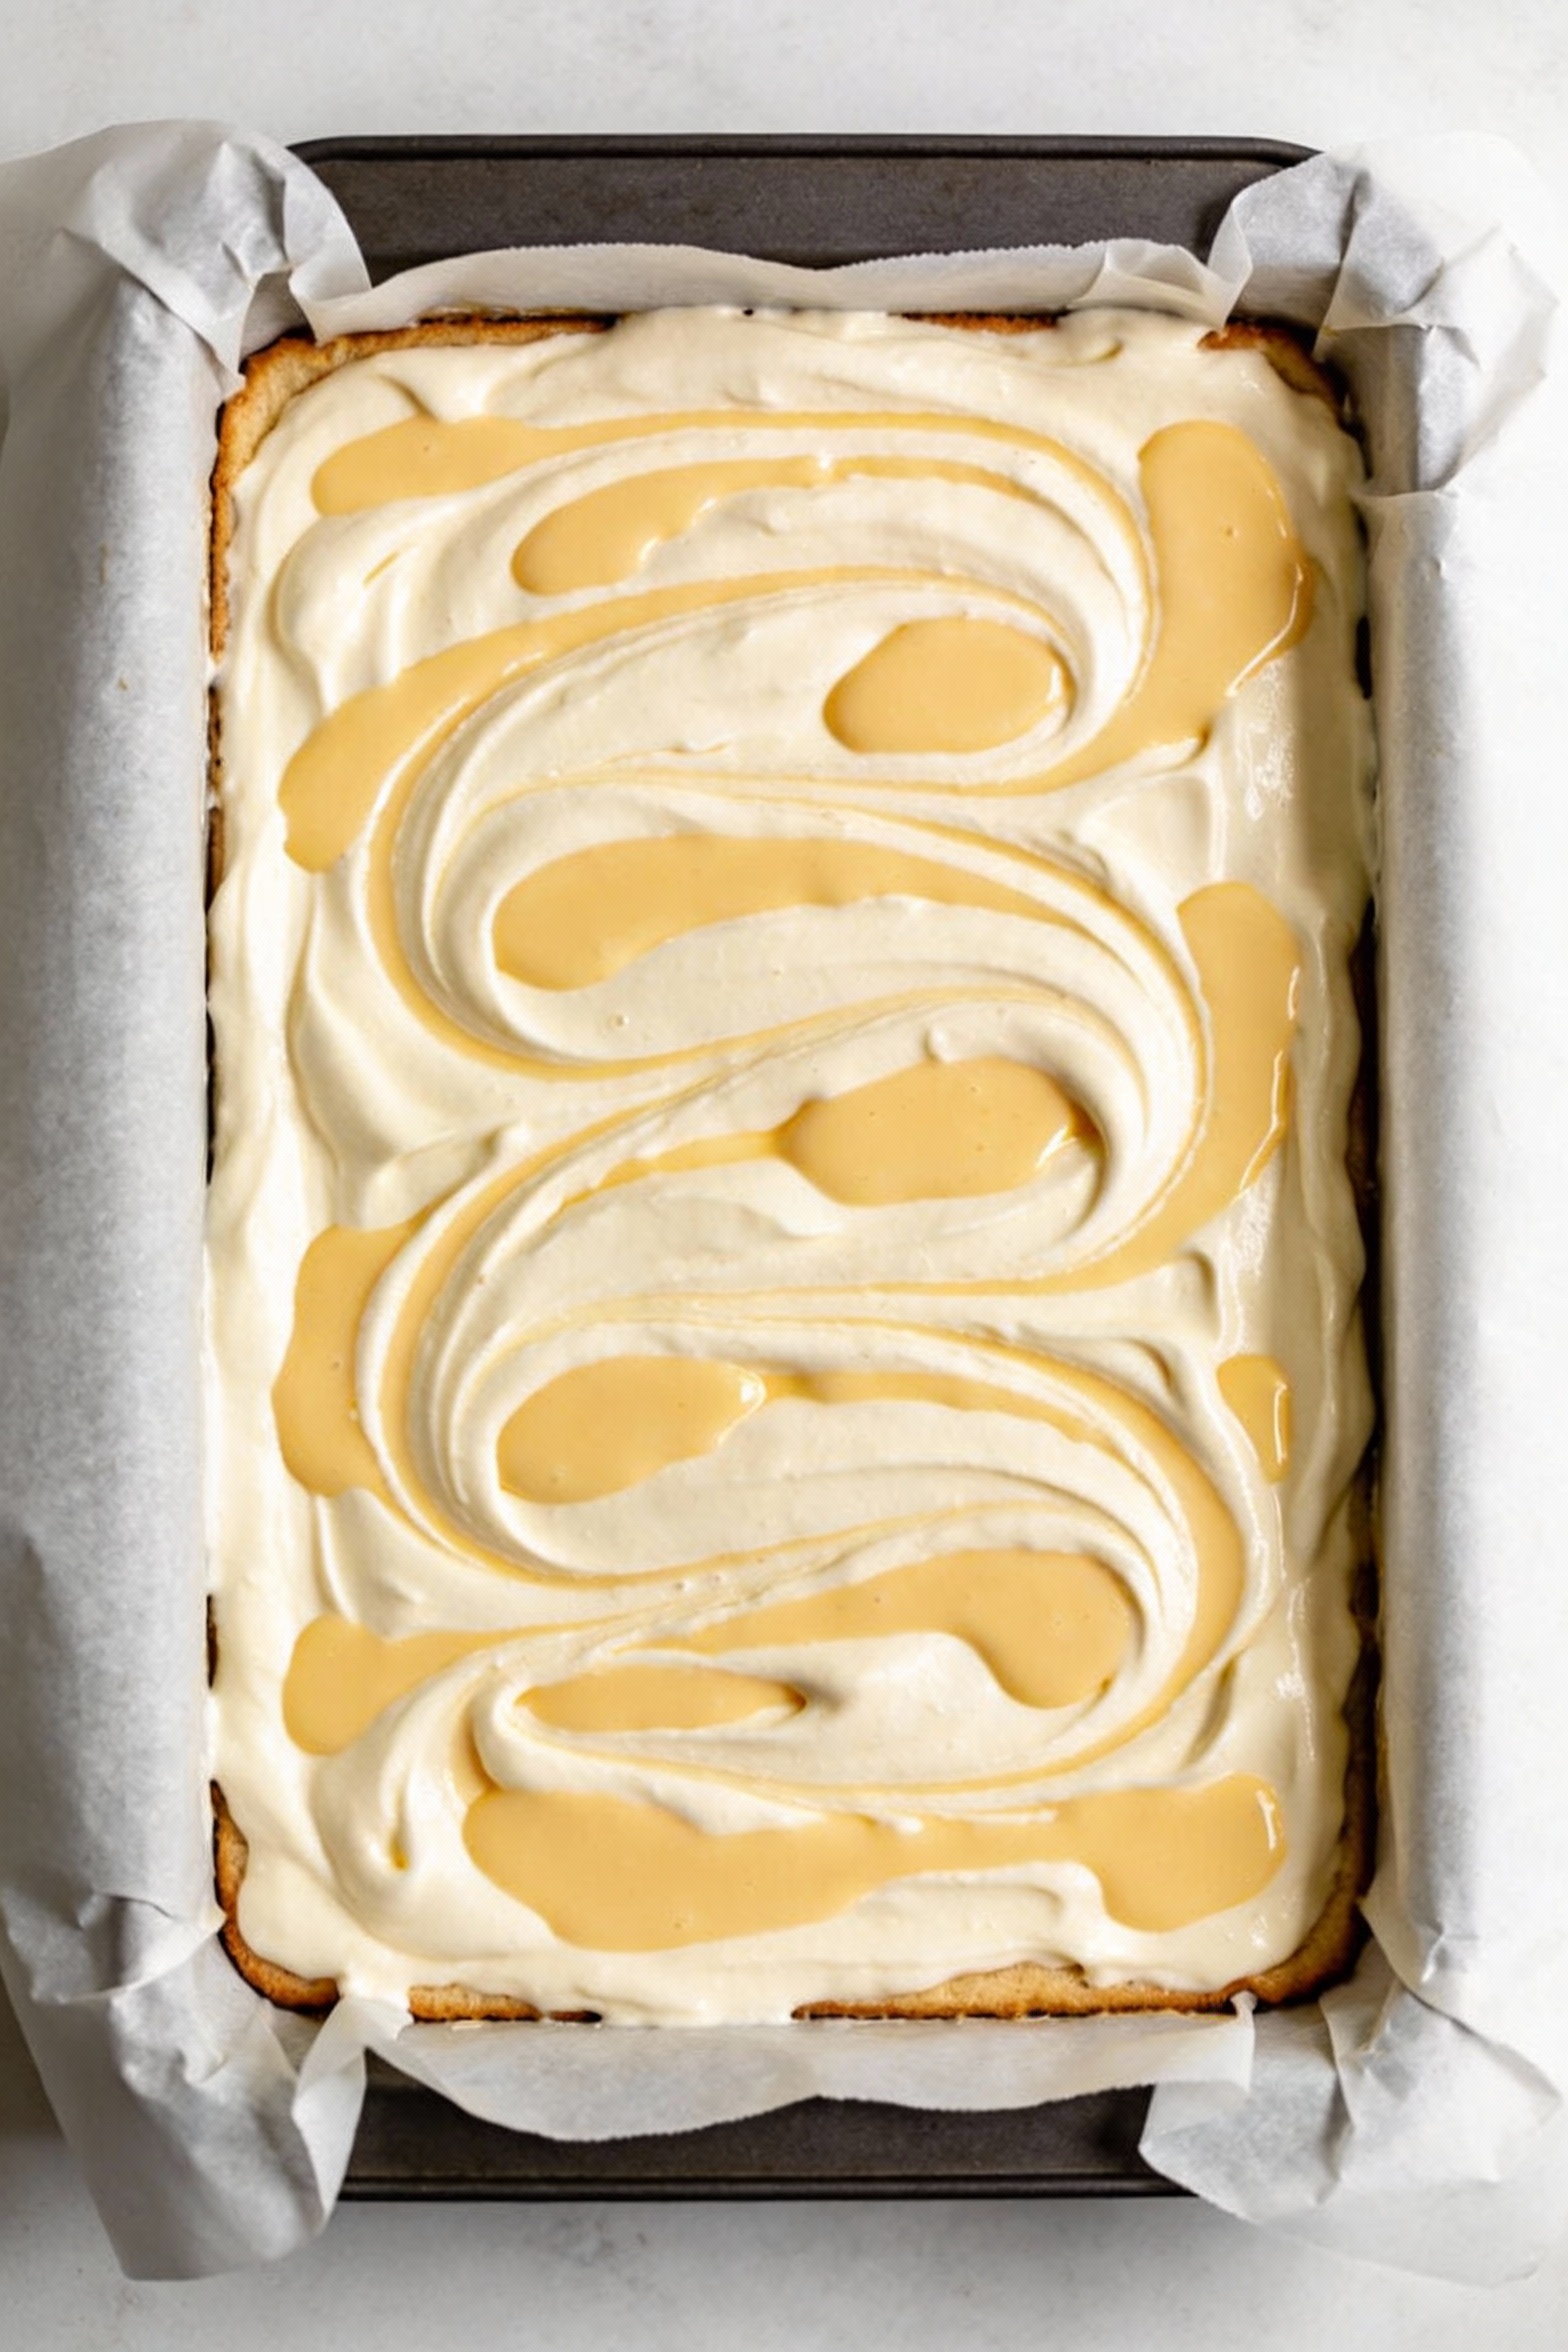
Spread into the pan. Pour batter into the prepared pan and smooth the top. Set aside while you make custard.
-
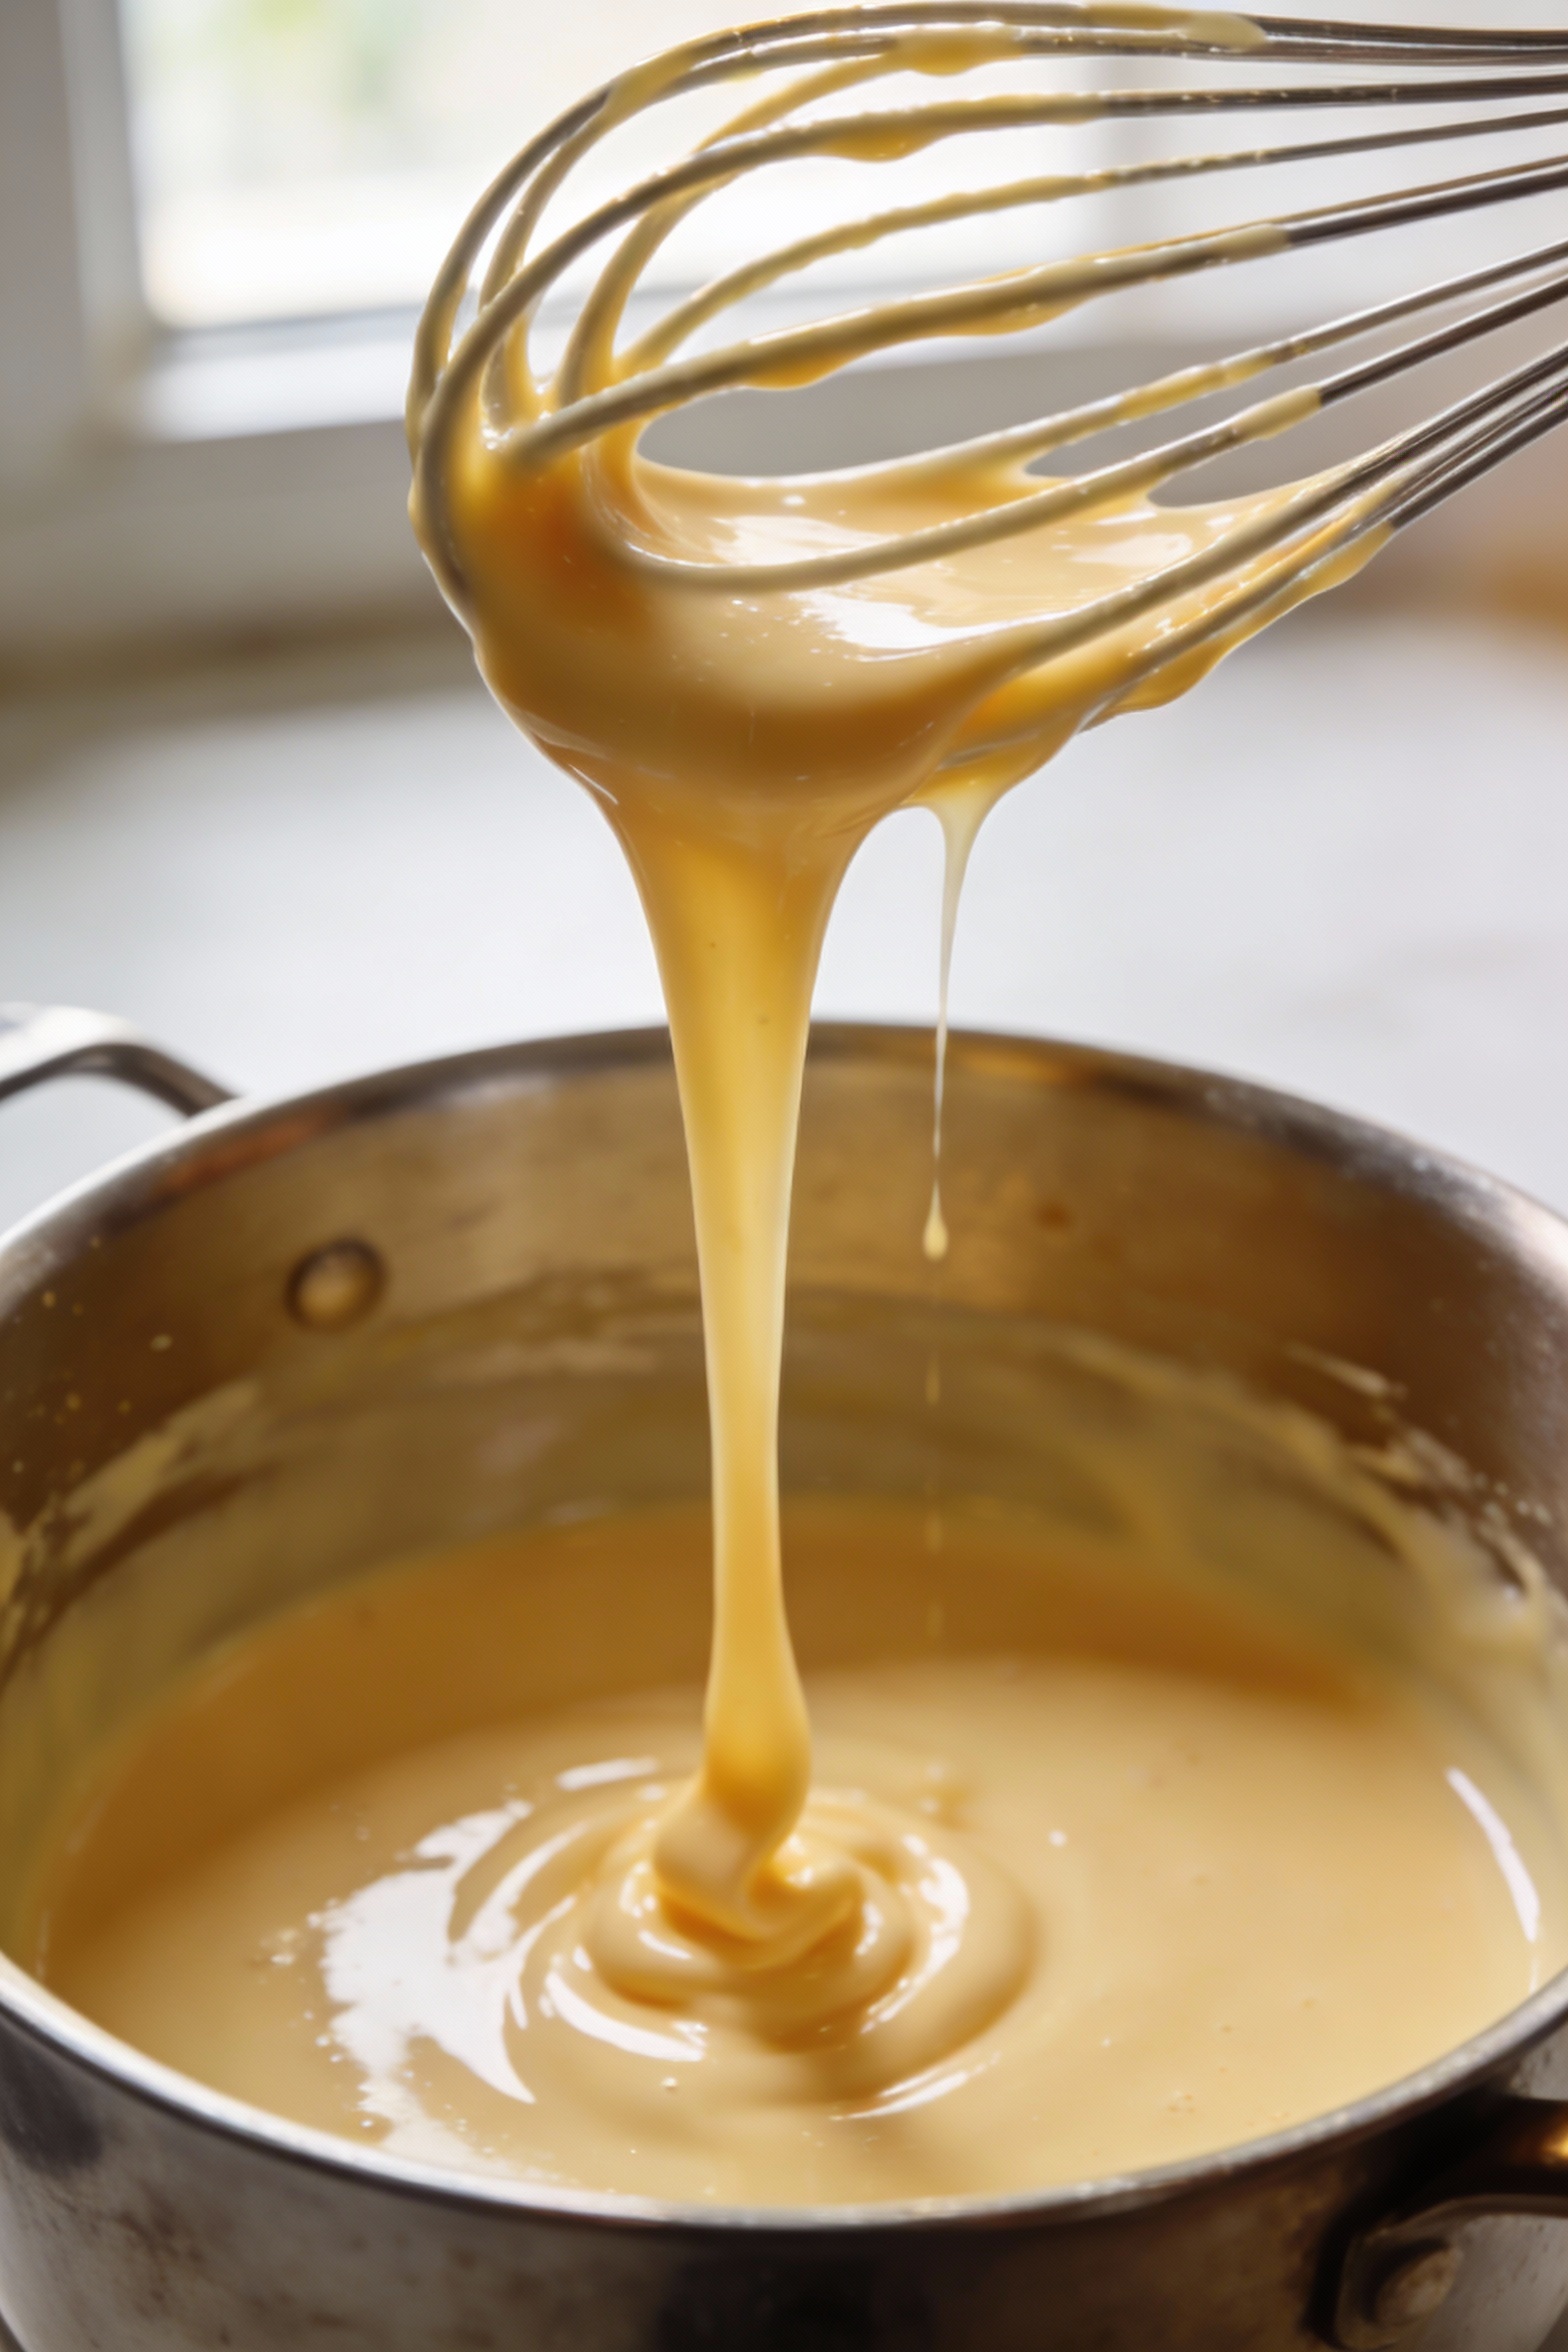
Start the custard. In a saucepan (heat off), whisk 1/2 cup sugar with cornstarch and a pinch of salt. Whisk in 1 1/2 cups milk and the heavy cream (if using) until smooth.
-
Add yolks like a pro. Whisk in 3 egg yolks until fully blended. Turn heat to medium and whisk constantly until it thickens, 4–7 minutes. You want pudding-like, not “still soup.”
-
Finish the custard flavor. Take off heat and whisk in 1 tablespoon vanilla. Let it cool for 3–5 minutes so it doesn’t melt your cake batter on contact.
-
Layer it. Spoon custard over the cake batter in dollops, then gently swirl with a butter knife. Don’t go wild; you’re creating ribbons, not a beige tornado.
-
Bake. Bake 35–45 minutes until the edges set and the center jiggles slightly but doesn’t slosh. A toothpick should come out with a few moist crumbs (not wet batter).
-
Cool, then chill. Cool in pan for 45 minutes. Refrigerate at least 2 hours (overnight is even better) so the custard sets for clean slices.
-
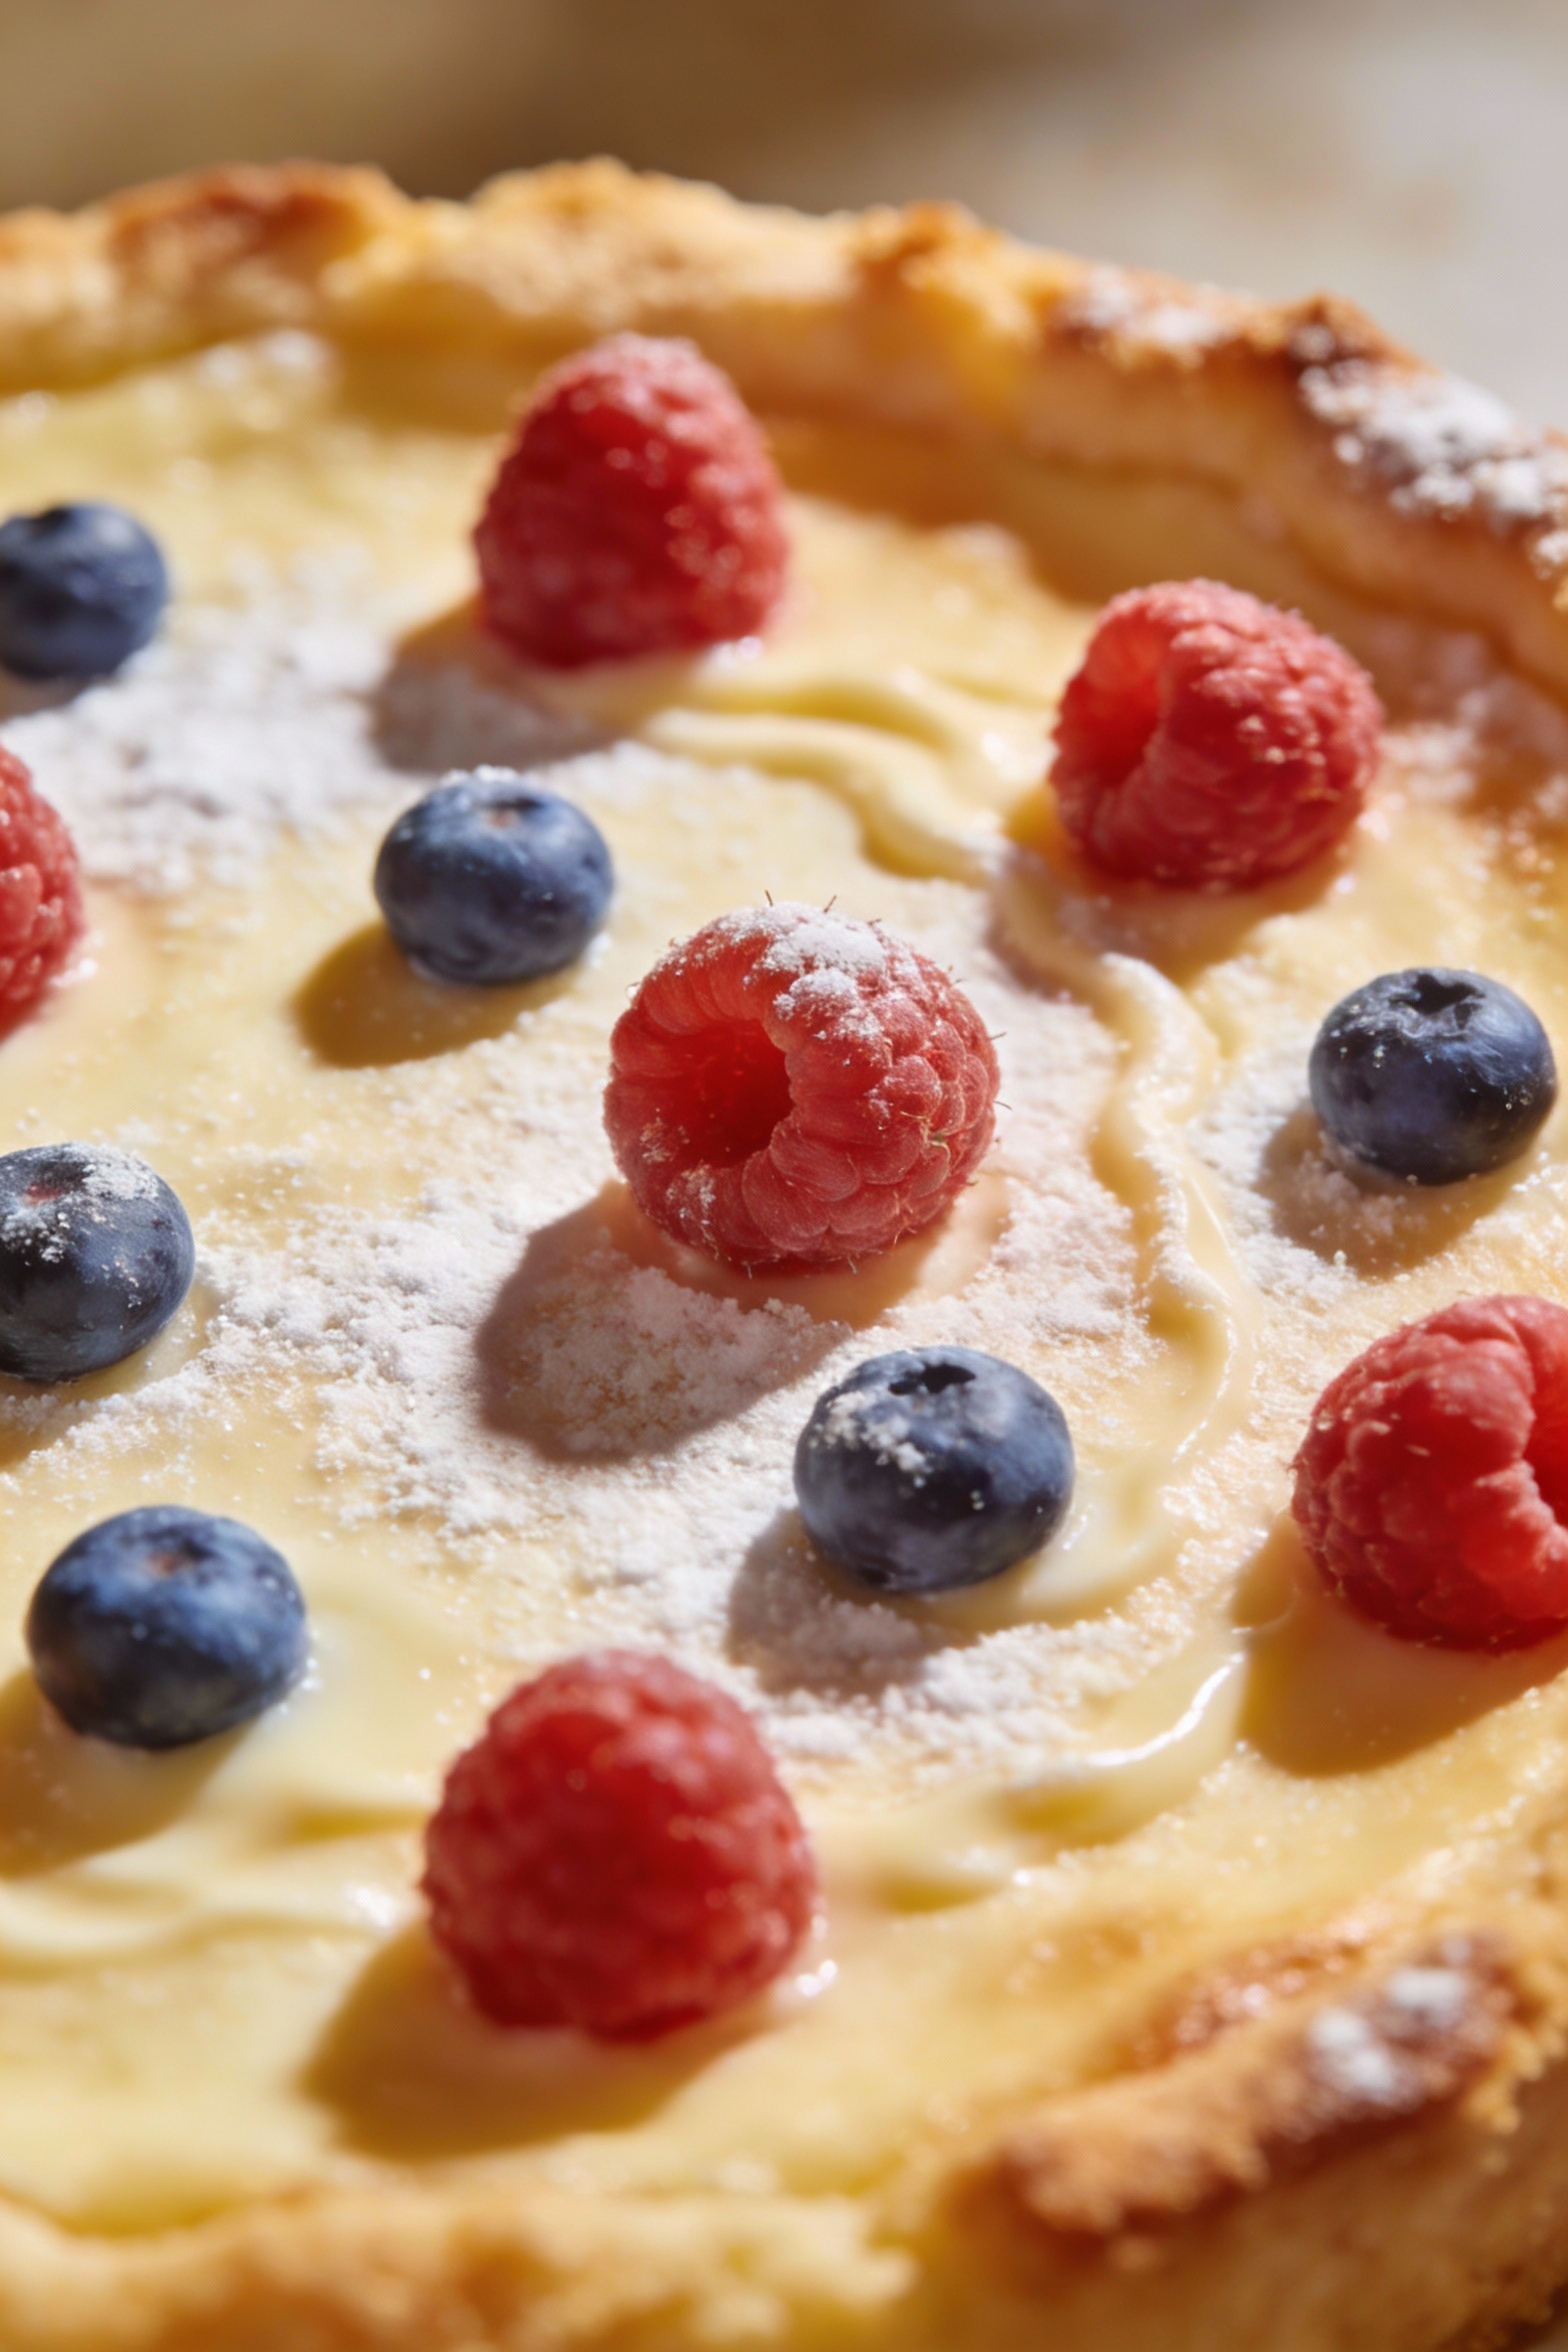
Serve like you meant it. Lift out using parchment, dust with powdered sugar, and top with berries if you want the “fancy café” look.
Storage Tips
Refrigerate leftovers. Cover tightly and store in the fridge for up to 4 days. The custard needs cold storage, no exceptions.
Slice smart. For clean cuts, use a sharp knife and wipe it between slices. IMO this tiny step makes it look professionally made.
Freezing? You can freeze slices for up to 1 month, wrapped well. Thaw overnight in the fridge; the texture stays good, just slightly softer.
Transport tip. Keep it chilled until right before serving. Warm custard gets a little too “I’m melting,” and nobody asked for that.
Why This is Good for You
Portion-friendly indulgence. It tastes rich, so you don’t need a massive slab to feel satisfied. That’s a win for dessert sanity.
Protein from eggs and dairy. This isn’t a health food, but it does bring more staying power than a plain sugar-bomb cake.
Comfort matters. A homemade treat that reliably turns out well lowers stress. Yes, that counts as a benefit.
Ingredient control. You control sweetness, add fruit, or swap in lactose-free milk. Try that with a random bakery slice.
Avoid These Mistakes
Don’t rush the custard. If you stop whisking, it can clump or scorch. Stay with it for a few minutes; you can scroll later.
Don’t pour boiling custard on batter. Super-hot custard can sink too fast and mess with the bake. Let it cool briefly before layering.
Don’t overbake. Overbaking dries the cake and makes the custard less creamy. Pull it when it’s set with a gentle jiggle.
Don’t skip chilling. Warm slices taste good, but they look messy. Chill if you want neat layers and that “wow” cut.
Don’t eyeball cornstarch. Too little gives runny custard; too much makes it gummy. Measure it.
Recipe Variations
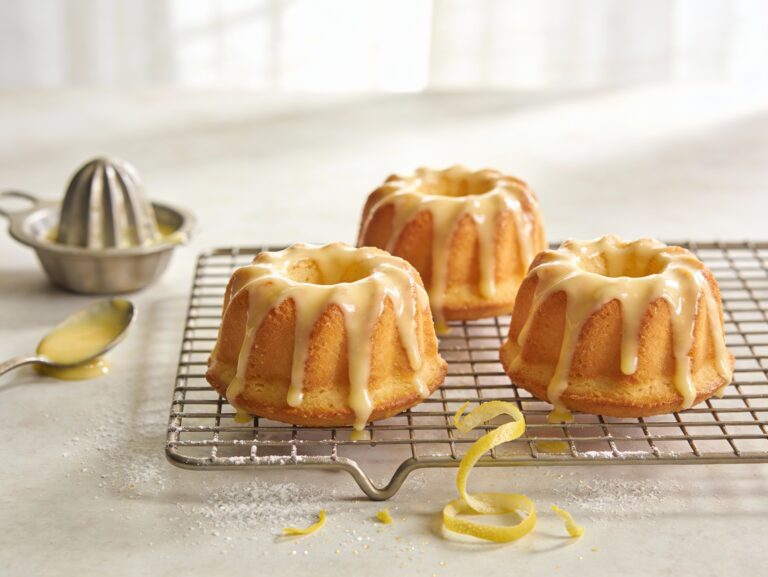
Lemon custard swirl. Add 1–2 teaspoons lemon zest to the cake batter and 2 tablespoons lemon juice to the custard off heat. Bright, sharp, dangerously snackable.
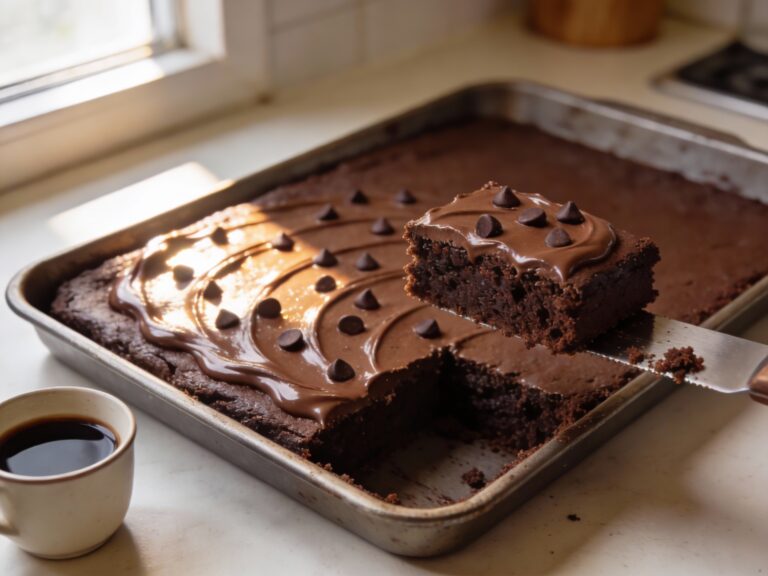
Chocolate-vanilla combo. Whisk 2 tablespoons cocoa powder into the custard mix before heating, or fold mini chocolate chips into the cake batter.
Coconut cream vibe. Replace 1/2 cup milk with coconut milk and add 1/2 teaspoon coconut extract. Top with toasted coconut for extra drama.
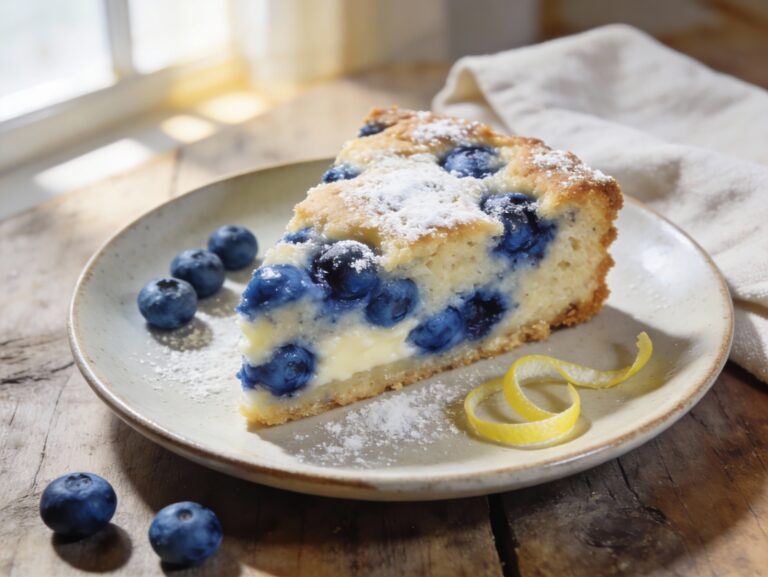
Berry burst. Scatter blueberries or raspberries on top right before baking, then swirl lightly. The fruit pops against the creamy custard.
Coffeehouse version. Add 2 teaspoons instant espresso powder to the custard base. Serve with whipped cream if you want to fully commit.
FAQ
Can I make this as a layer cake instead of a sheet cake?
Yes, but it’s trickier. Bake the cake as two 8-inch layers, chill the custard until thick, then spread it as a filling and keep the whole cake refrigerated. Sheet cake stays simpler and slices cleaner.
How do I know the custard is thick enough on the stove?
It should coat the whisk and fall in slow ribbons, like pudding. If it still pours like milk, keep whisking on medium heat for another minute or two.
Can I use store-bought pudding instead of homemade custard?
You can, and it will work. Use a thick, ready-to-serve pudding and chill it first so it doesn’t disappear into the batter. Homemade tastes richer and less “instant,” though.
What milk works best?
Whole milk gives the best texture and flavor. You can use 2% in a pinch, but the custard may taste slightly thinner unless you include the optional heavy cream.
Why did my custard sink to the bottom?
This usually happens if the custard was too hot or too thin when you layered it. Let it thicken properly on the stove and cool a few minutes before dolloping onto the batter.
Can I add frosting?
Absolutely. A light whipped cream topping or cream cheese frosting works well. Keep it modest so the custard still steals the show.
Is this safe to eat with eggs in the custard?
Yes. The custard cooks on the stove until thickened, and then the whole cake bakes. Store it chilled and eat within the recommended time.
In Conclusion
This cake gives you that bakery-style experience: tender crumb, creamy custard, clean slices, and compliments you didn’t have to beg for.
Make it once and it becomes your “signature” dessert, the one people request like you run a secret pastry business.
Keep it classic, or spin it with lemon, berries, or espresso depending on the vibe.
Either way, you’ll end up with a pan that mysteriously empties itself. Weird how that happens, right?