Mini Bundt Cake Recipes That Look Bakery-level Fast
Whip up cute, party-ready cakes with big flavor, quick bakes, and easy glazes—no fancy skills, just a smart pan.
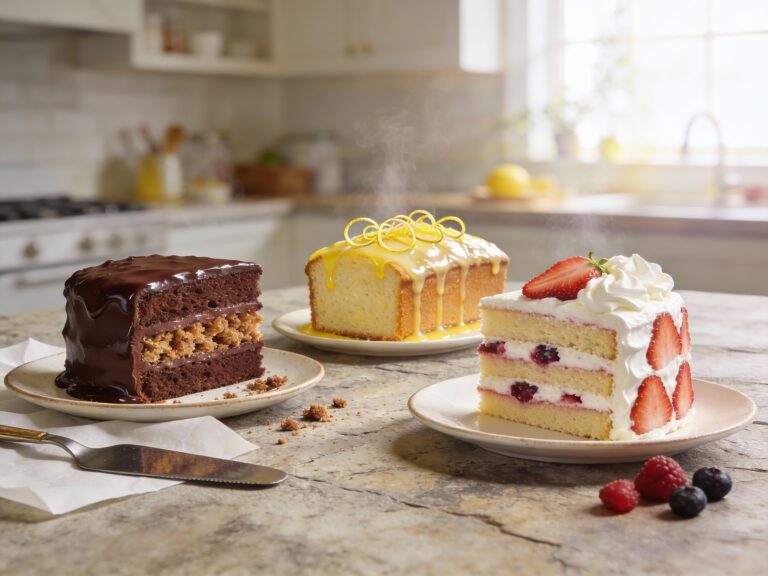
You know that moment when you need a dessert that looks expensive but takes zero emotional energy? That’s the entire point of tiny bundt cakes. They bake faster, cool faster, and somehow make you look like the kind of person who owns matching serving platters. They also solve the classic problem: one big cake that gets cut into sad, uneven slices. These come out already portioned, already pretty, and already begging for a glossy drizzle.
What Makes This Recipe Awesome
Mini bundts hit the sweet spot between “wow” presentation and weeknight-level effort. The ridges and curves do the decorating for you, so a simple glaze becomes a full-on moment. They also scale beautifully: bake a batch for gifting, brunch, showers, bake sales, or just because you want cake without committing to a giant slab.
The texture wins too. Because they’re smaller, you get more edge-to-center ratio, which means more of that tender, lightly caramelized crust. And if you’ve ever waited forever for a big bundt to cool before glazing, you’ll love how quickly these get to the “eat me” stage. IMO, they’re the most efficient way to feel fancy.
Ingredients
This master list covers a versatile vanilla base plus the most popular flavor add-ins and finishes. You can mix and match from the options in the variations section.
- All-purpose flour (plus a little extra for the pan)
- Baking powder
- Baking soda
- Fine salt
- Unsalted butter, softened (plus more for the pan)
- Granulated sugar
- Eggs, room temperature
- Vanilla extract
- Sour cream or Greek yogurt (for moisture)
- Milk or buttermilk
- Powdered sugar (for glaze)
- Citrus juice (lemon or orange) or milk, for thinning glaze
- Optional add-ins: cocoa powder, espresso powder, mini chocolate chips, berries, lemon zest, orange zest, cinnamon, nutmeg
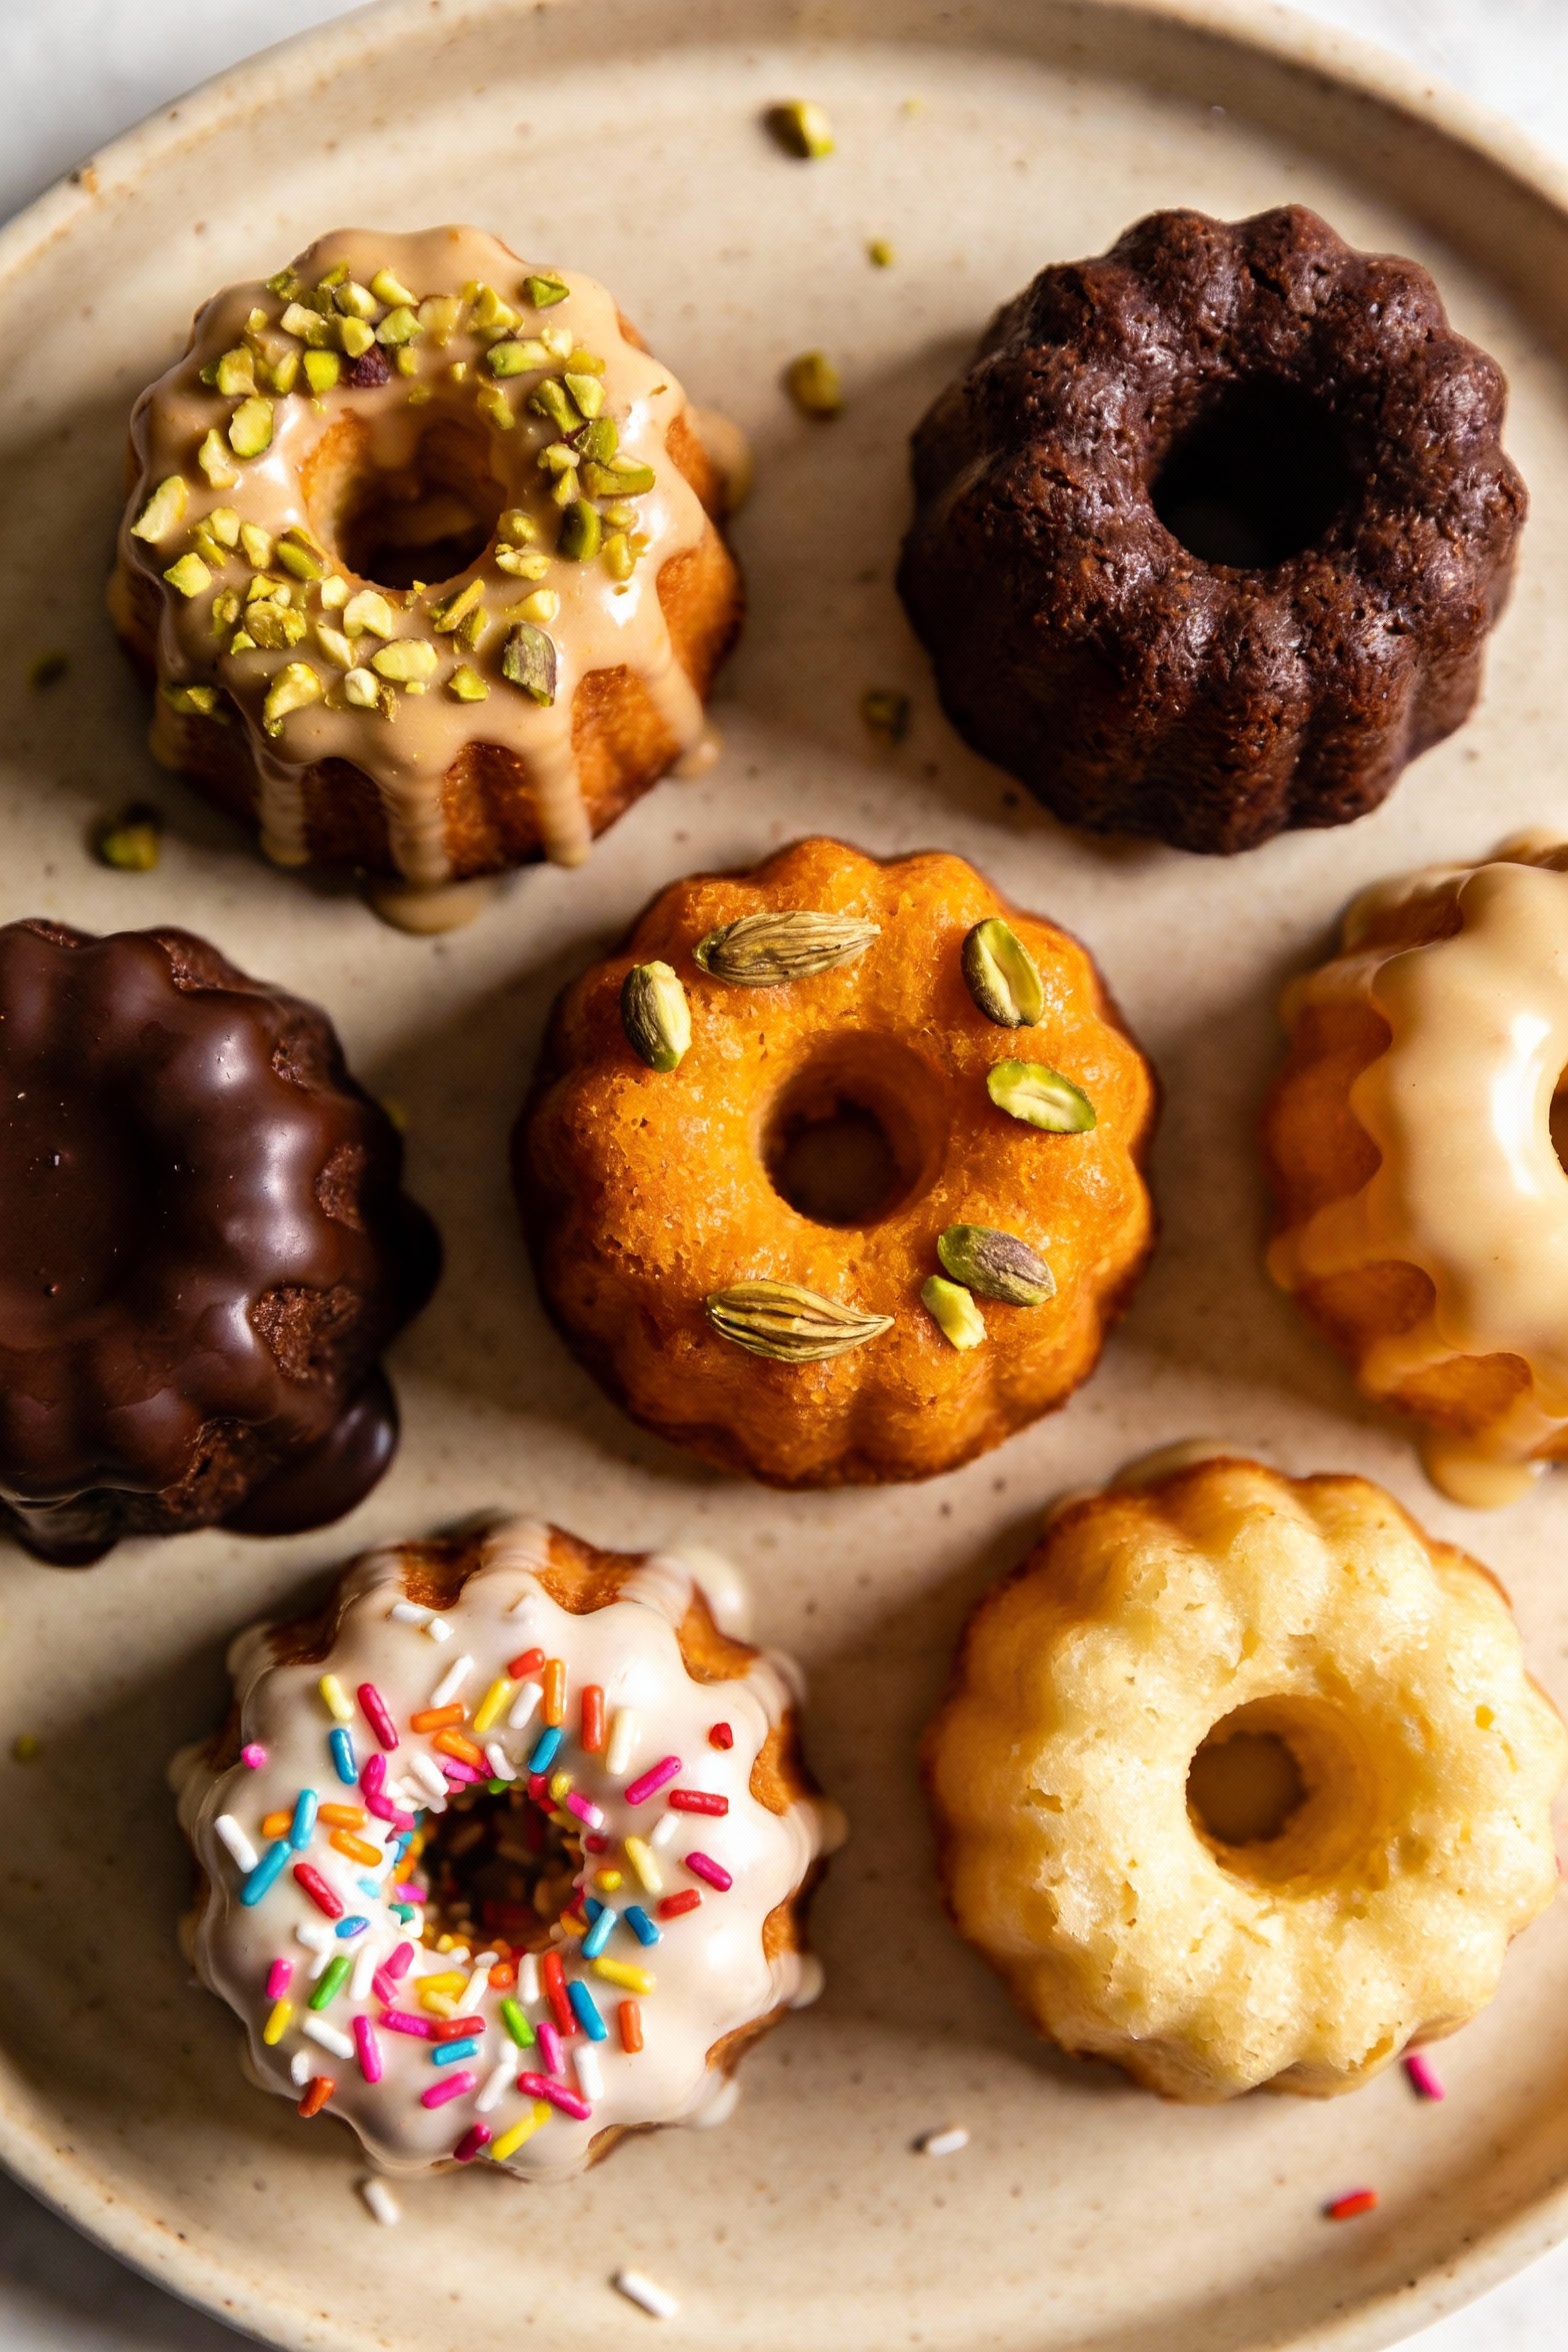
- Optional toppings: chopped nuts, sprinkles, toasted coconut, candied peel
Cooking Instructions
Use a standard mini bundt pan (often 6-cavity) or a 12-cavity mini bundtlette pan. If your pan size differs, watch bake time and use the doneness cues.
-
Prep like you mean it. Heat oven to 350°F (175°C). Grease every groove of the mini bundt pan with butter, then dust with flour and tap out the excess. Those tiny ridges hold grudges if you skip this.
-
Mix the dry team. In a bowl, whisk flour, baking powder, baking soda, and salt until evenly combined. This prevents random bitter “oops” bites from uneven leavening.
-
Cream for lift. In a larger bowl, beat softened butter and sugar until pale and fluffy, about 2 to 3 minutes. You’re building air here, not just combining ingredients.
-
Add eggs with patience. Beat in eggs one at a time, scraping the bowl as needed. Add vanilla. If it looks slightly curdled, relax; it usually smooths out once flour hits the party.
-
Bring in the moisture. Mix in sour cream (or yogurt) until smooth. This is the secret to that plush crumb that stays soft the next day.
-
Alternate like a pro. Add dry ingredients in two additions, alternating with milk or buttermilk, mixing just until combined. Overmixing makes mini cakes go from tender to “why is this chewy?” fast.
-
Fill with control. Spoon batter into cavities about 2/3 full. Tap the pan on the counter once or twice to settle the batter and reduce big air pockets.
-
Bake and watch the cues. Bake 14 to 20 minutes depending on pan size. They’re done when the tops spring back lightly and a toothpick comes out with a few moist crumbs, not wet batter.
-
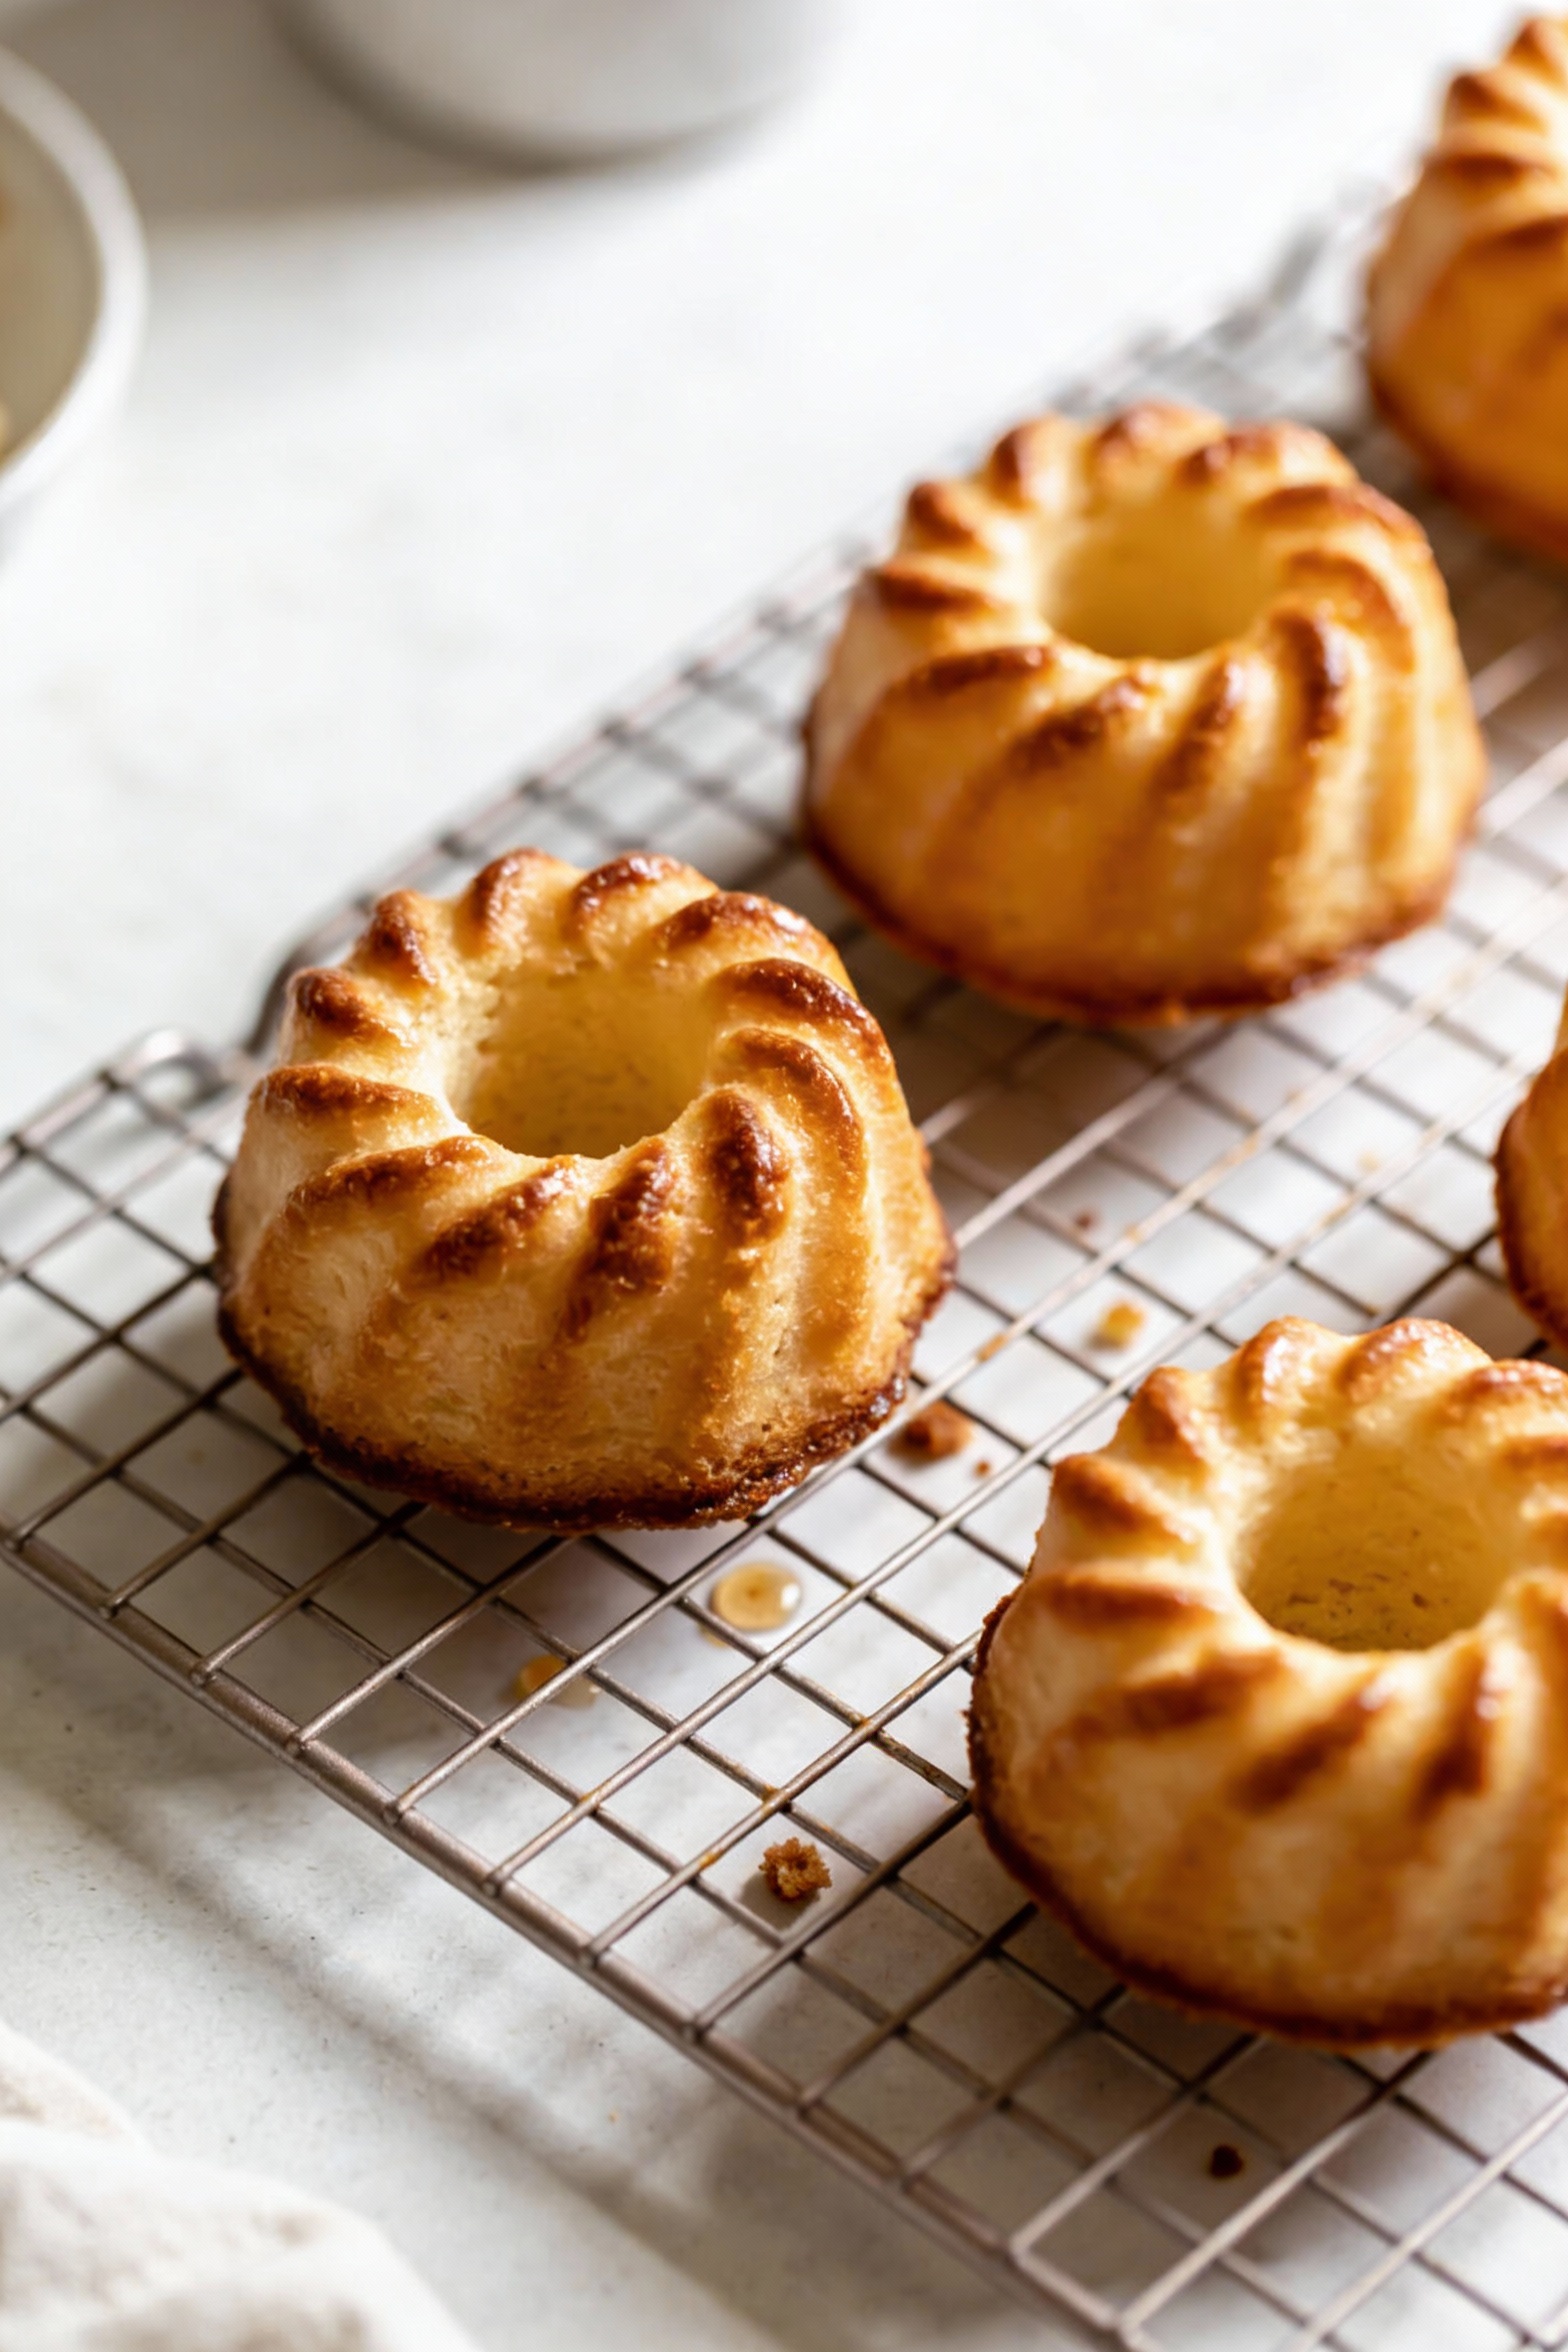
Cool the right way. Cool in the pan 8 to 10 minutes, then invert onto a rack. If one resists, let it sit another 2 minutes and try again; forcing it is how you create “abstract art” cake.
-
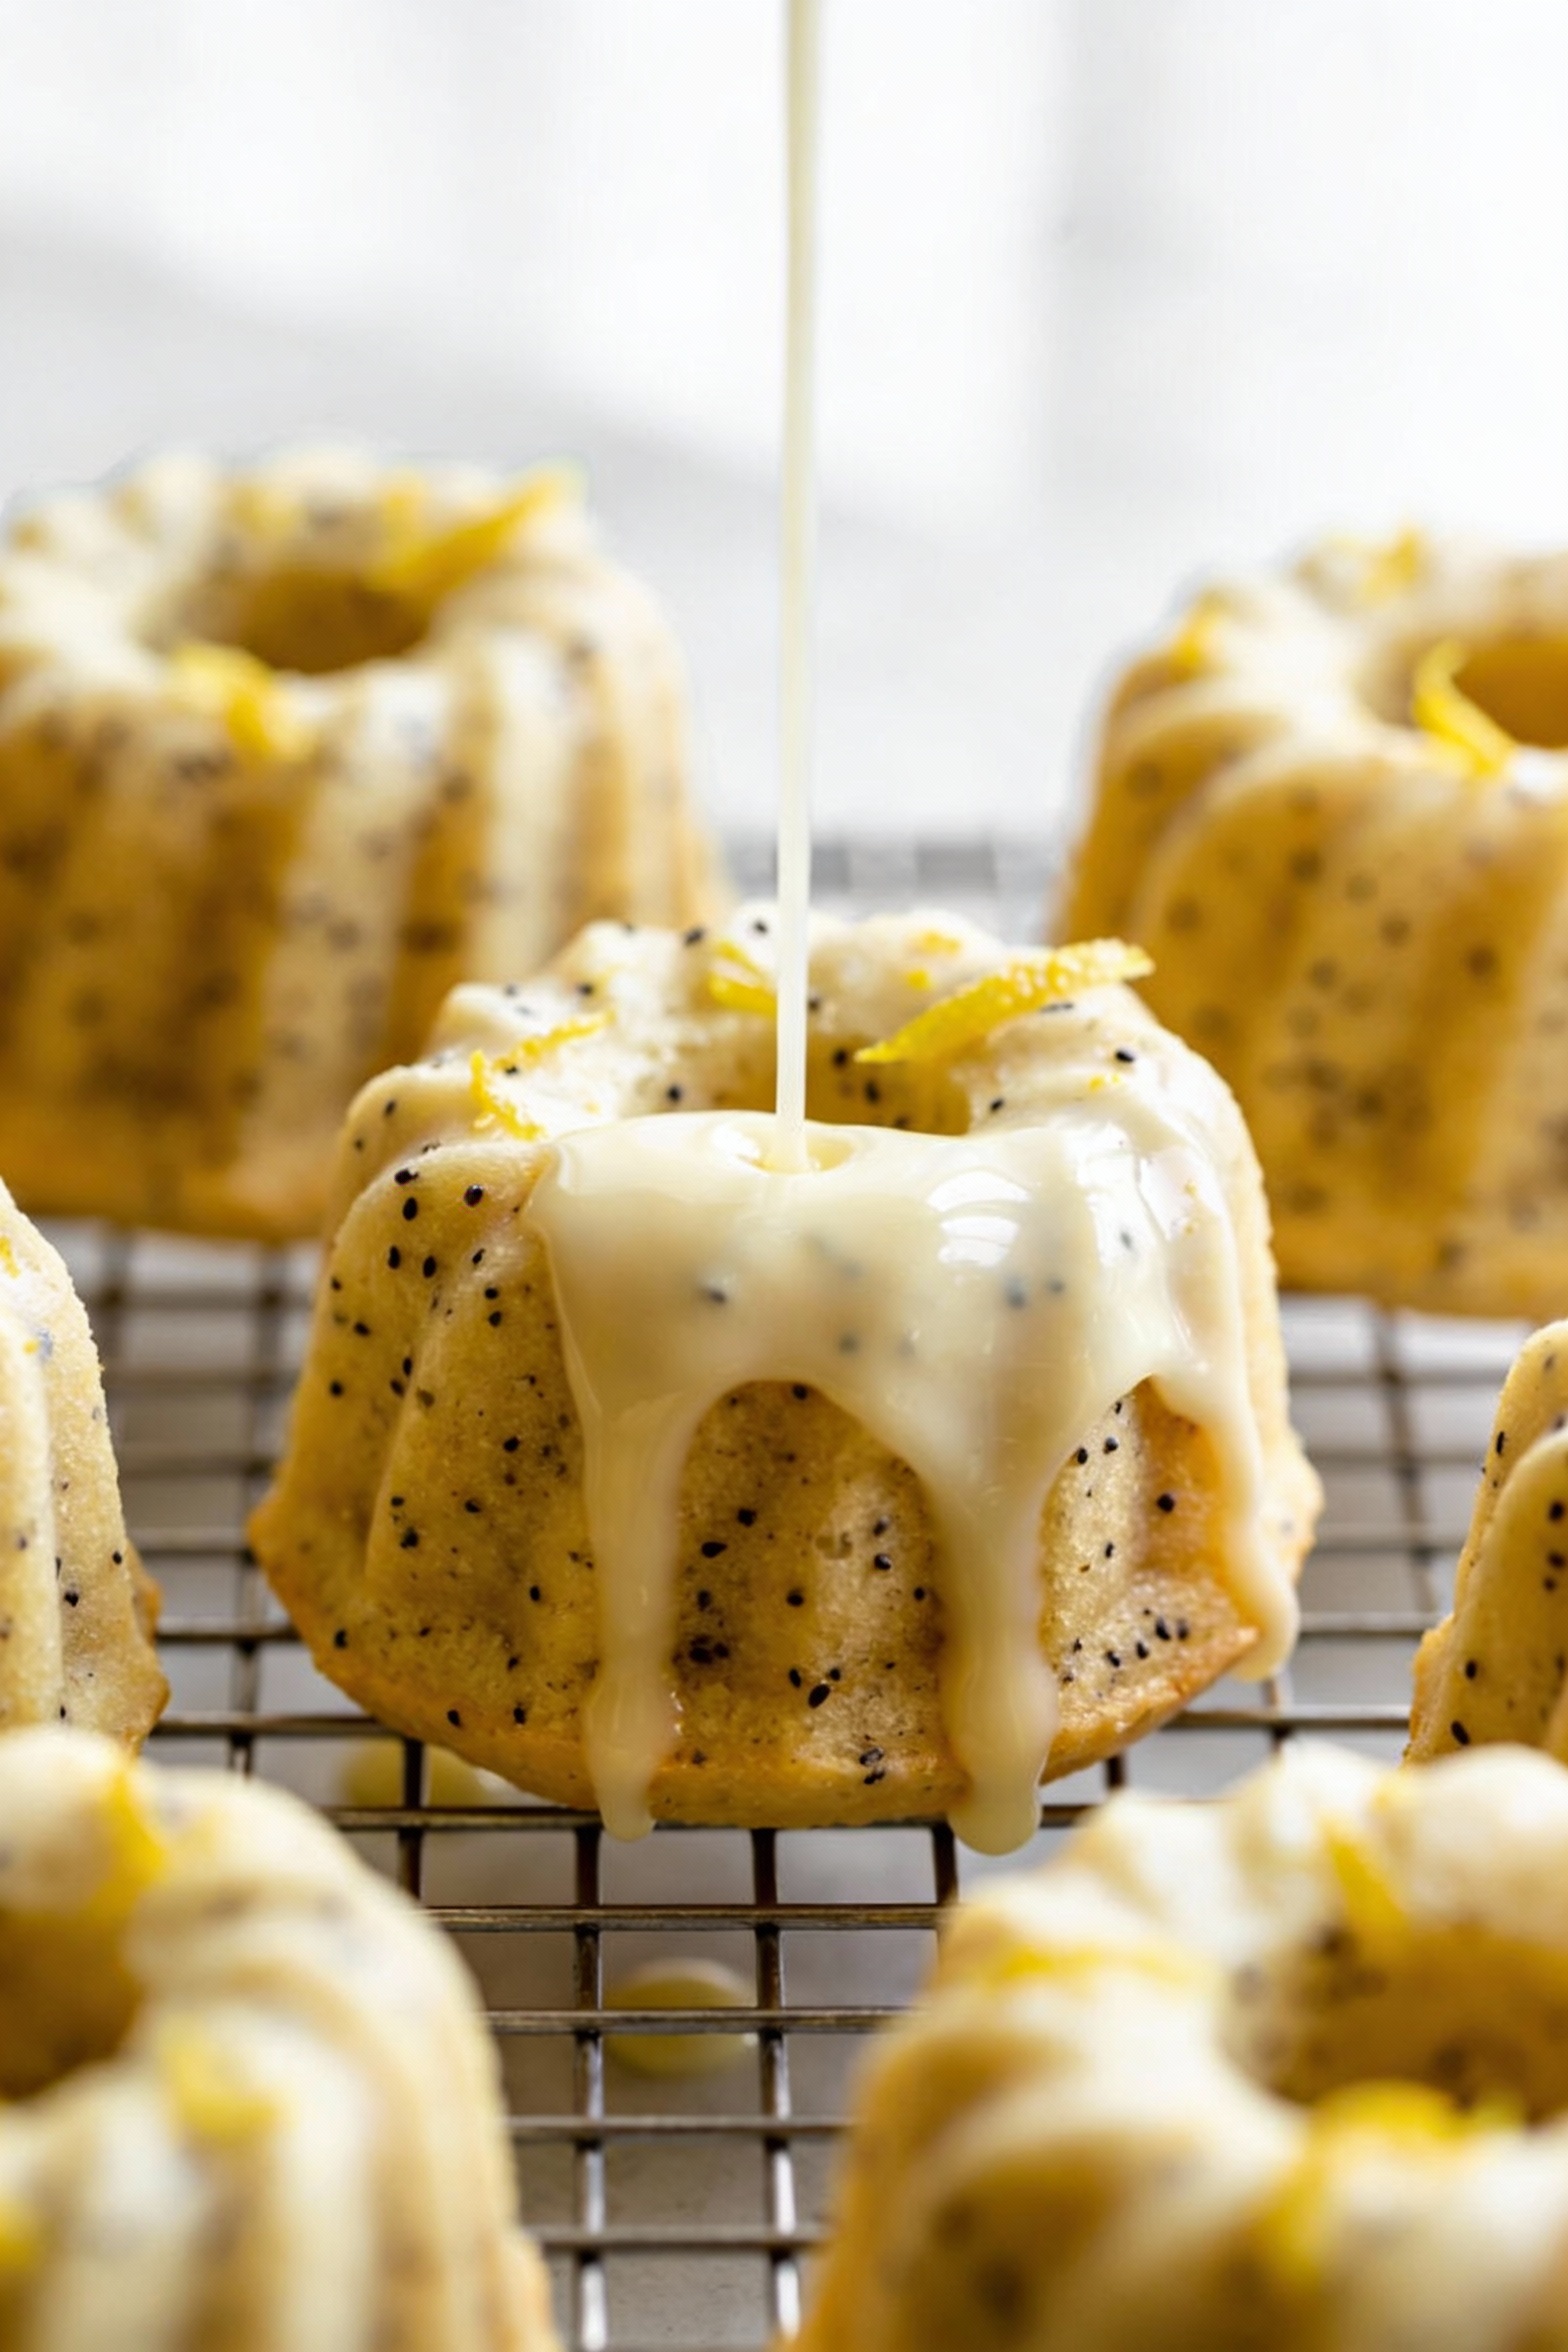
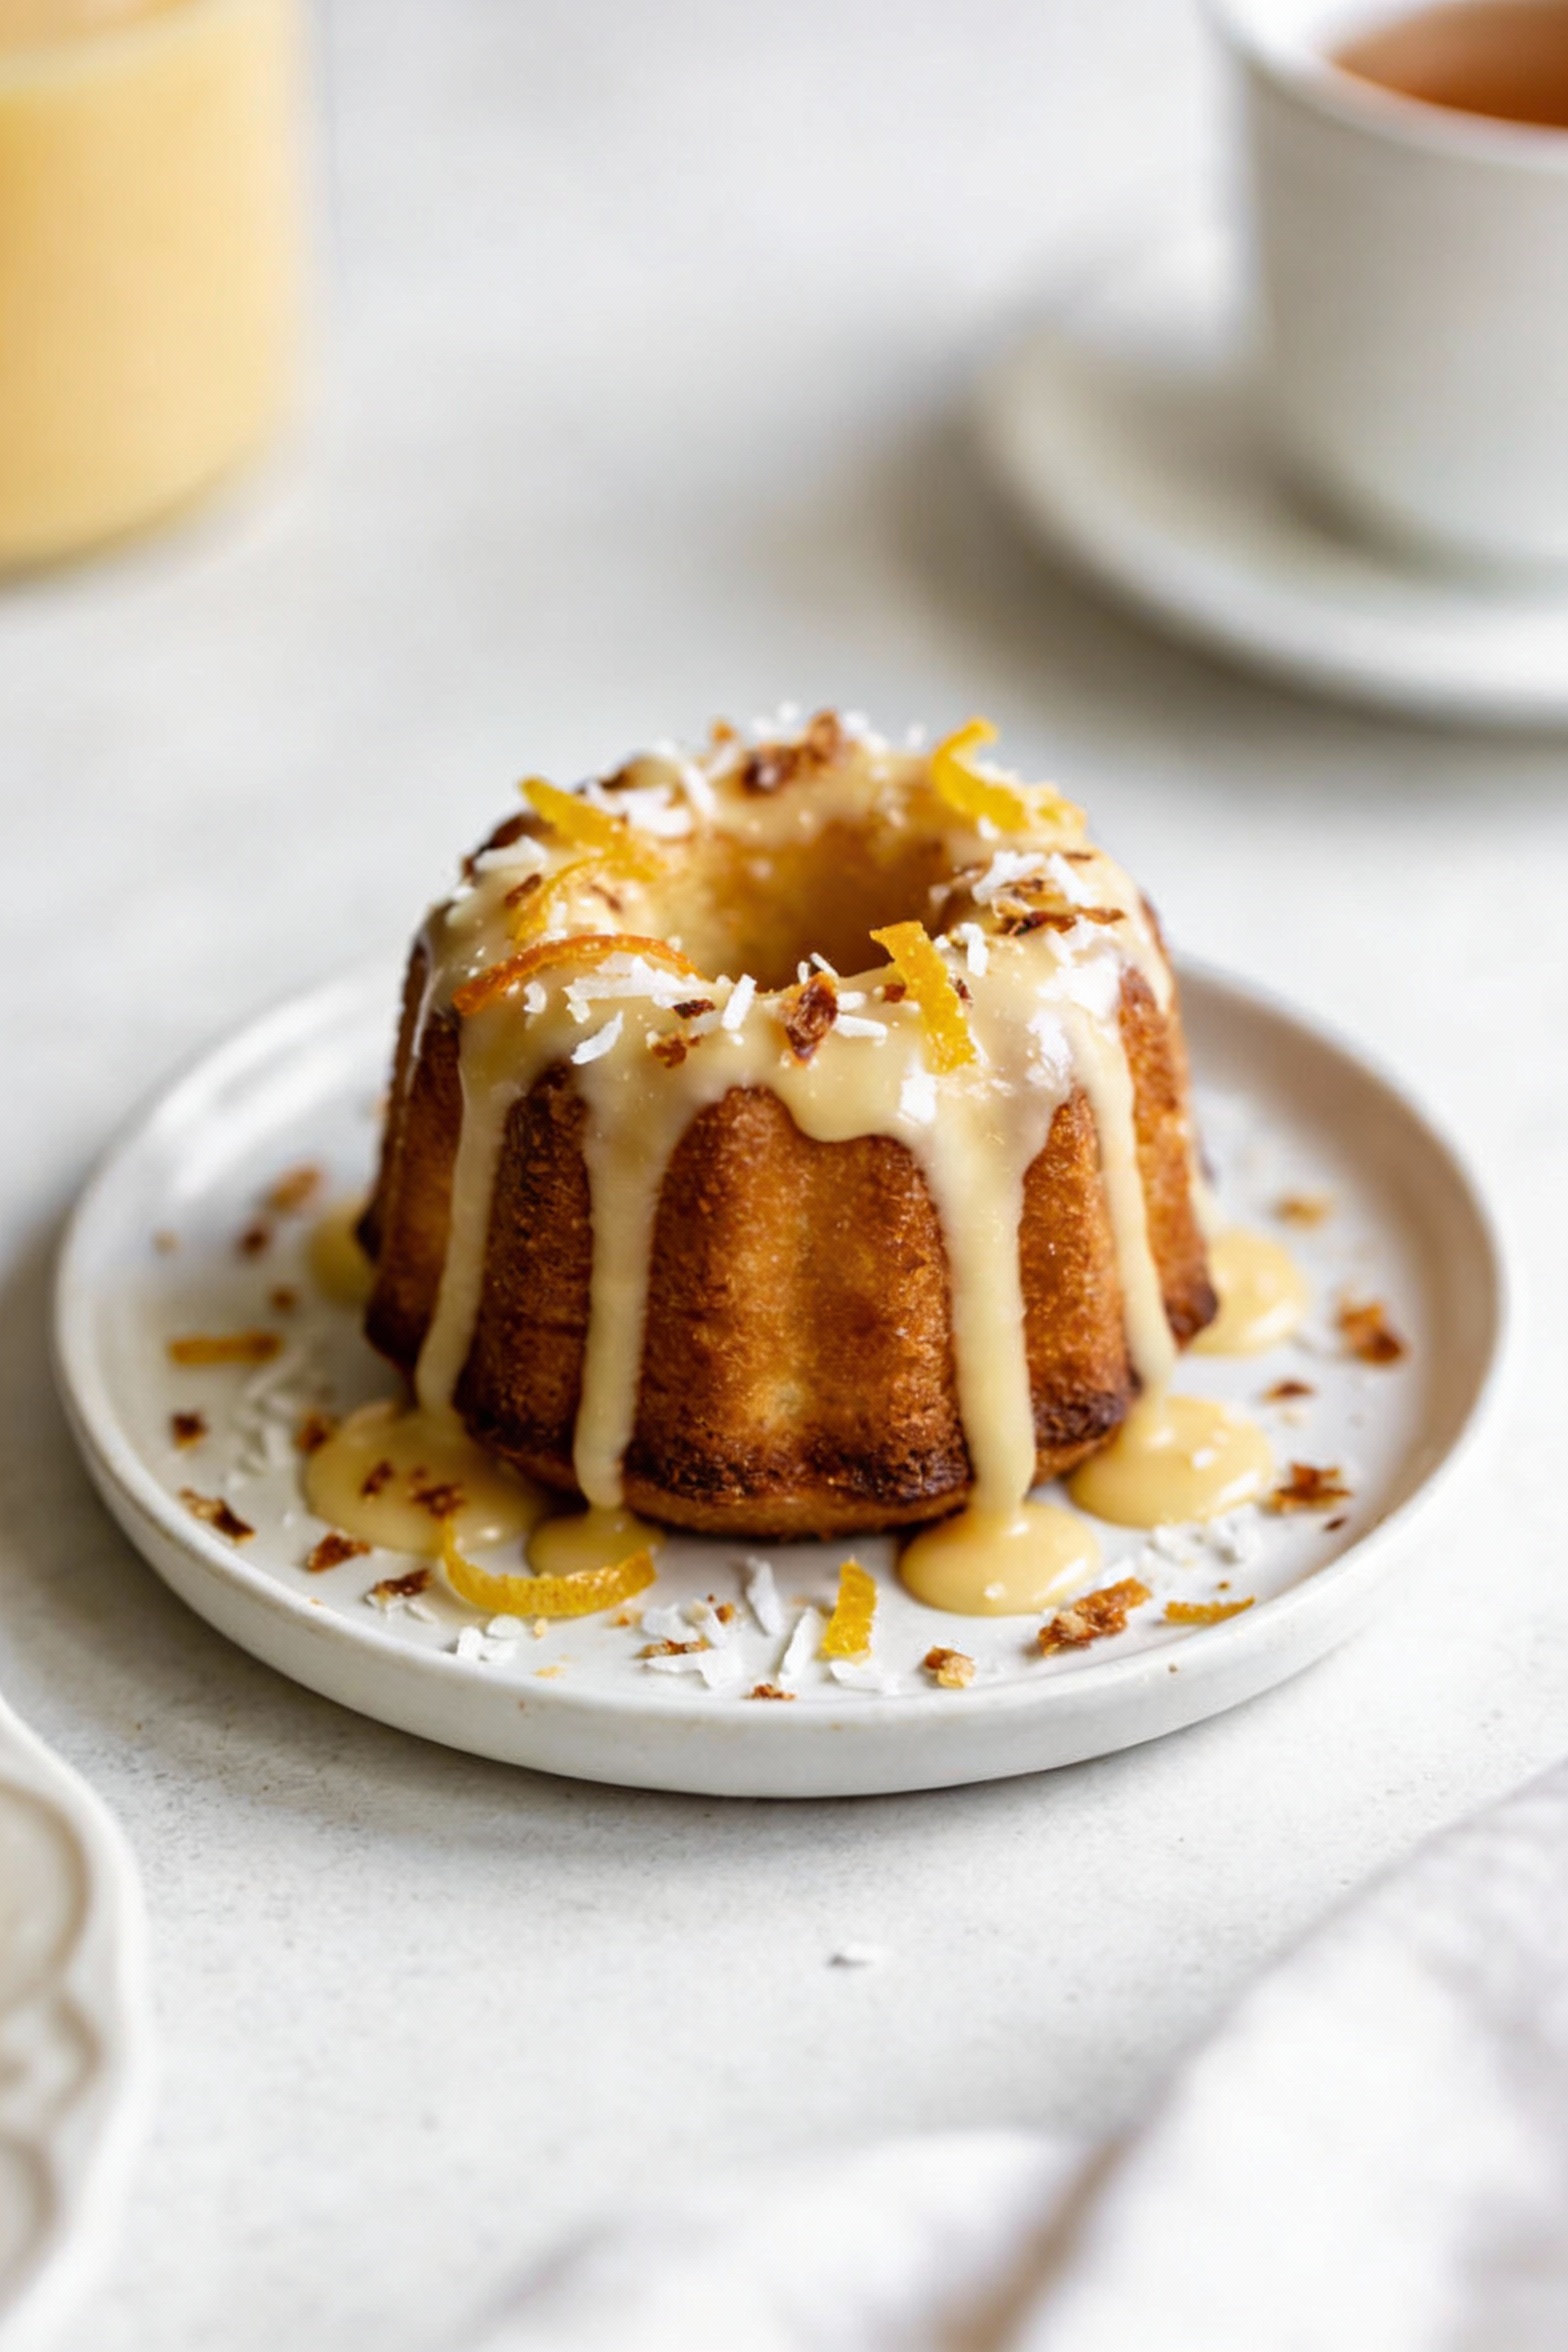
Glaze for instant glow-up. Whisk powdered sugar with a little citrus juice or milk until thick but pourable. Spoon over cooled cakes so it drips into the grooves like it knows what it’s doing.
-
Finish with flair. While glaze is wet, add chopped nuts, zest, or sprinkles. Then pretend you run a boutique bakery out of your kitchen.
How to Store
Store fully cooled mini bundt cakes in an airtight container at room temperature for 2 to 3 days. If your kitchen runs warm or humid, the fridge keeps them neat, but it can dry them slightly over time.
For best texture, refrigerate only if your glaze includes dairy-heavy additions and bring cakes to room temp before serving. If you want that just-baked vibe, warm one for 8 to 10 seconds in the microwave. FYI, “one” is usually optimistic.
They also freeze beautifully. Wrap each cake tightly in plastic wrap, then place in a freezer bag for up to 2 months. Thaw at room temperature, then glaze fresh for the cleanest look.
Nutritional Perks
These are still cake, not a kale smoothie, but mini bundts make portion control easier without feeling like a punishment. The smaller size helps you serve a satisfying dessert that doesn’t automatically turn into a giant slice “because it’s already cut.”
Using sour cream or Greek yogurt adds a bit of protein and helps the crumb stay moist so you don’t need extra frosting to make it enjoyable. Add citrus zest or spices and you boost flavor without needing more sugar. And if you include berries, you get fiber and antioxidants hiding in a dessert costume.
What Not to Do
- Don’t under-grease the pan. Bundt grooves are dramatic and will cling to cake like it’s their job.
- Don’t overfill cavities. Overflow ruins the shape and makes unmolding a mess.
- Don’t overmix after adding flour. You want tender, not bouncy.
- Don’t rush the unmold. Too hot and they tear; too cold and they stick harder.
- Don’t glaze warm cakes. The glaze melts into a sticky puddle instead of draping nicely.
- Don’t skip the cooling rack. Bottoms get soggy if they sit on a plate while warm.
Variations You Can Try
Start with the base method, then use one of these flavor paths. Keep add-ins modest so the batter still flows into the pan details.
- Lemon poppy seed: Add lemon zest and a spoonful of poppy seeds; glaze with lemon juice for a bright finish.
- Chocolate espresso: Replace a portion of flour with cocoa powder and add a pinch of espresso powder; top with a chocolate glaze.
- Brown butter vanilla: Brown the butter, cool until soft, then cream with sugar; it tastes like “I tried harder” without actually trying harder.
- Cinnamon swirl: Layer batter with a cinnamon-sugar mix; use a toothpick to gently swirl.
- Orange cardamom: Add orange zest and a pinch of cardamom; finish with an orange glaze and chopped pistachios.
- Berry burst: Fold in small berries (or chopped strawberries tossed lightly in flour) and glaze with a simple vanilla drizzle.
- Confetti party: Fold in rainbow sprinkles at the very end; keep the glaze clear vanilla so the colors show.
- Maple pecan: Use a maple glaze and top with toasted pecans for cozy, bakery vibes.
FAQ
What pan do I need for mini bundt cakes?
A mini bundt pan or bundtlette pan works best because it creates defined ridges and easy release. If you only have a muffin tin, you can still bake the batter, but you’ll lose the signature shape and some of the “wow” factor.
How do I keep mini bundt cakes from sticking?
Grease thoroughly, then flour the pan, making sure every groove is coated. Let the cakes cool 8 to 10 minutes before inverting, and don’t yank them out early. A nonstick pan helps, but prep matters more than brand.
How full should I fill the cavities?
Aim for about two-thirds full. This gives the batter room to rise without spilling over and keeps the center baking evenly so the cakes unmold cleanly.
How do I know when they’re done baking?
Look for a light spring-back when you press the top gently and edges that start to pull away slightly. A toothpick should come out with a few moist crumbs, not wet batter. If the tops look shiny, they usually need a couple more minutes.
Can I make them ahead for a party?
Yes. Bake a day ahead, store airtight, and glaze the day of for the freshest look. If you freeze them, thaw fully before glazing so the glaze sets instead of sliding off.
What glaze works best for the bundt shape?
A thick-but-pourable glaze clings to the ridges and drips naturally, which highlights the shape. Start with powdered sugar and add liquid slowly until it ribbons off the spoon. If you go too thin, it vanishes into the cake.
Can I reduce the sugar without ruining the texture?
You can reduce sugar slightly, but don’t cut it aggressively because sugar affects moisture and tenderness. If you want a less-sweet result, keep the cake recipe intact and use a lighter glaze or a tart citrus drizzle.
Wrapping Up
Mini bundt cakes give you maximum payoff for minimum effort: cute shape, quick bake, easy portioning, and a glaze that makes everything look intentional. Once you nail the pan prep and the cooling window, you can crank out endless flavors without reinventing the wheel. Make a classic vanilla batch, then pick one bold twist and one simple topping to keep it fun. Your future self, holding a perfectly glazed tiny cake, will feel extremely validated.